Zinc Silicate Crystalline Glaze Pottery
A chronicle of my recent progress
Phil Hamling
Click on thumbnails to enlarge photos

|
|
Zinc Silicate Crystalline Glaze Pottery A chronicle of my recent progress Phil Hamling Click on thumbnails to enlarge photos |
|
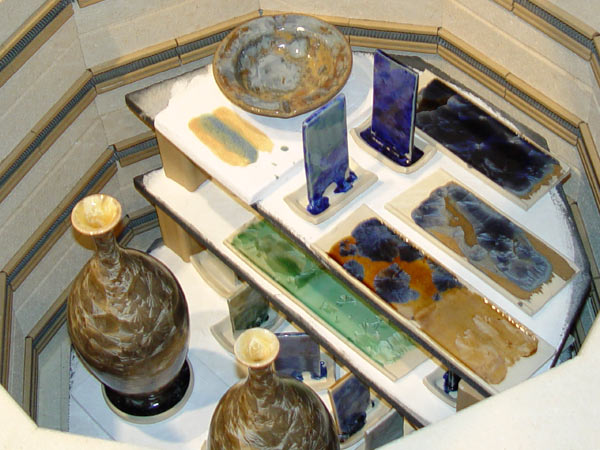
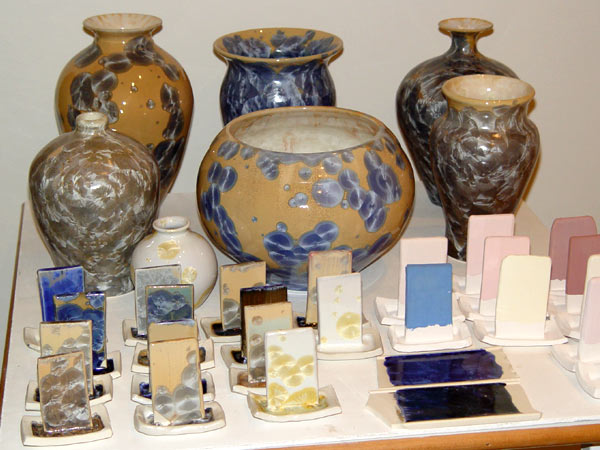
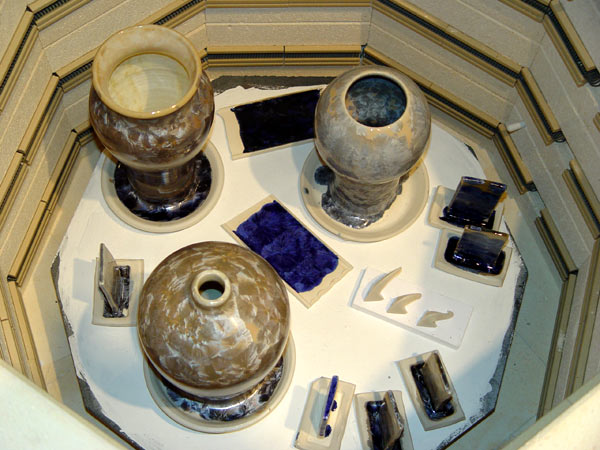
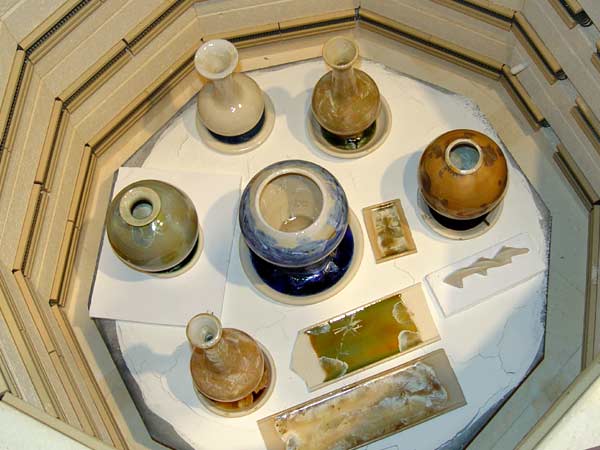
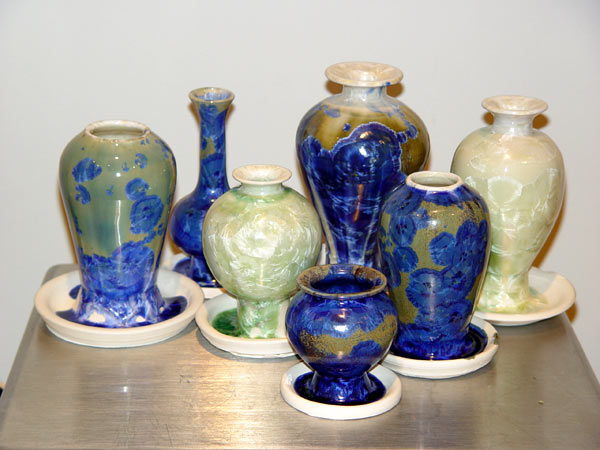
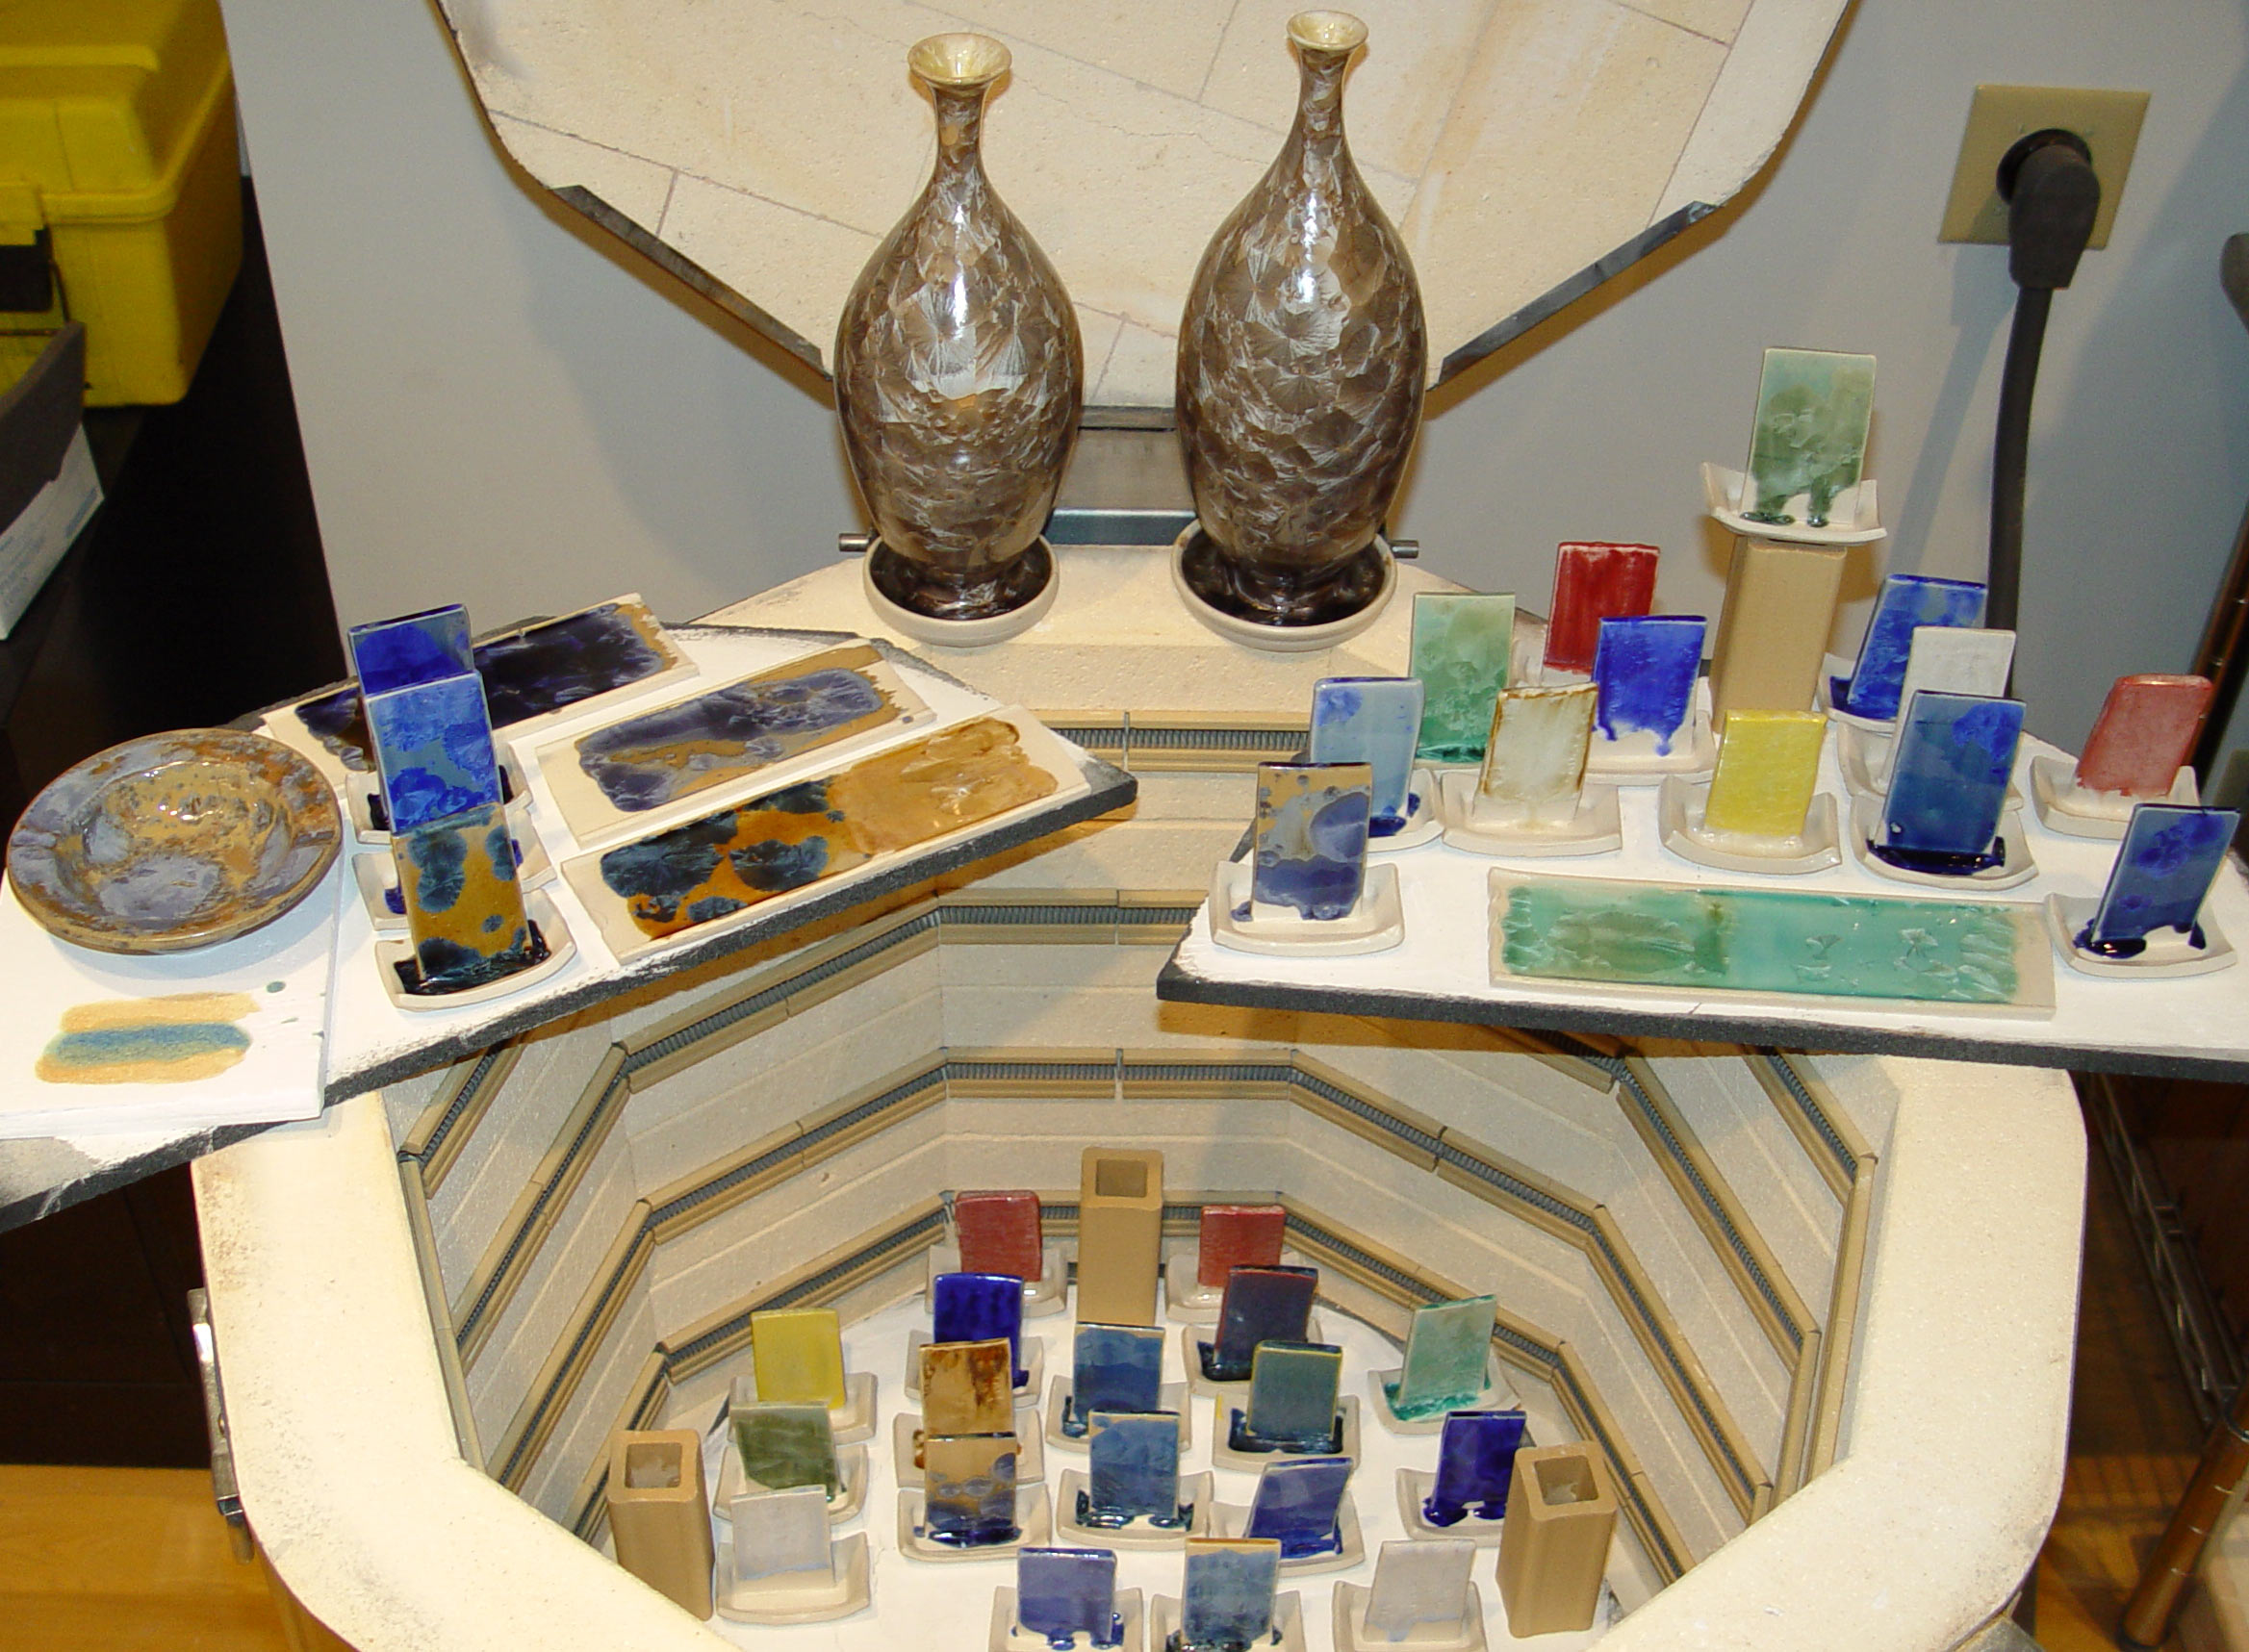
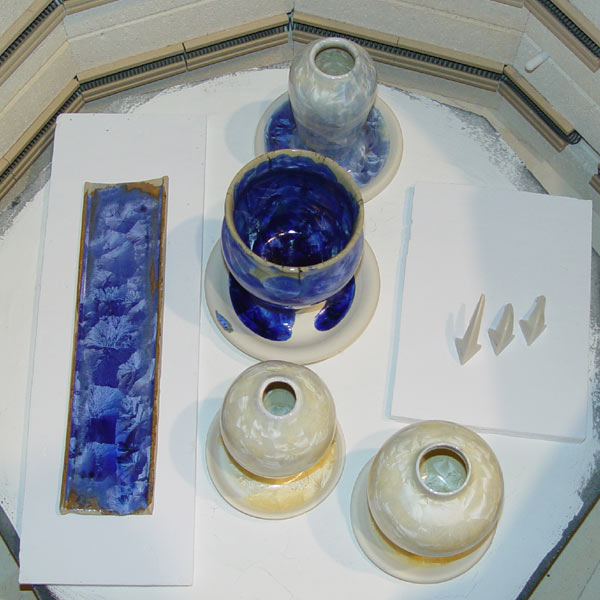
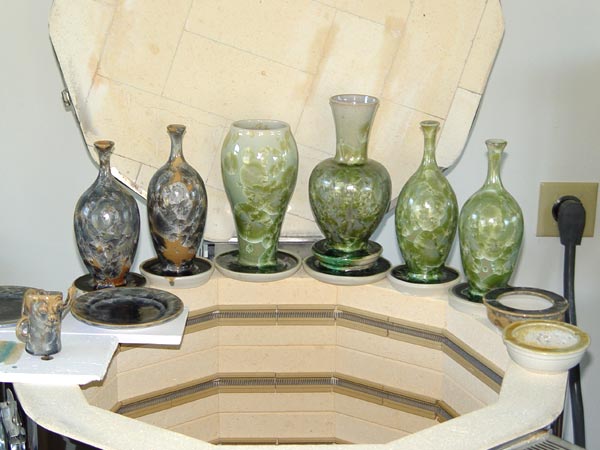
5-8-07 14th Firing Results
|
|
|
|
|
|
|
|
|
|
|
|
|
|
|
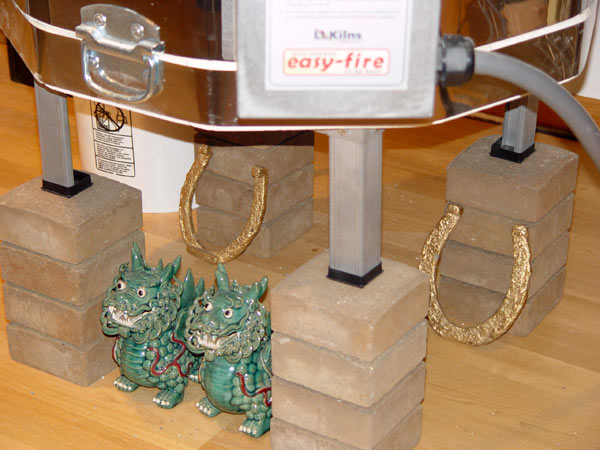
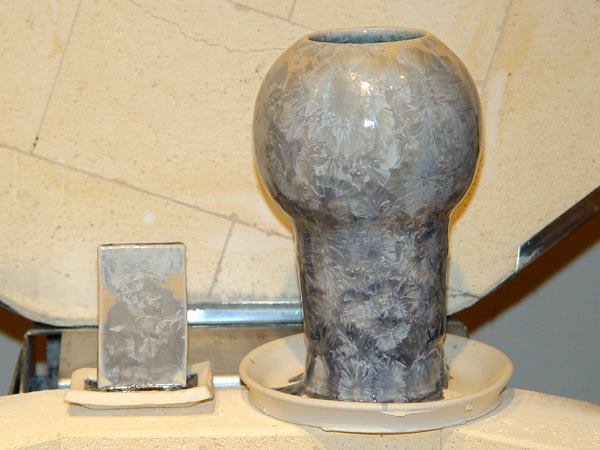
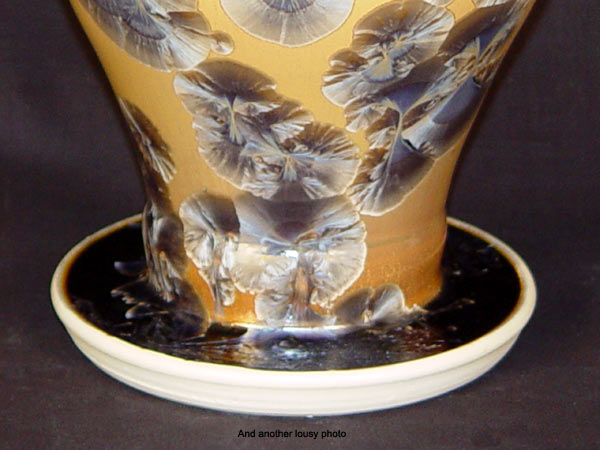
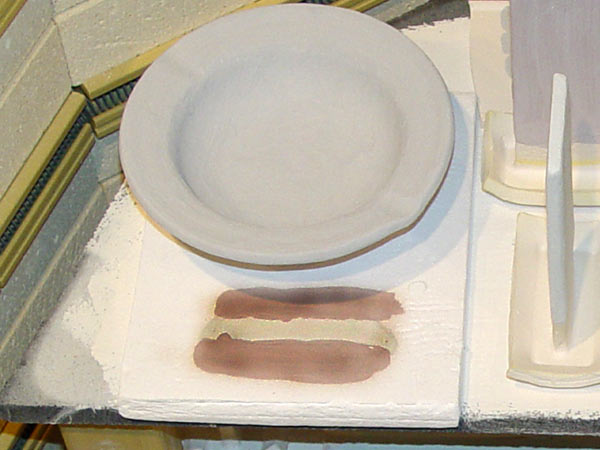
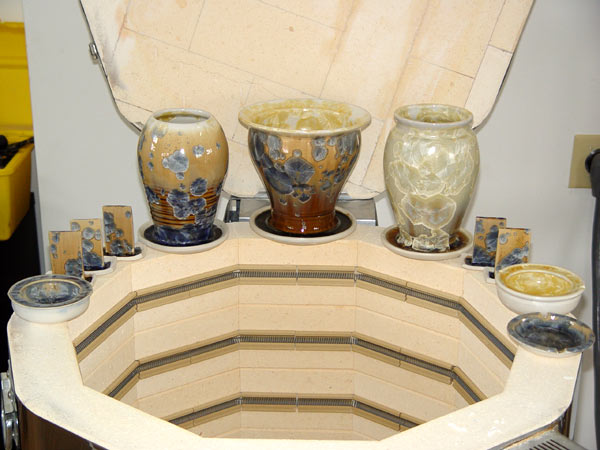
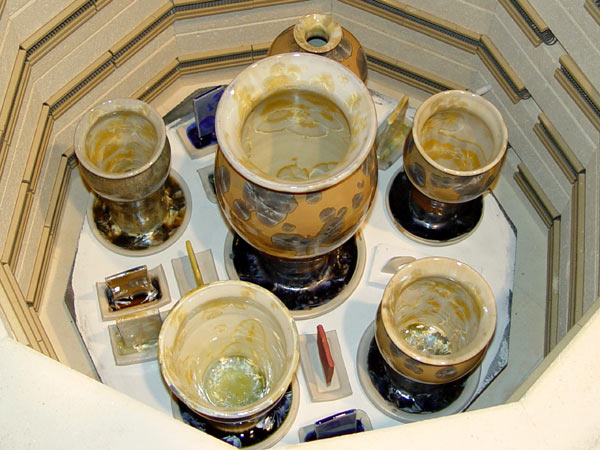
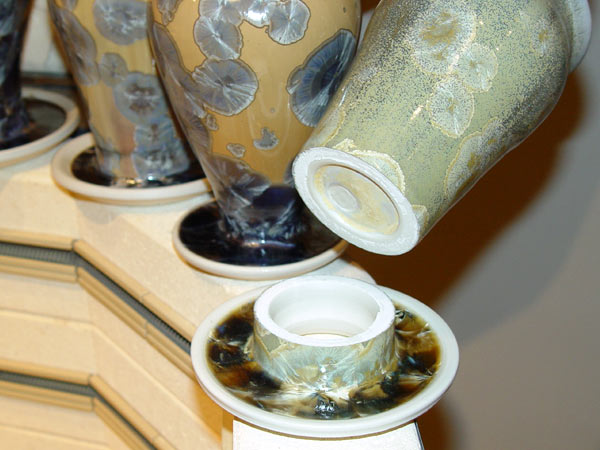
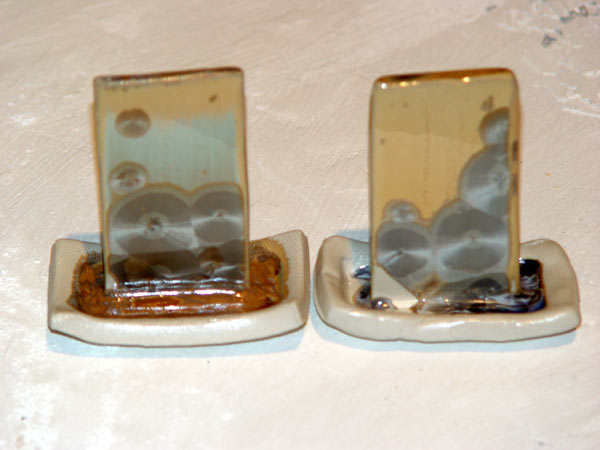
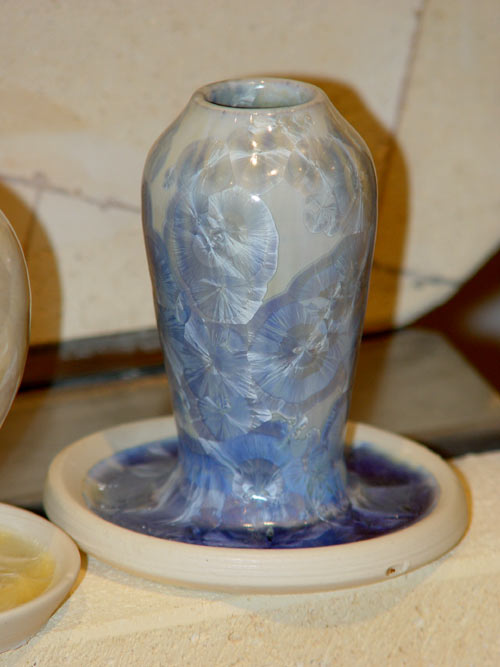
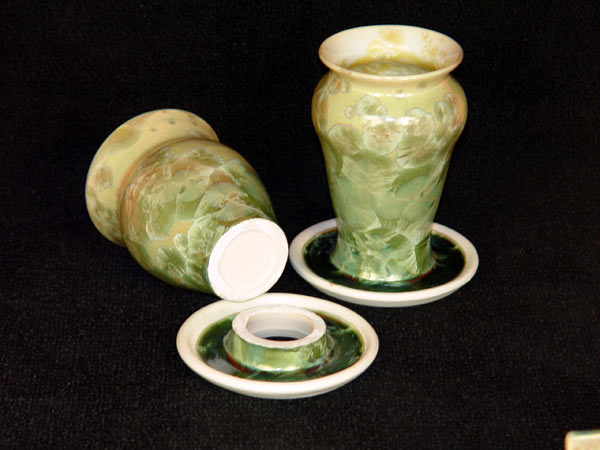
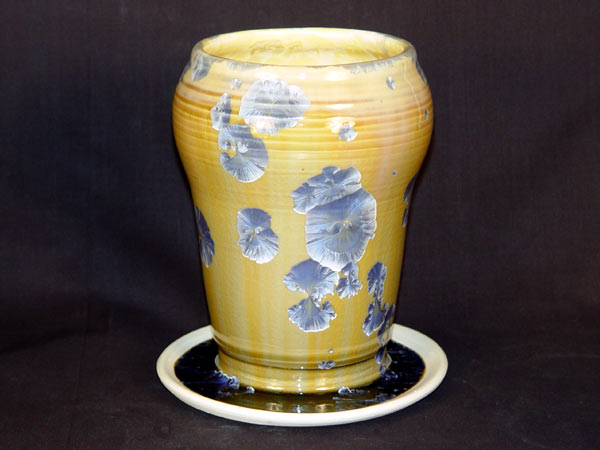
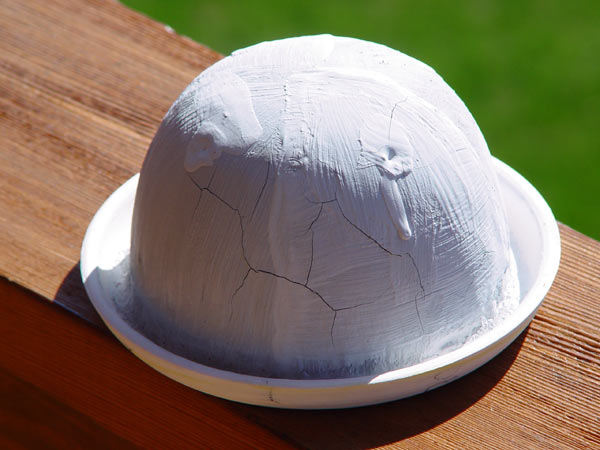
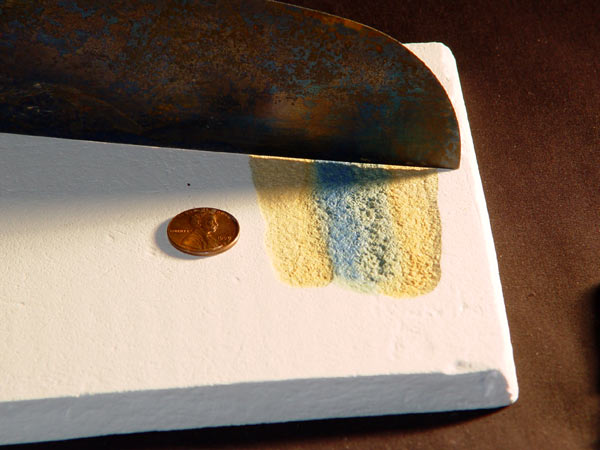
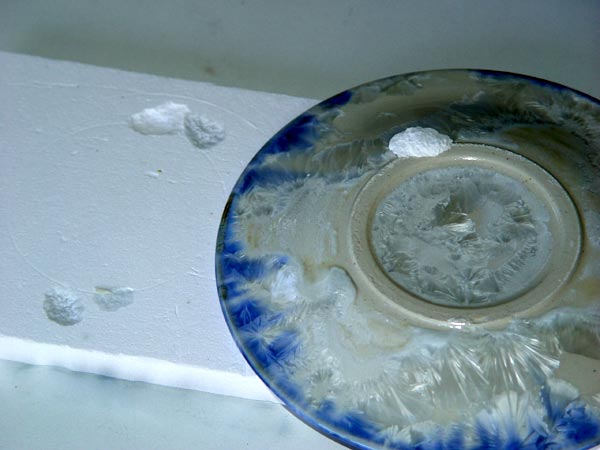 Alumina Insulation Type ZAL-15 worked real well as a safety setter. A
small amount of glaze dripped off the saucer onto the 15 lb. / cu. ft. density
insulation. ZAL-15 is rigid enough not to collapse under the load, refractory
enough not to get attacked by the molten glaze and friable enough that when the
saucer was pulled off it came apart without cracking the piece. The small chunk of
ZAL-15 stuck to the saucer was easy to get off with a diamond lap. It may be a
little pricey for the average crystalline glaze artist, but for more information
on ZAL-15 see
http://www.zircarceramics.com/pages/rigidmaterials/specs/zal15.htm
Alumina Insulation Type ZAL-15 worked real well as a safety setter. A
small amount of glaze dripped off the saucer onto the 15 lb. / cu. ft. density
insulation. ZAL-15 is rigid enough not to collapse under the load, refractory
enough not to get attacked by the molten glaze and friable enough that when the
saucer was pulled off it came apart without cracking the piece. The small chunk of
ZAL-15 stuck to the saucer was easy to get off with a diamond lap. It may be a
little pricey for the average crystalline glaze artist, but for more information
on ZAL-15 see
http://www.zircarceramics.com/pages/rigidmaterials/specs/zal15.htm
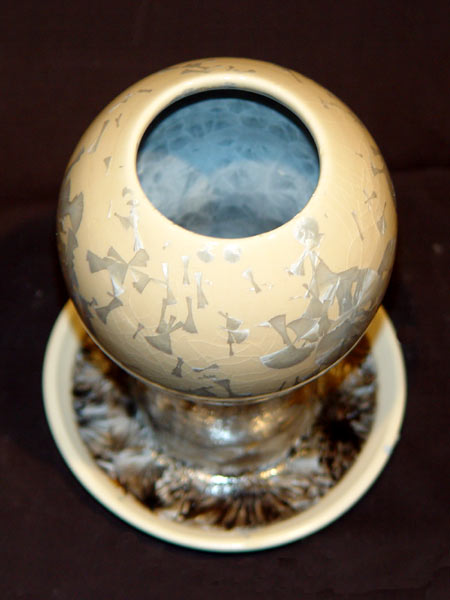
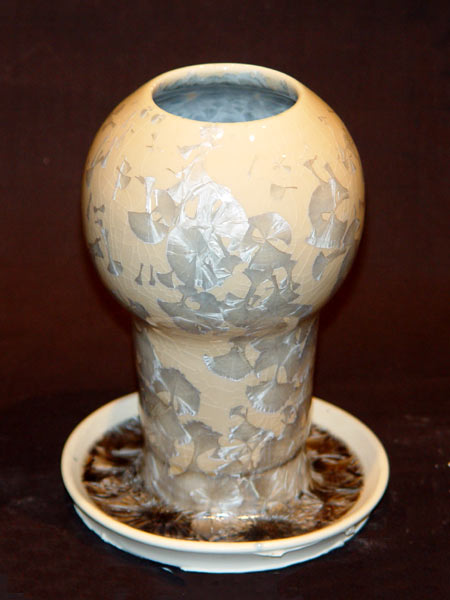
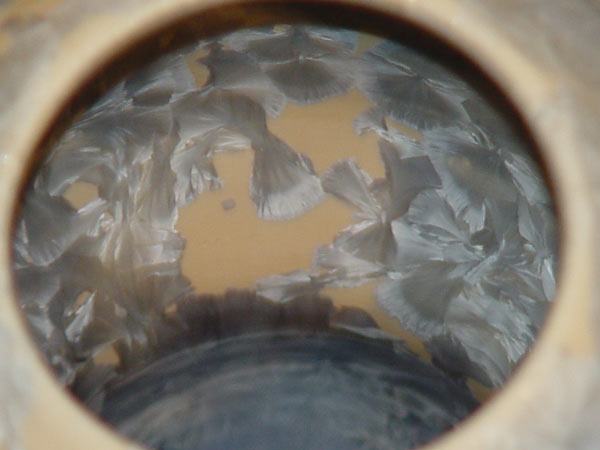
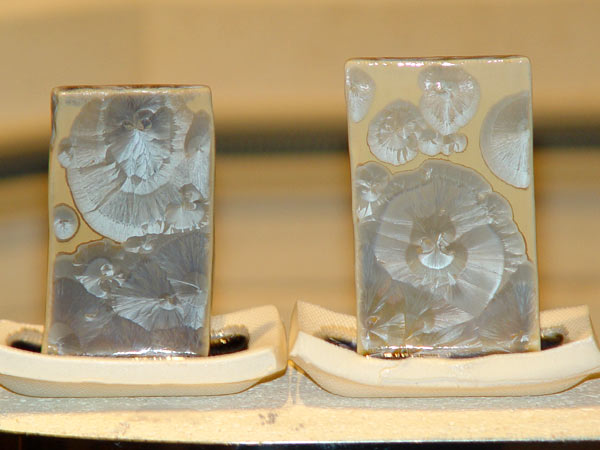
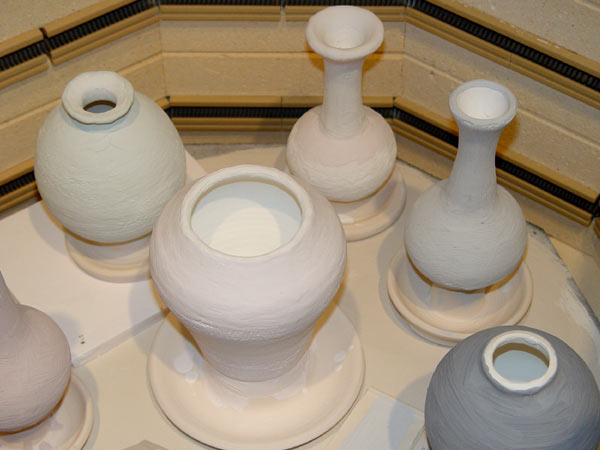
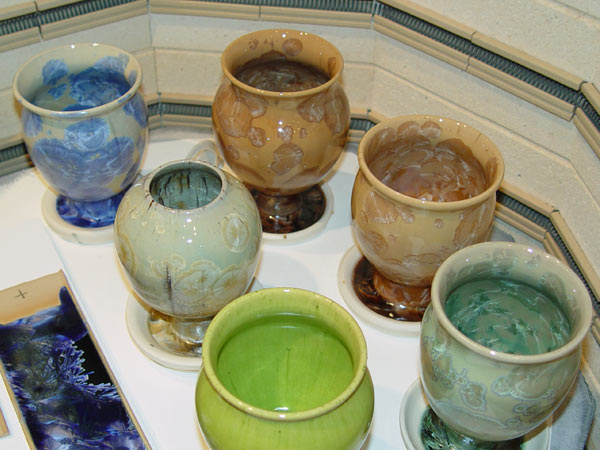
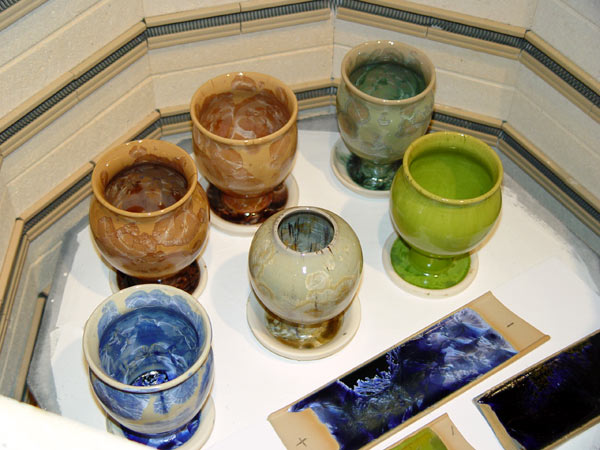
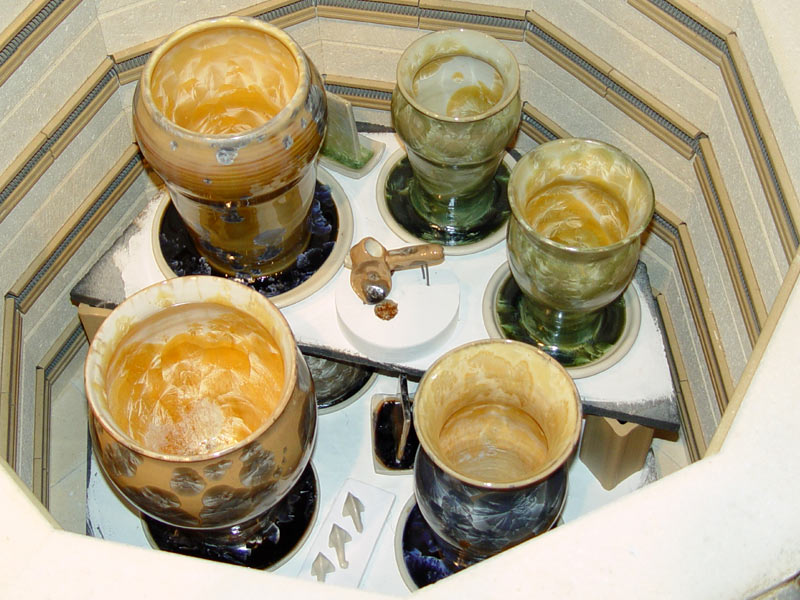
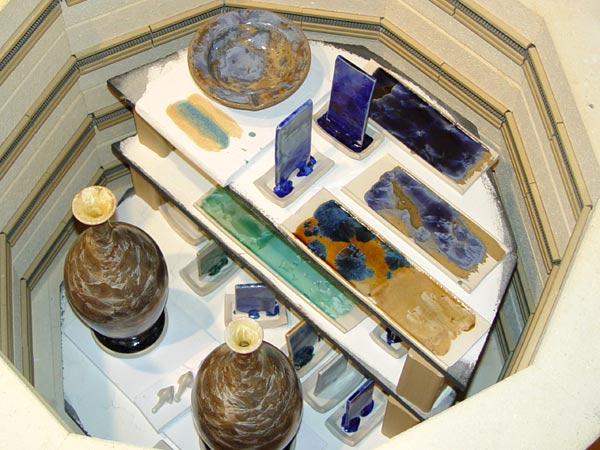
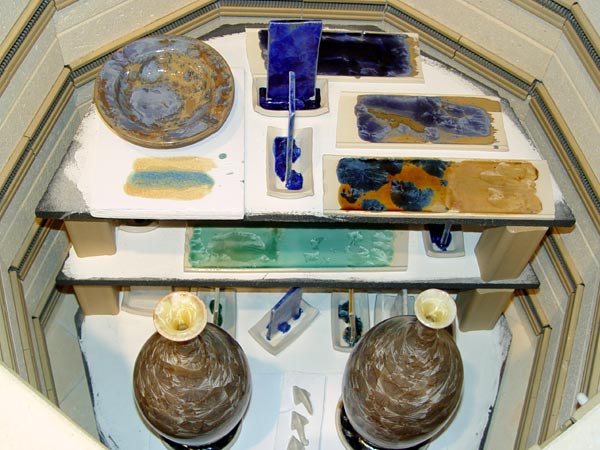
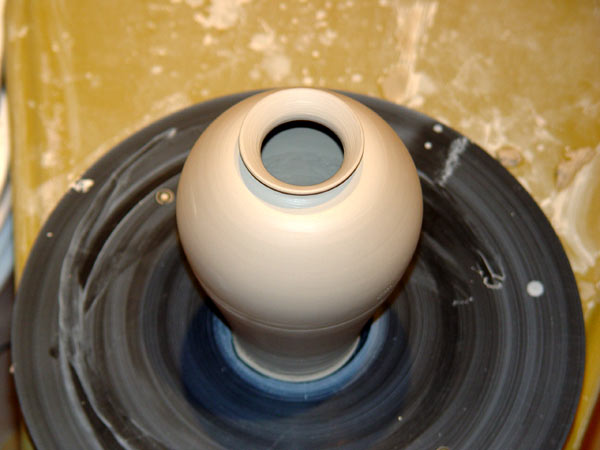
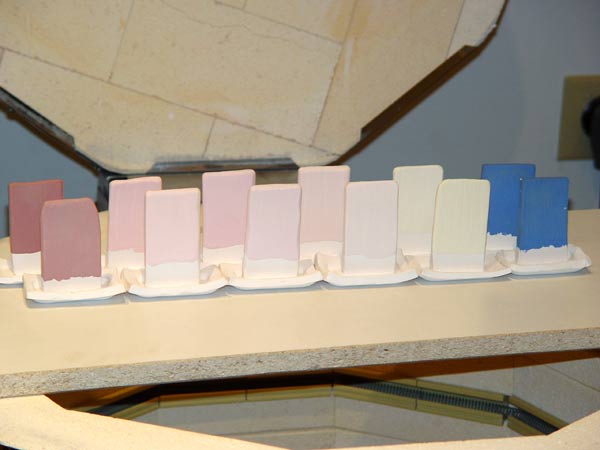
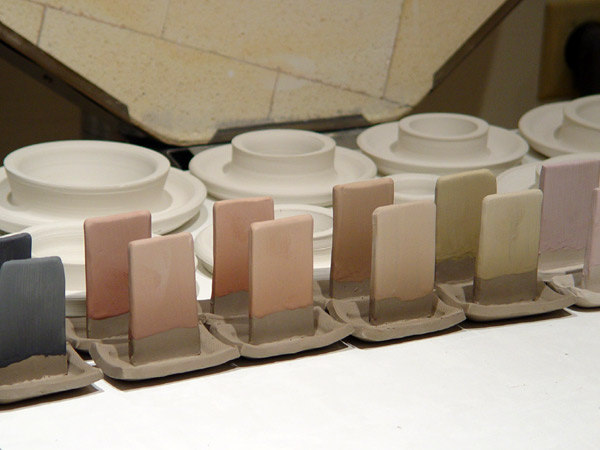
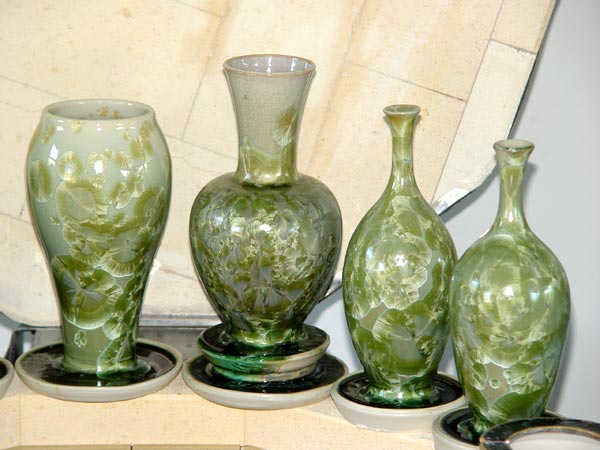
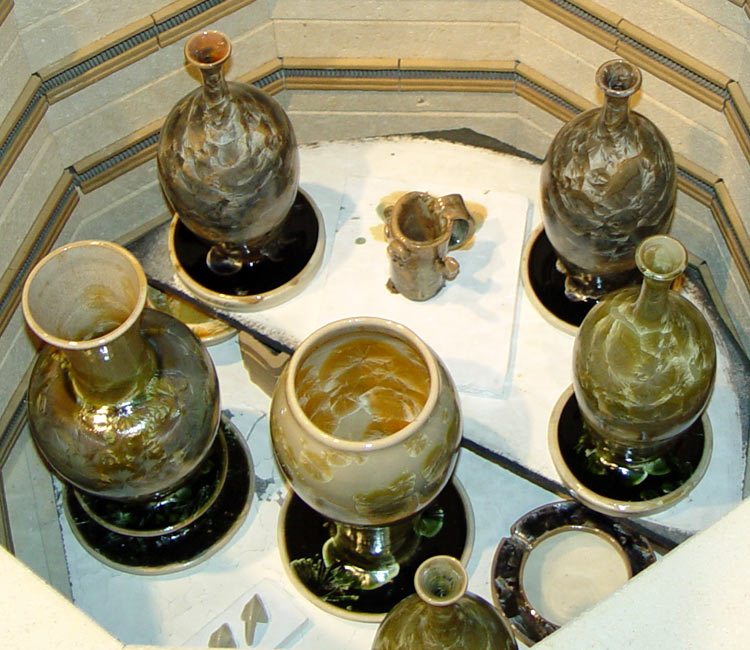
Monday 5-7-07
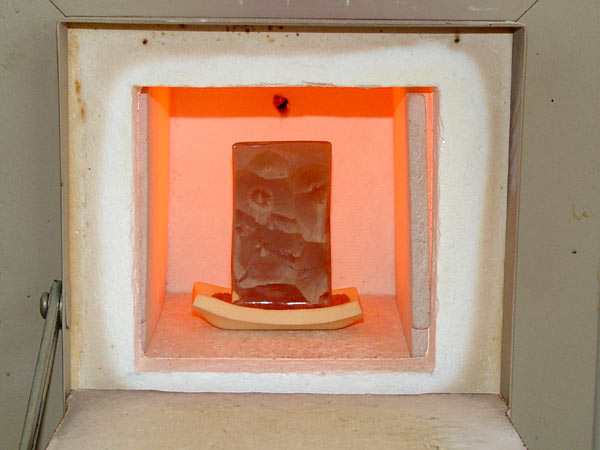
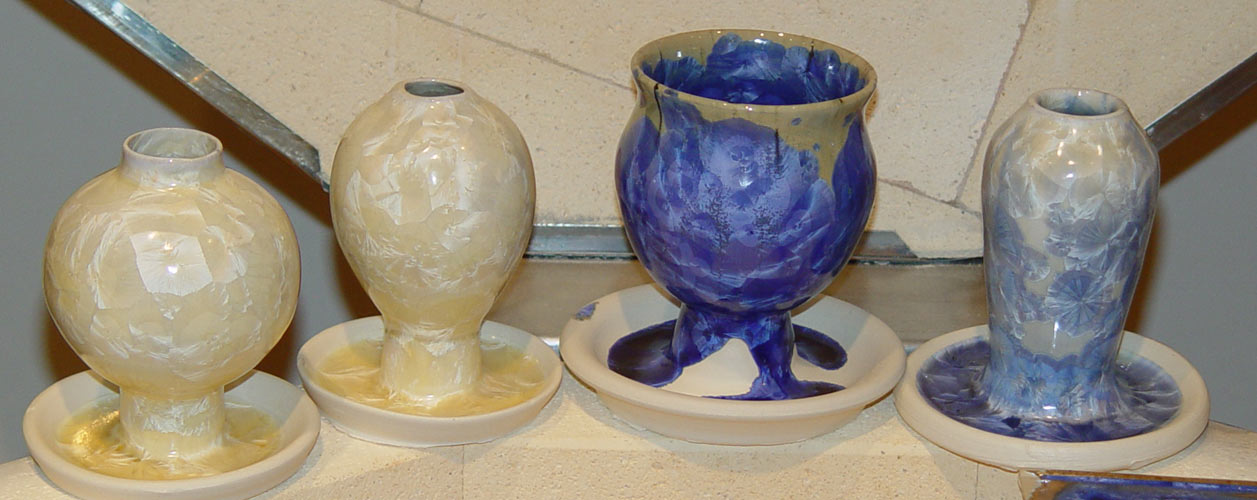
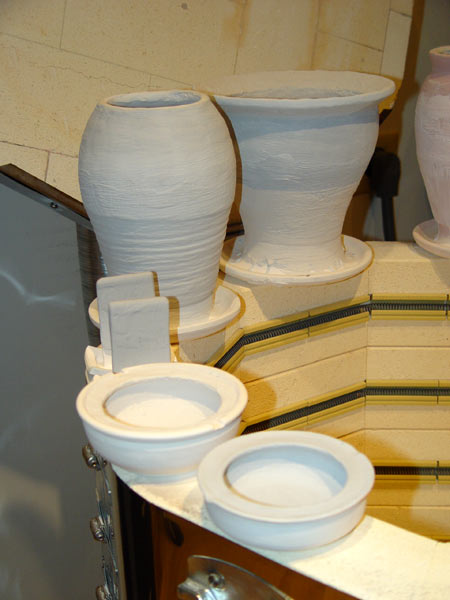
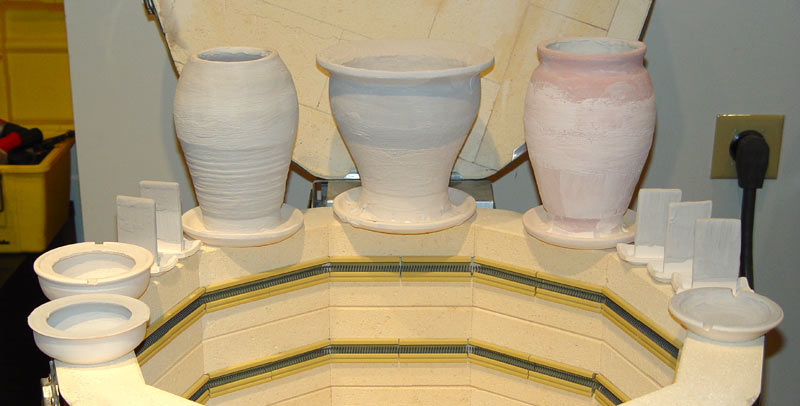
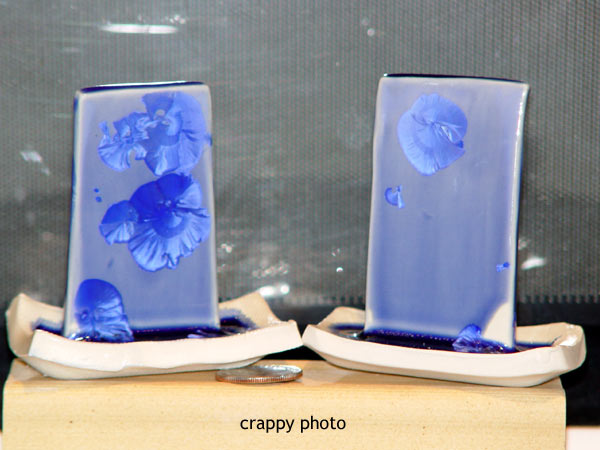
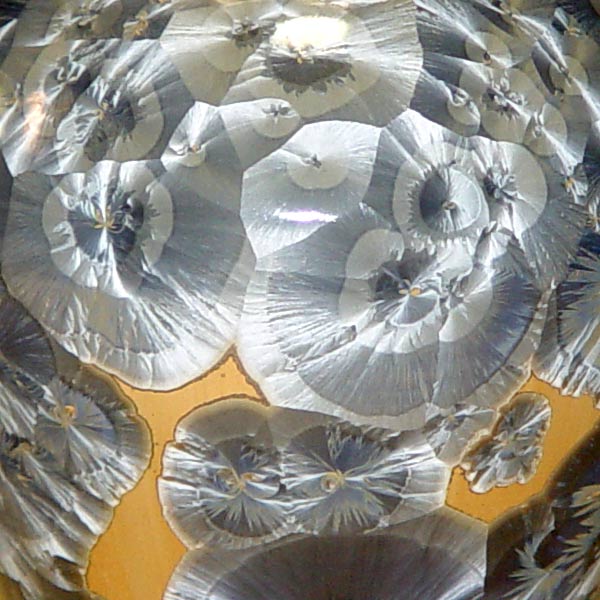
Sneak Preview 485°C
|
|
|
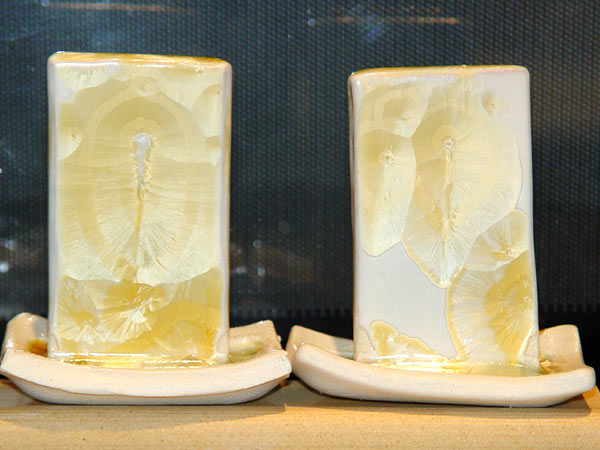
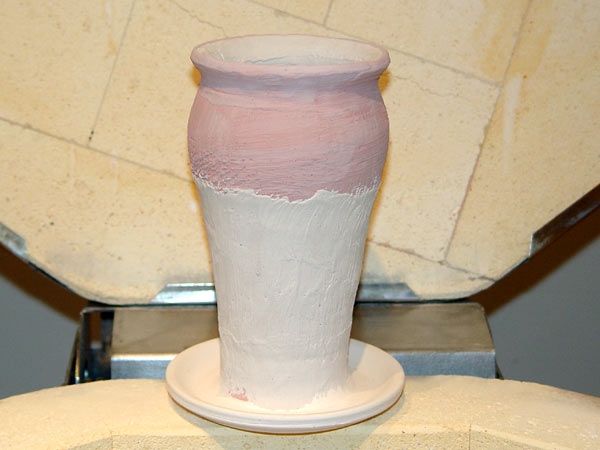
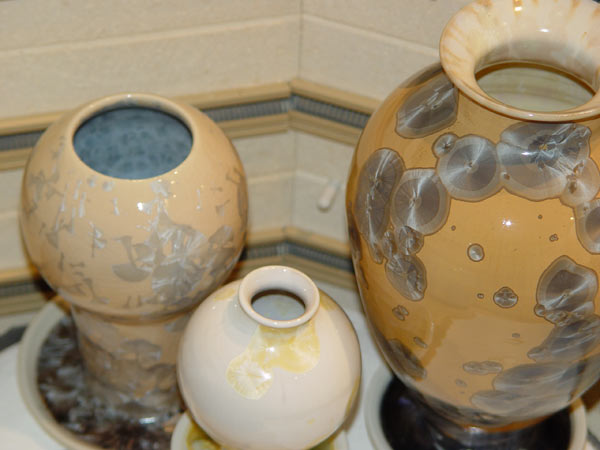
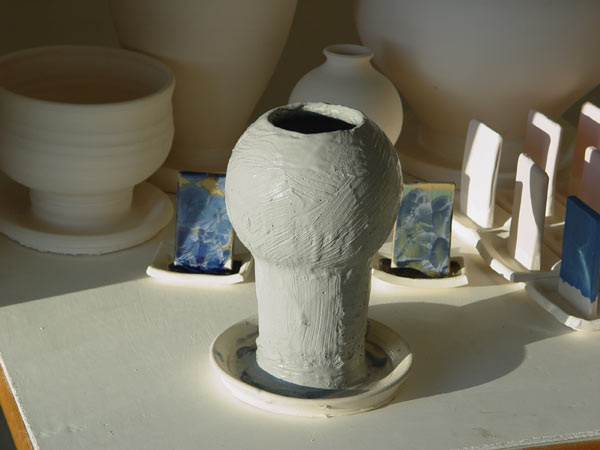
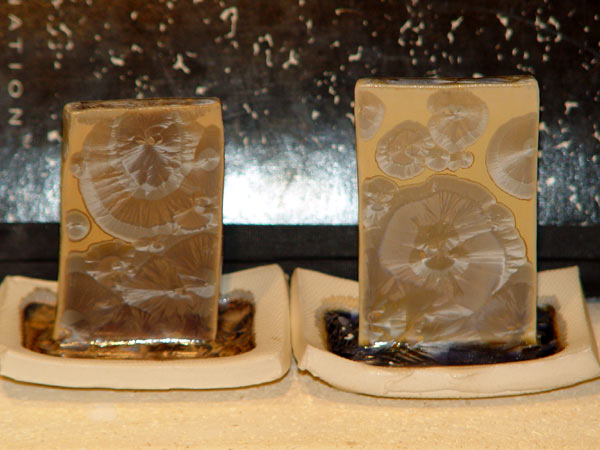
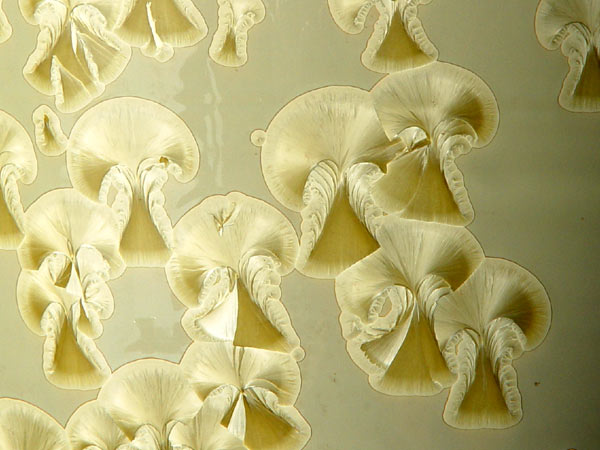
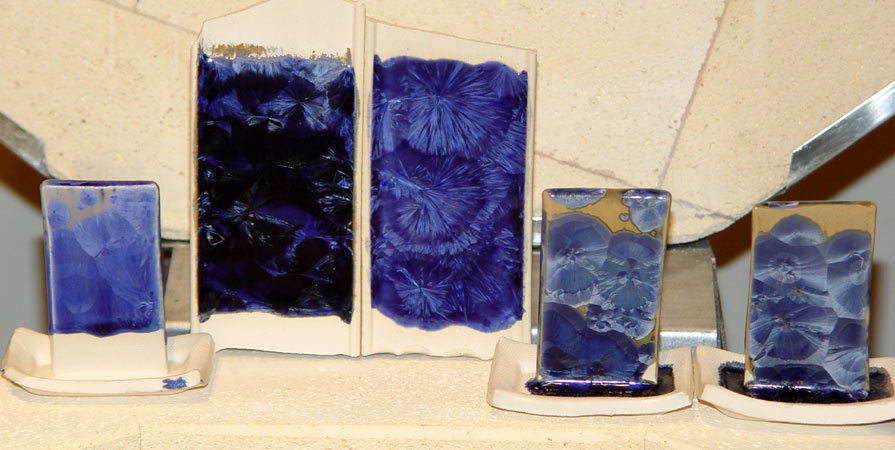
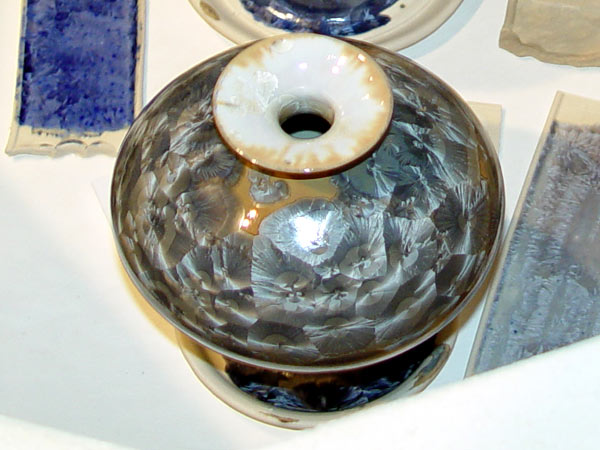
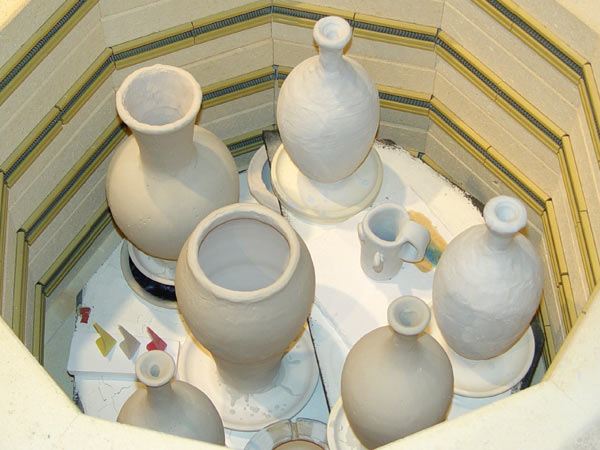
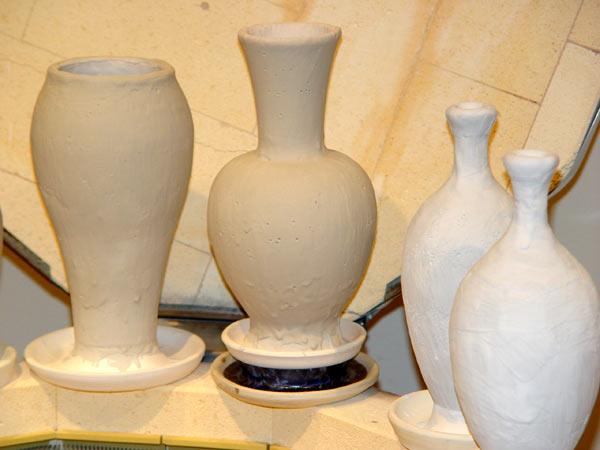
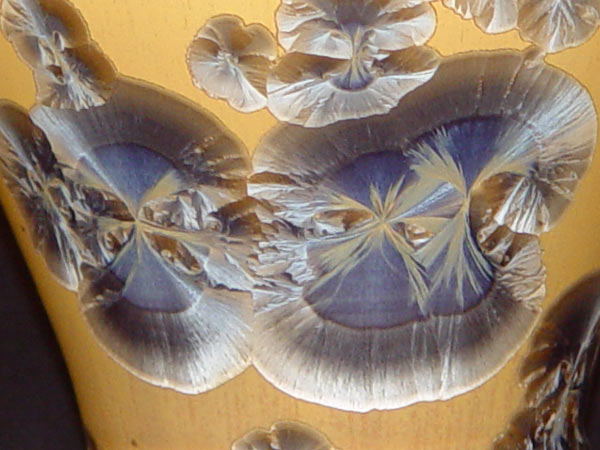
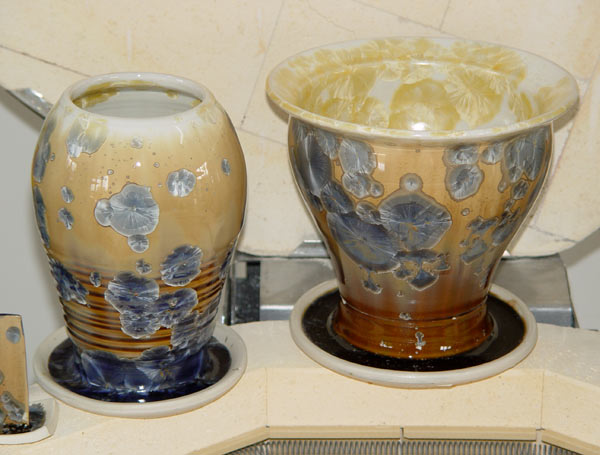
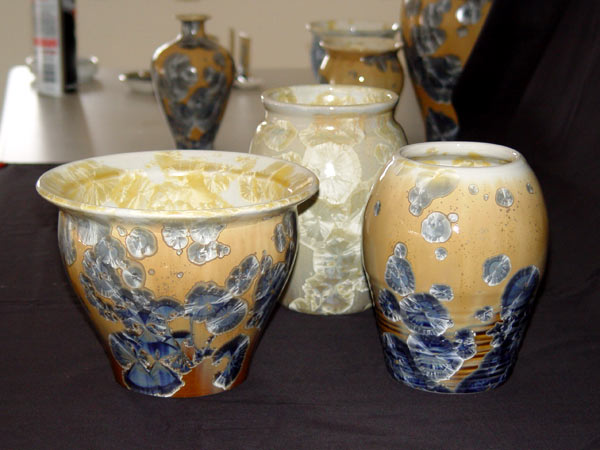
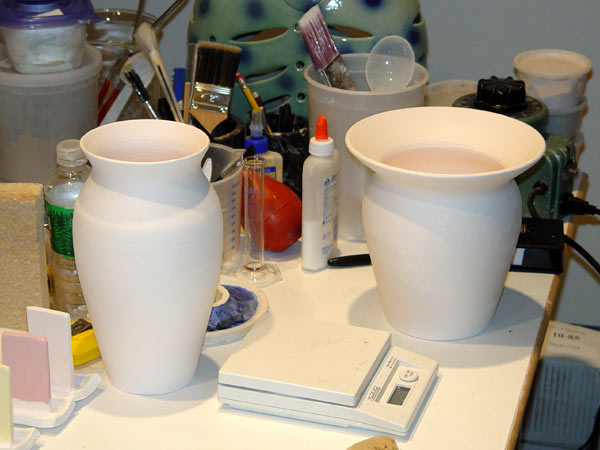
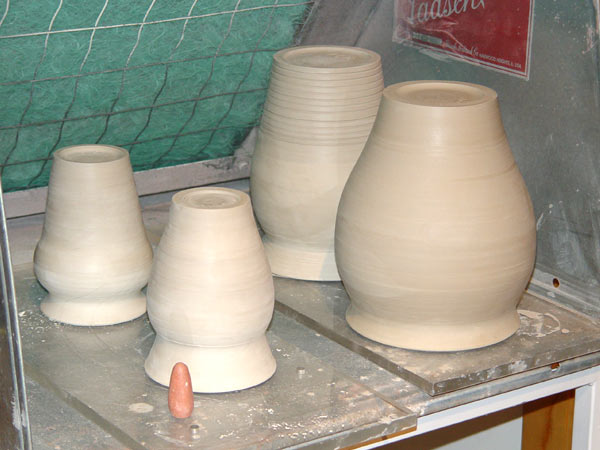
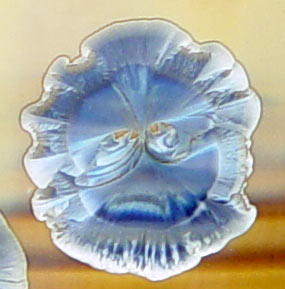
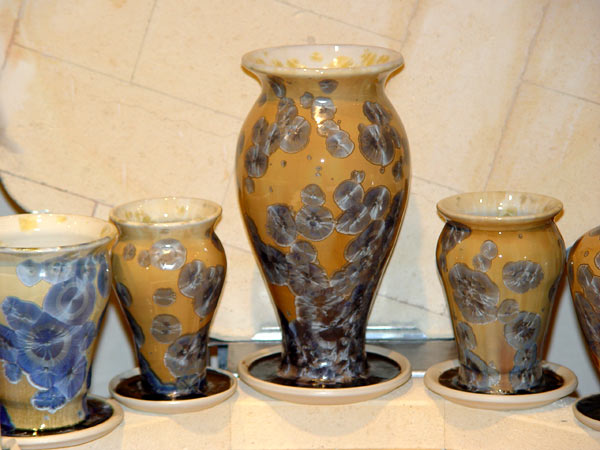
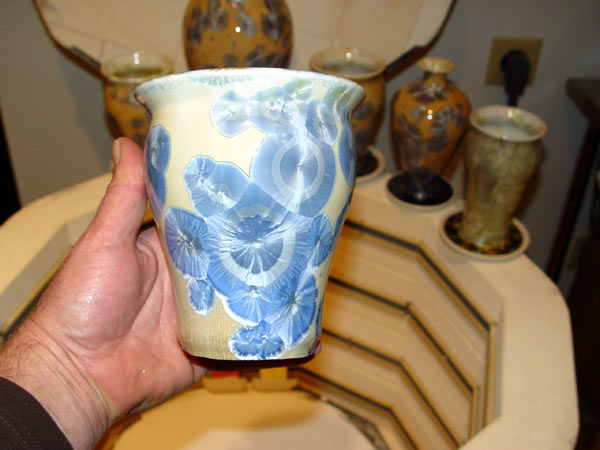
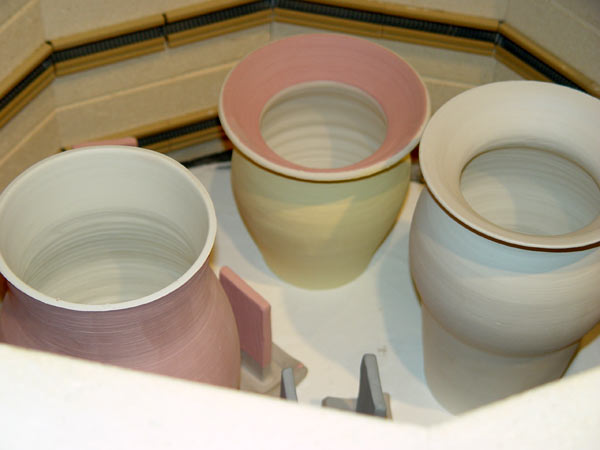
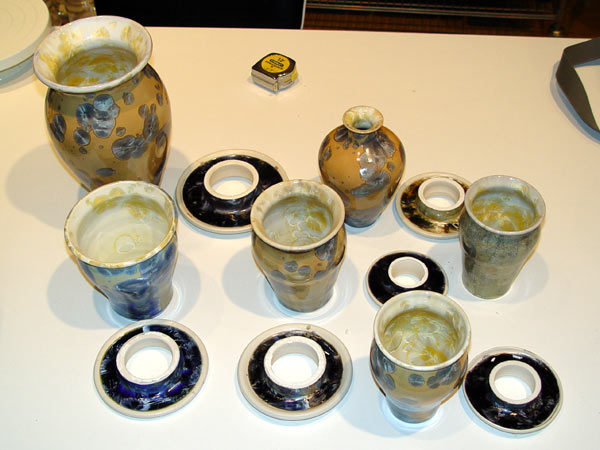
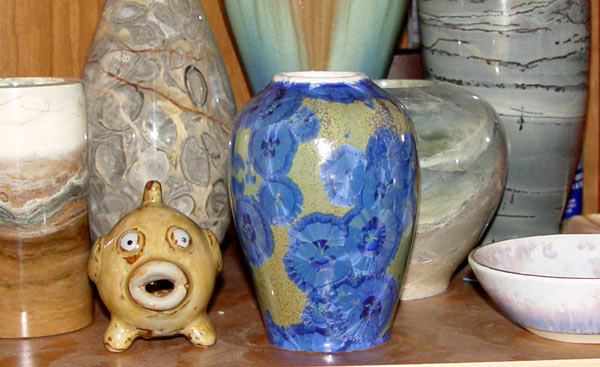
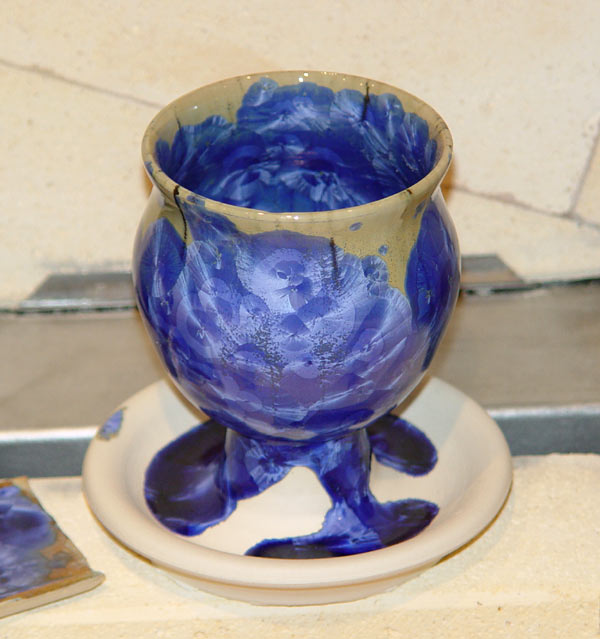
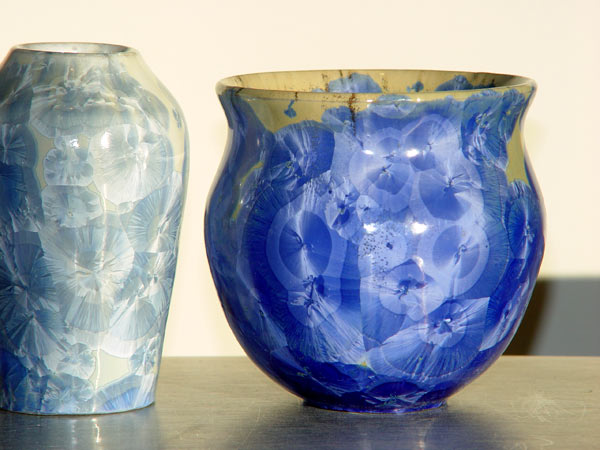
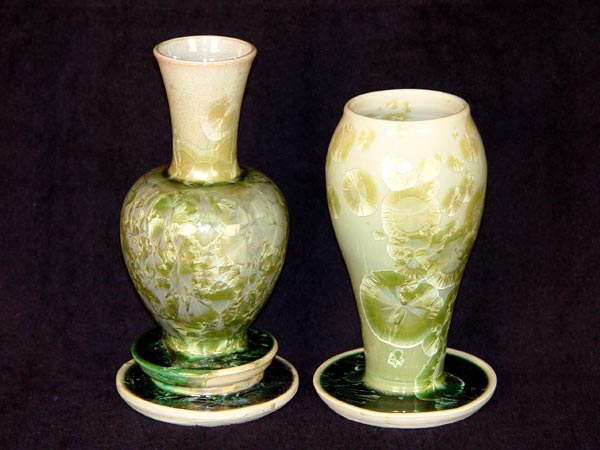
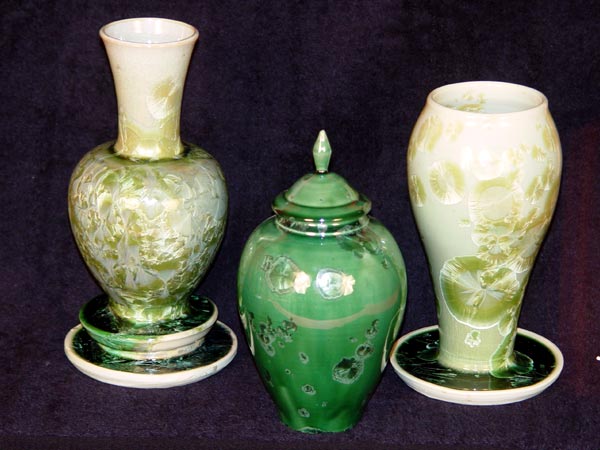
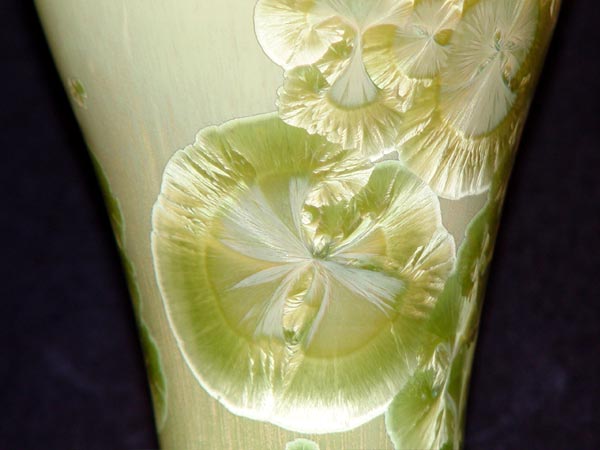
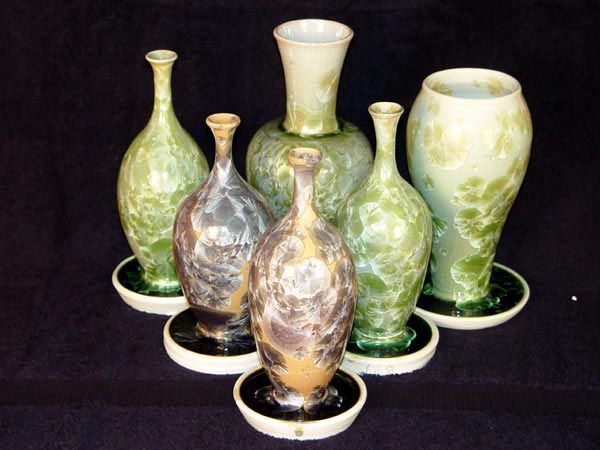
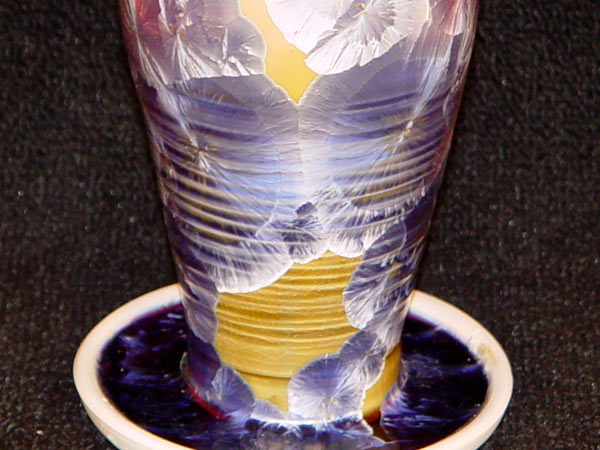
The fish scale look isn't the glaze thickness so much. It's the type of clay! The three pots circled are the same glaze on different clays. I will have to sort that out.
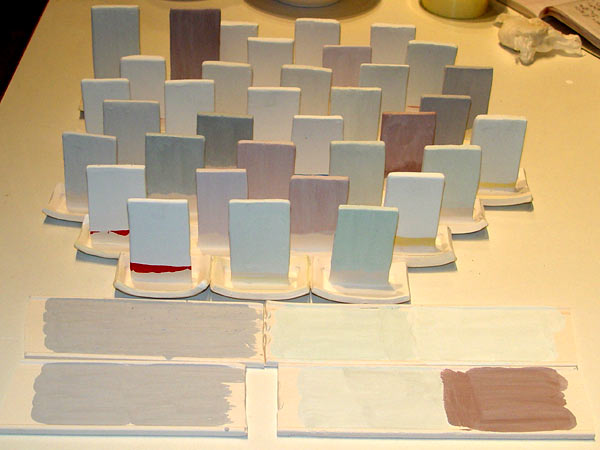
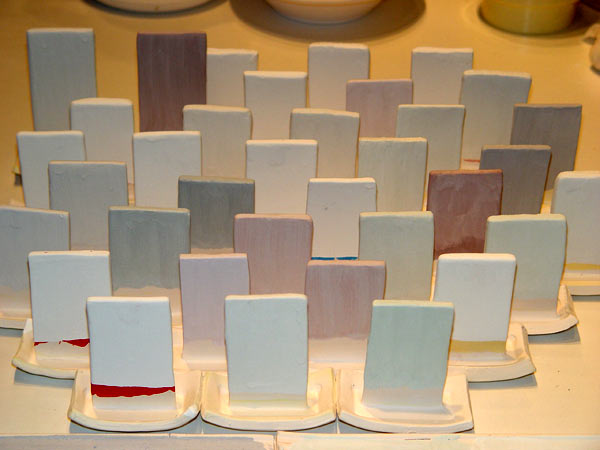
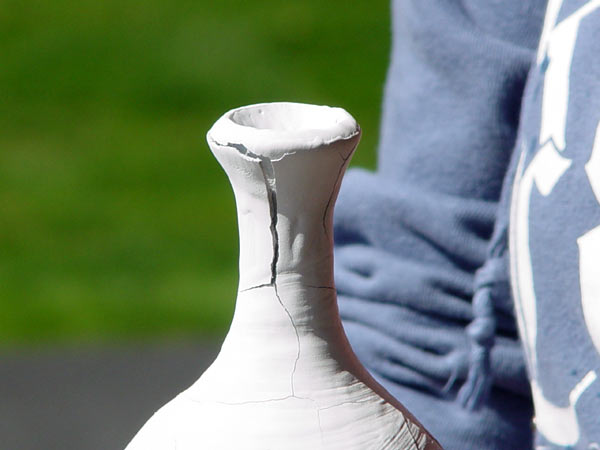 The last batch of
base glazes gave me a whole new problem. Drying glaze began shrinking and
cracking severely. I had thought that ball mill times are not critical. I
finally realized the last time I ball milled base glazes instead of the 1 to 2
hours I was using I lost track of time and it went for 4 to 5 hours. They were
much more fluid, and passed through the sieve easier than before and also shrank
like crazy. I tried to repair the cracking glaze and have my fingers crossed it
will not spall during firing. I subsequently milled some more glaze for 2 1/2
hours. It was much less fluid, more tedious to get through the screen but showed
no signs of cracking.
The last batch of
base glazes gave me a whole new problem. Drying glaze began shrinking and
cracking severely. I had thought that ball mill times are not critical. I
finally realized the last time I ball milled base glazes instead of the 1 to 2
hours I was using I lost track of time and it went for 4 to 5 hours. They were
much more fluid, and passed through the sieve easier than before and also shrank
like crazy. I tried to repair the cracking glaze and have my fingers crossed it
will not spall during firing. I subsequently milled some more glaze for 2 1/2
hours. It was much less fluid, more tedious to get through the screen but showed
no signs of cracking.
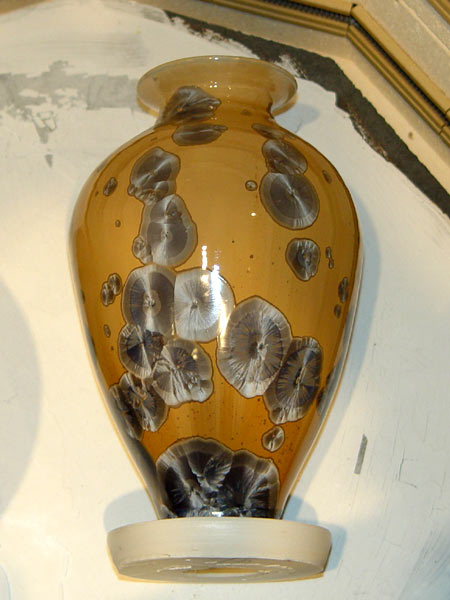
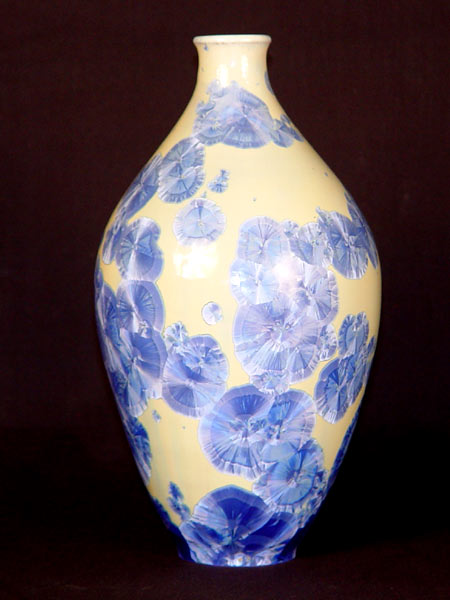
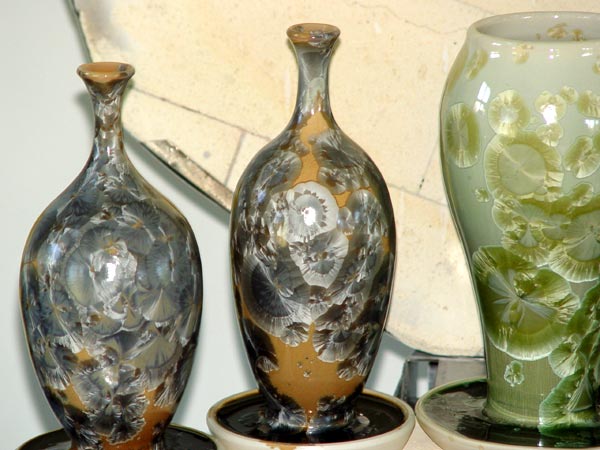
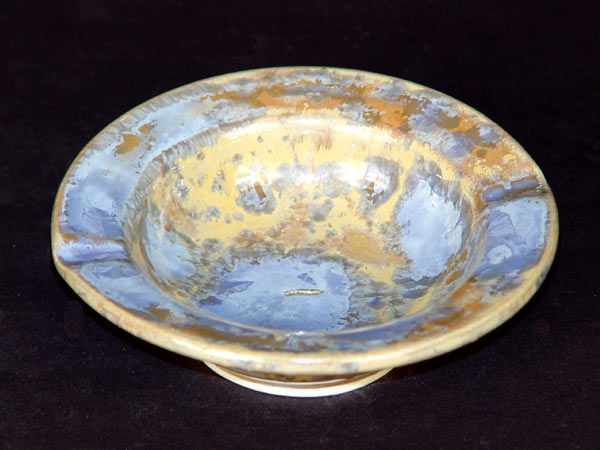
Re: "Namely metallic copper and gold highlights plus a copper red background."
I thought something between Chris' 0.4% CuOx + 1% Fe with 8% titania (which yielded nice red and gold crystals on a reddish background) and the last pieces he reduced for me would be nice. Mine had more iron and copper. My pieces had 8% rutile instead of titania, which itself gives iron. Also I added 1% iron. I thought to cut back on the iron and not add the 1% and only get what the rutile supplies. Regarding copper I thought dropping back to the fractional levels he used might not yield the metallic copper look so I left it at 3%. The glaze gods saw fit to see that I made a mistake and only added 2% when I mixed. I ended up with:
| Ingredient | 3110 | Zinc Oxide | Silica | Rutile | Kaolin | CuCo3 |
| Weight % | 51.8 | 24.5 | 14.4 | 8.0 | 1.2 | 2 |
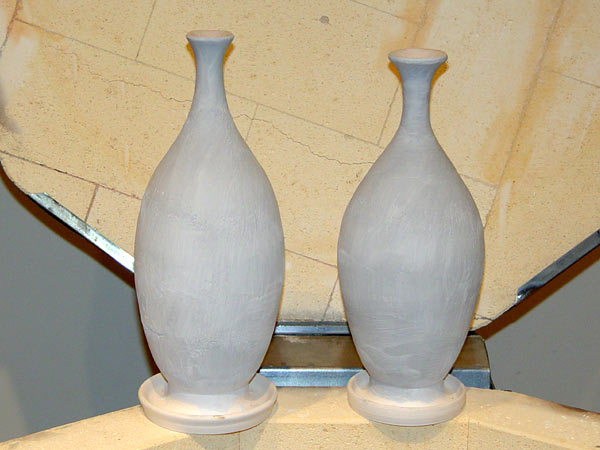
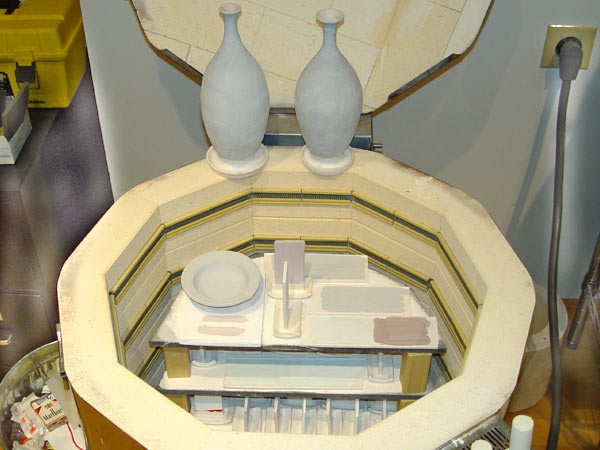
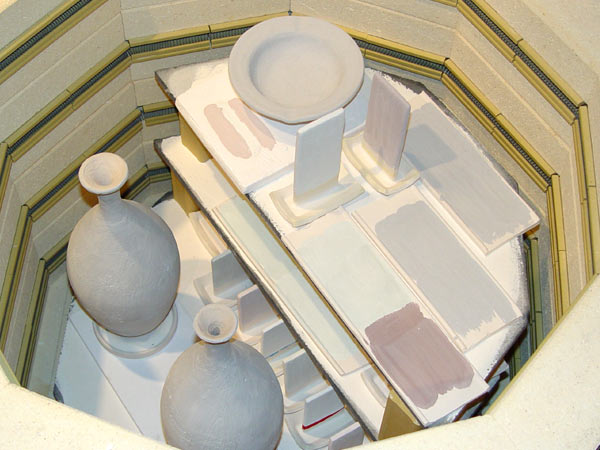
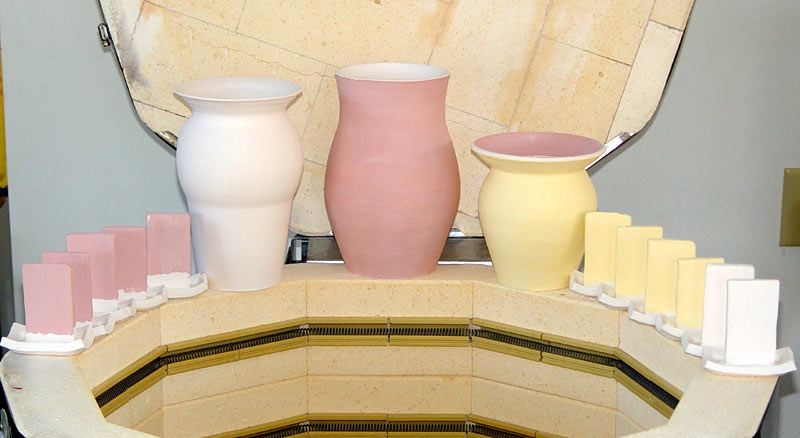
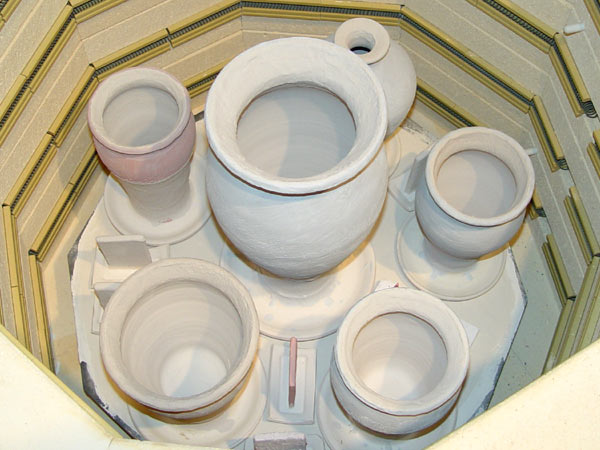
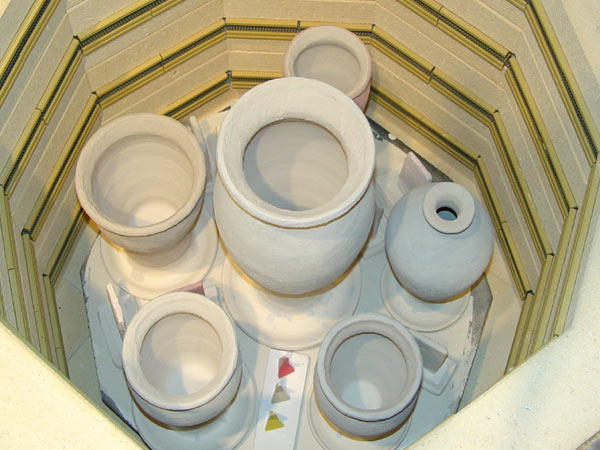
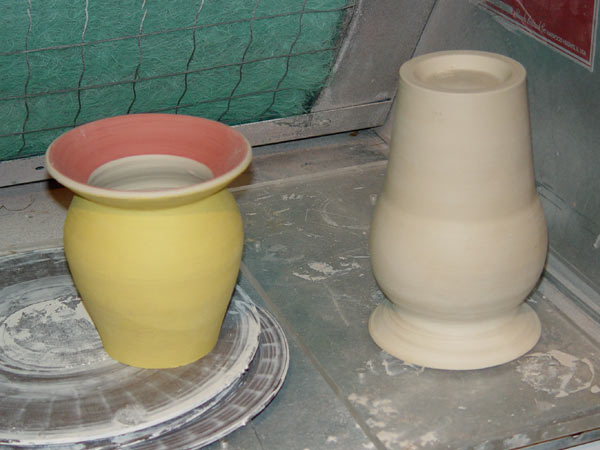
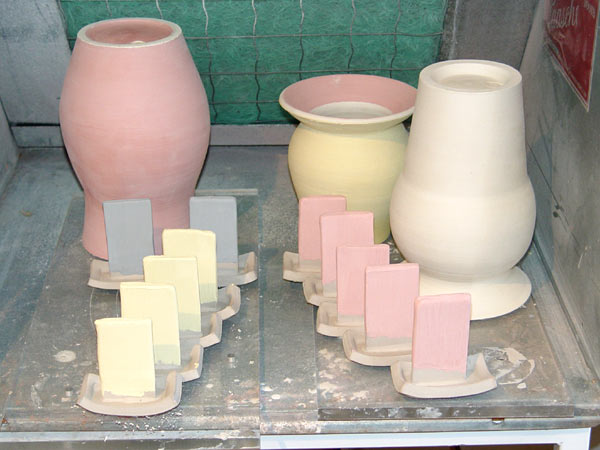
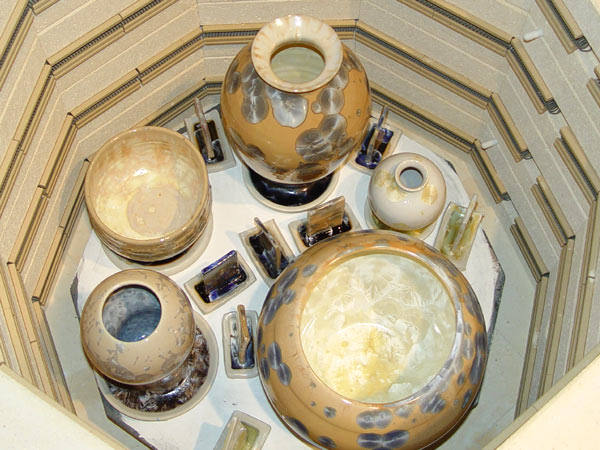
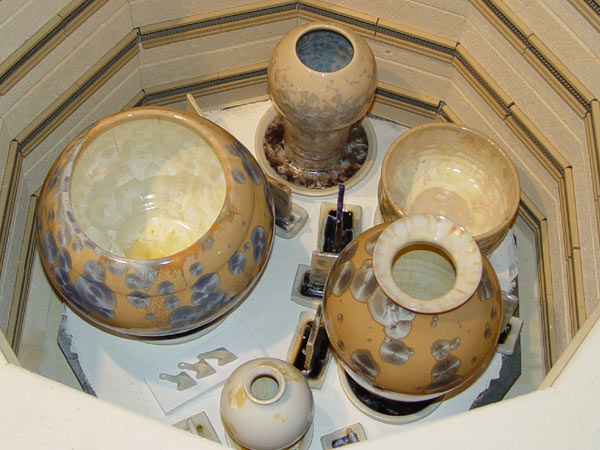
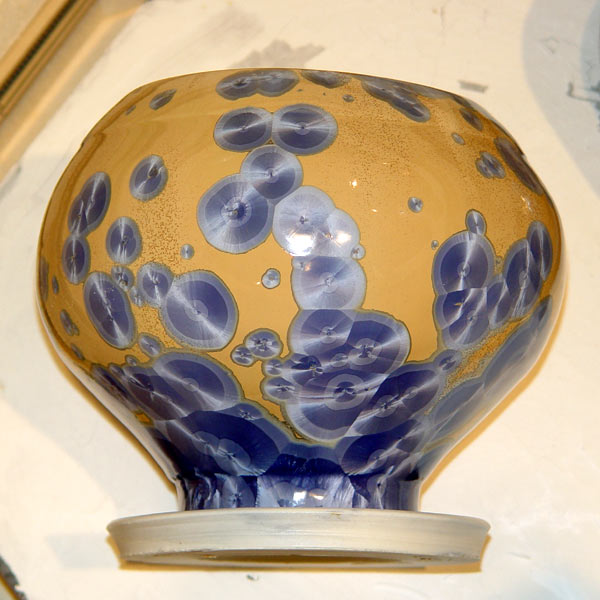
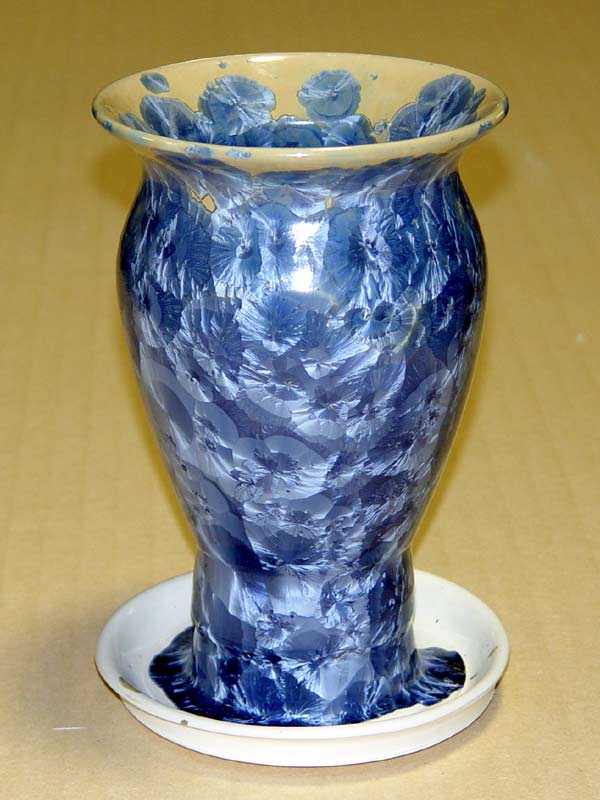
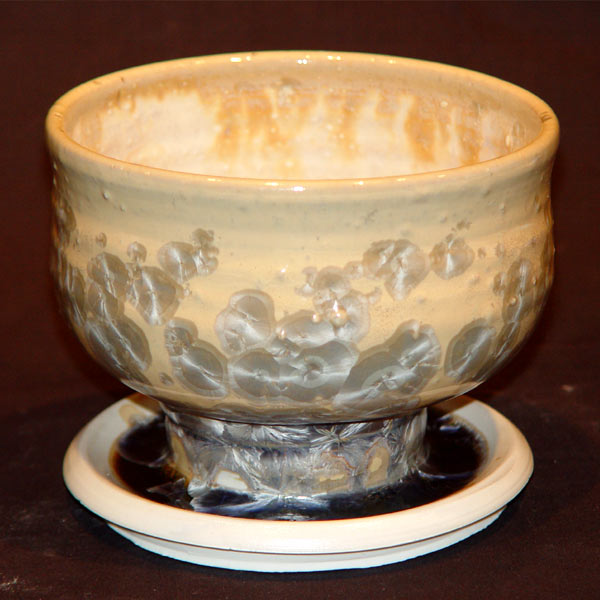
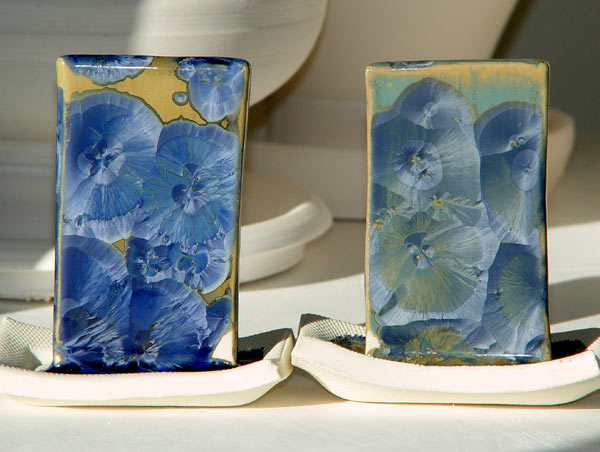
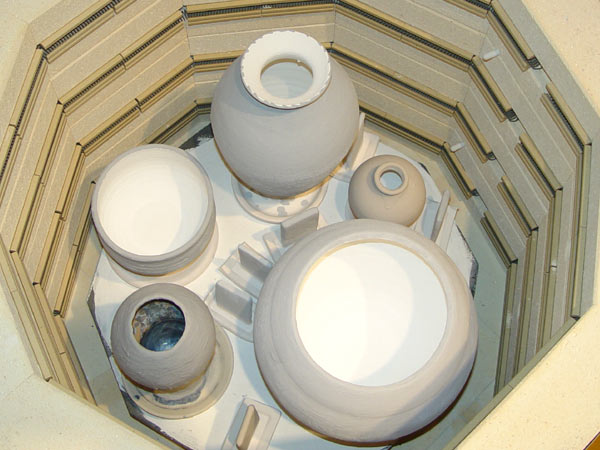
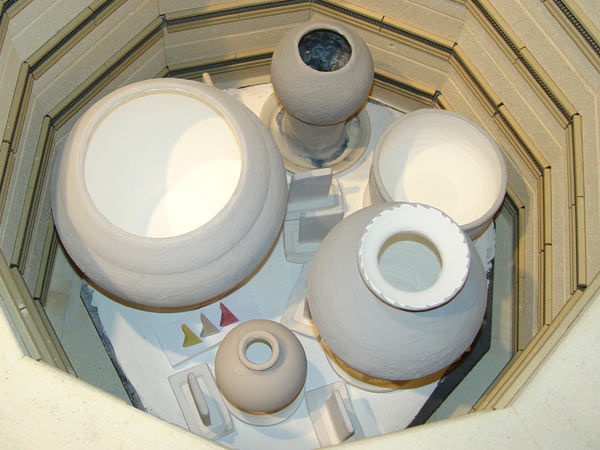
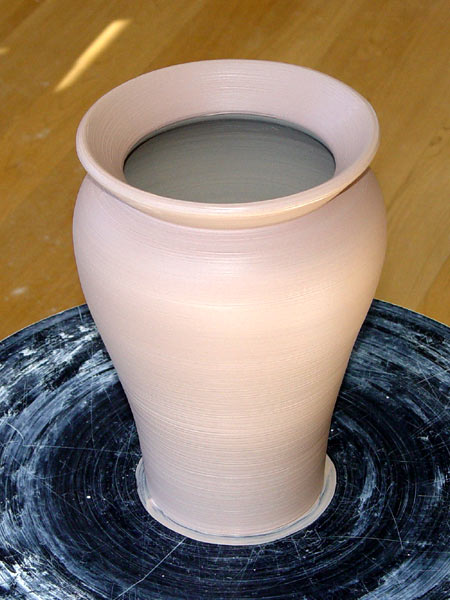
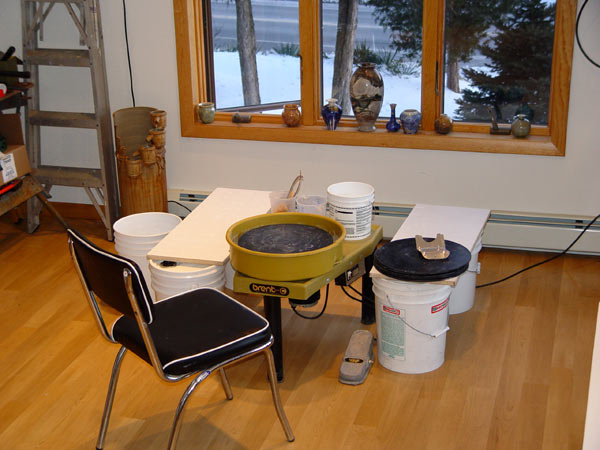
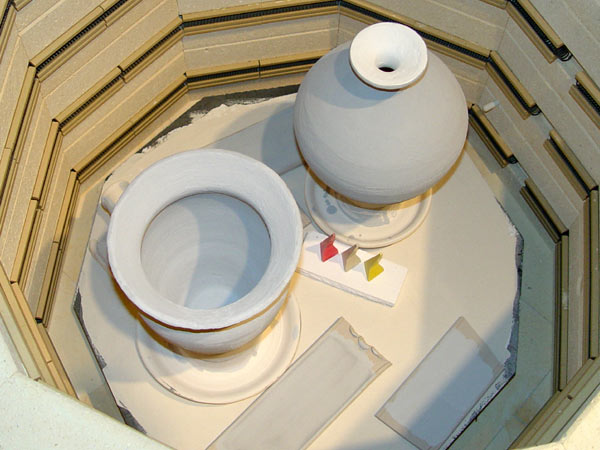
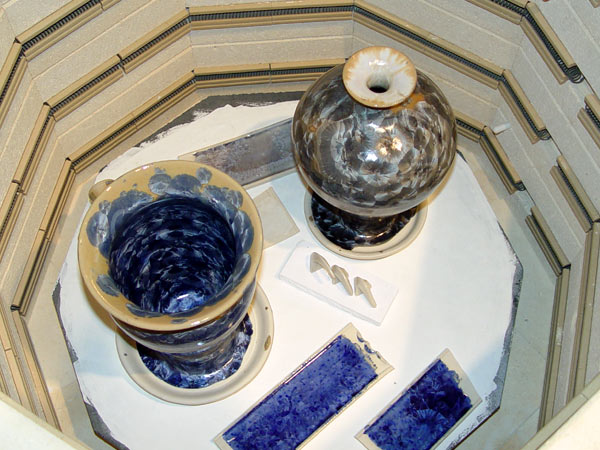
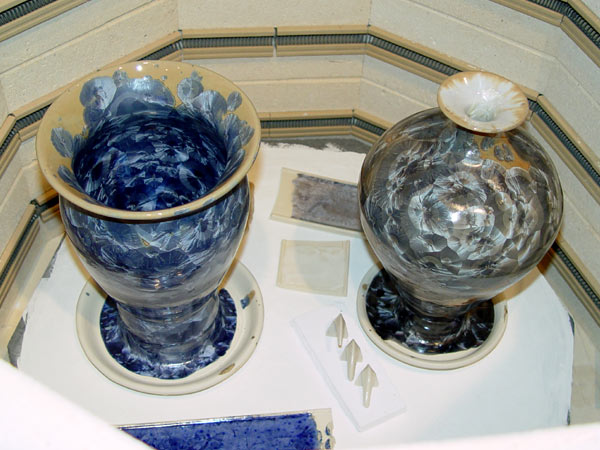
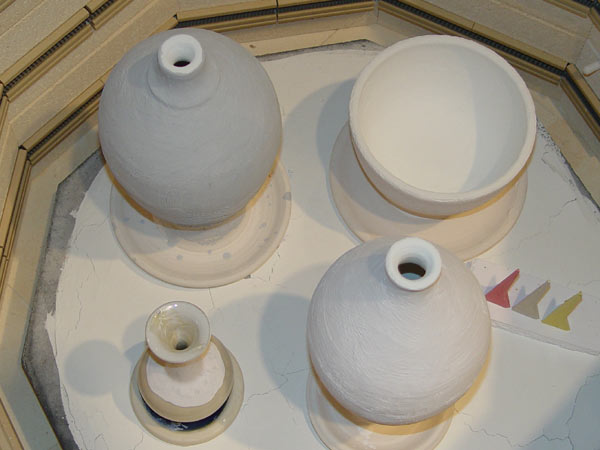
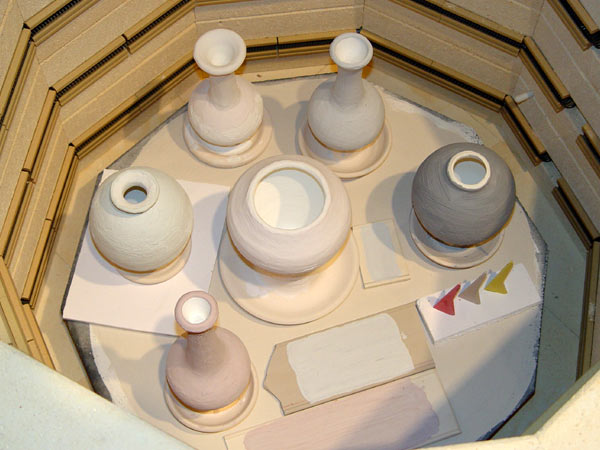
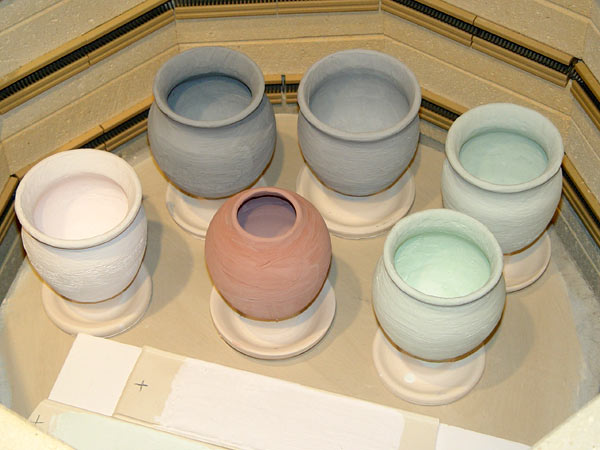
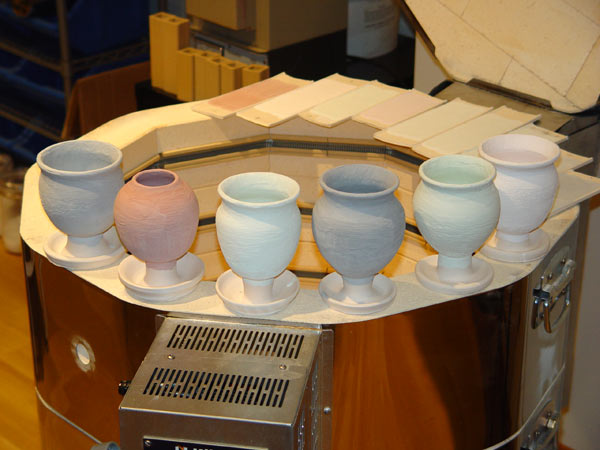
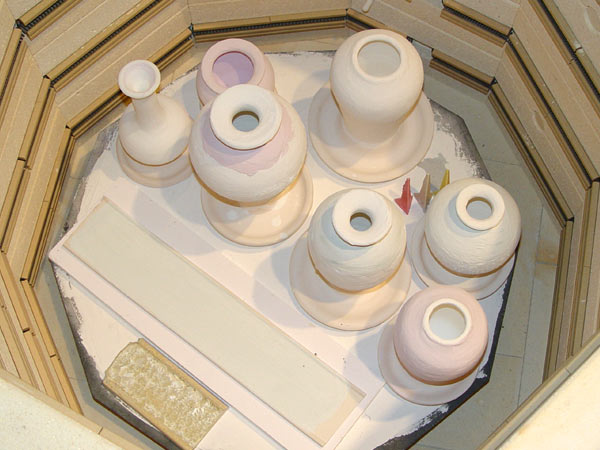
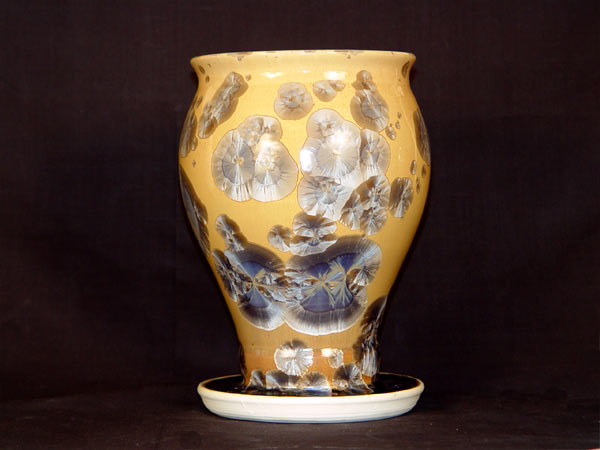
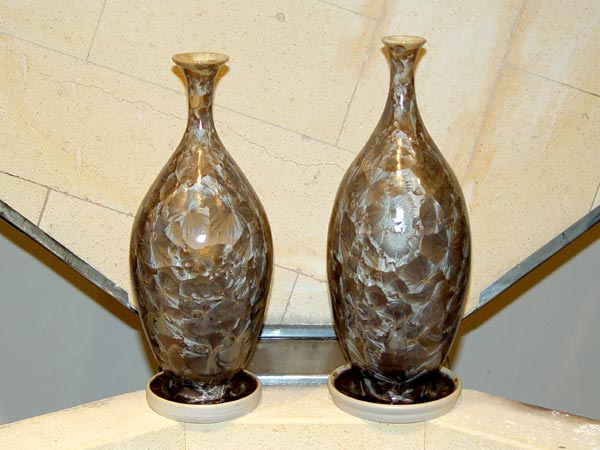
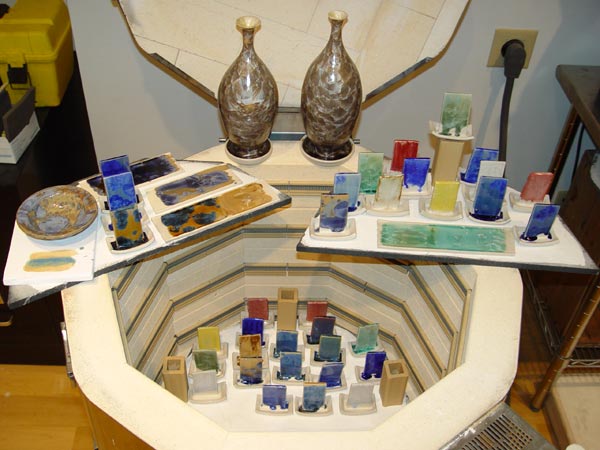
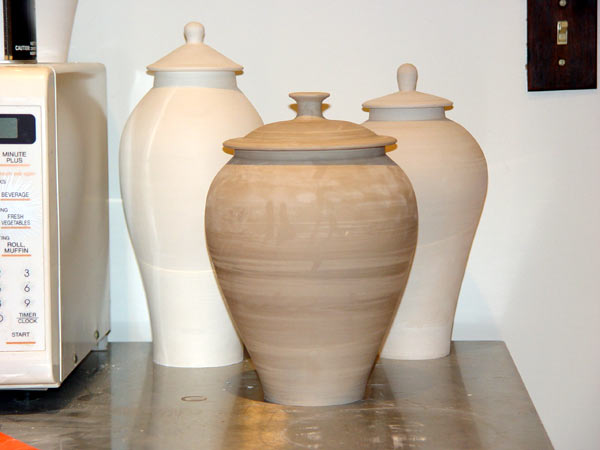
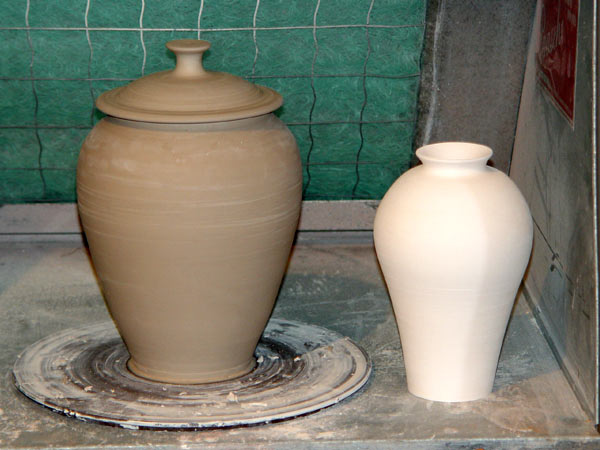
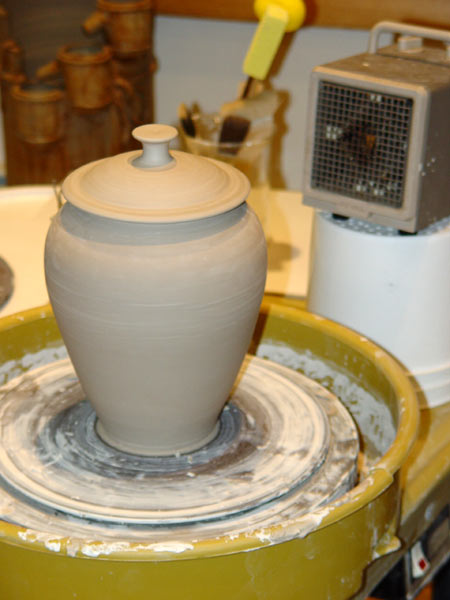
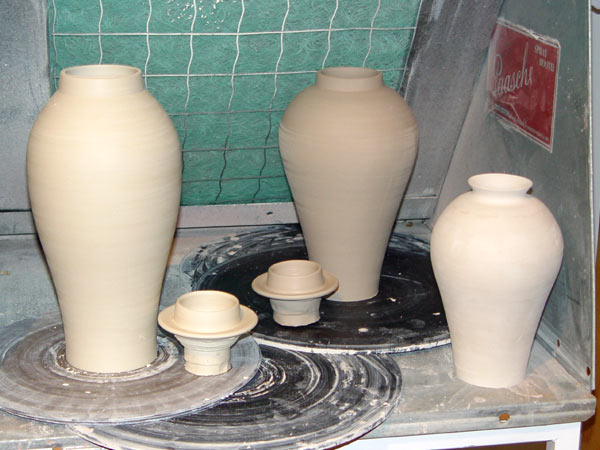
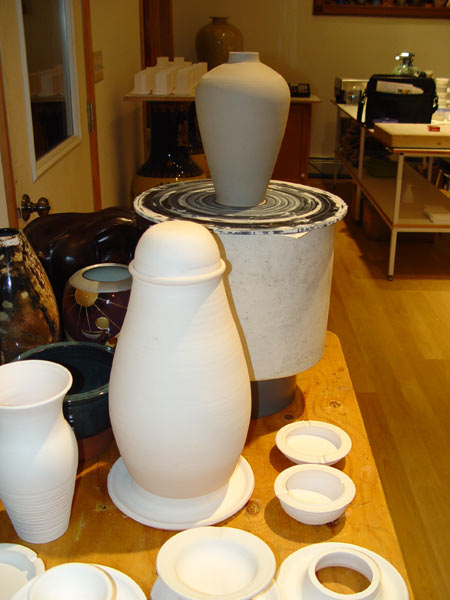
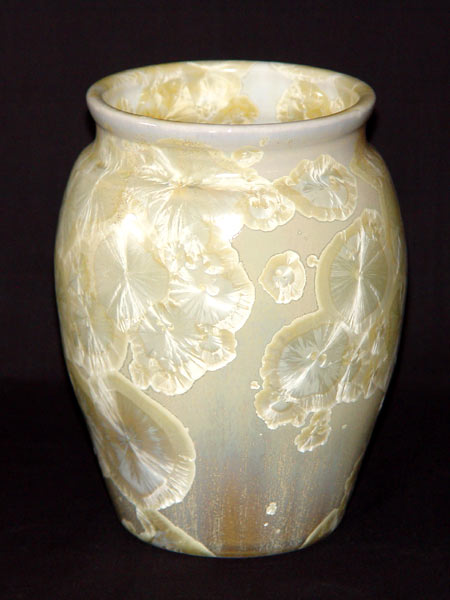
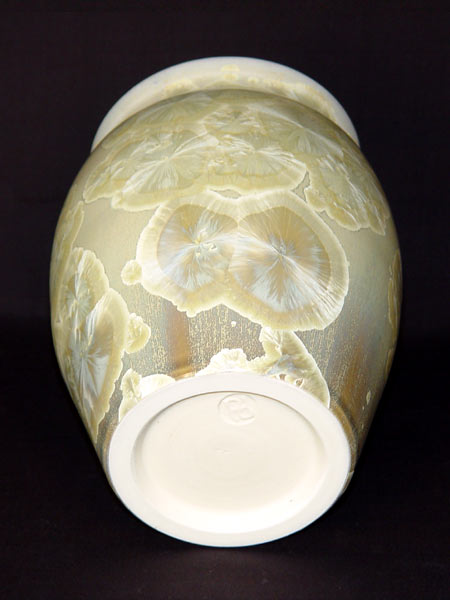
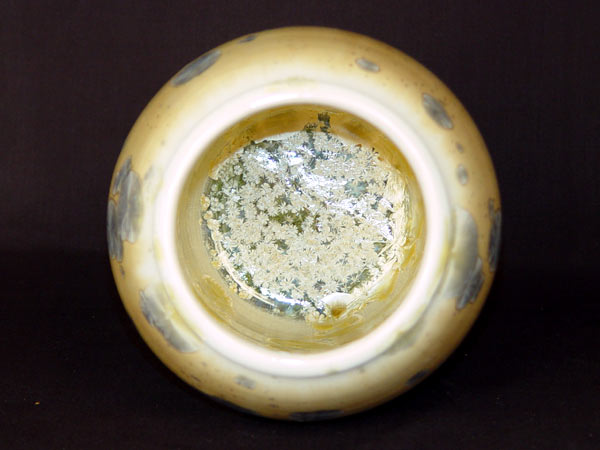
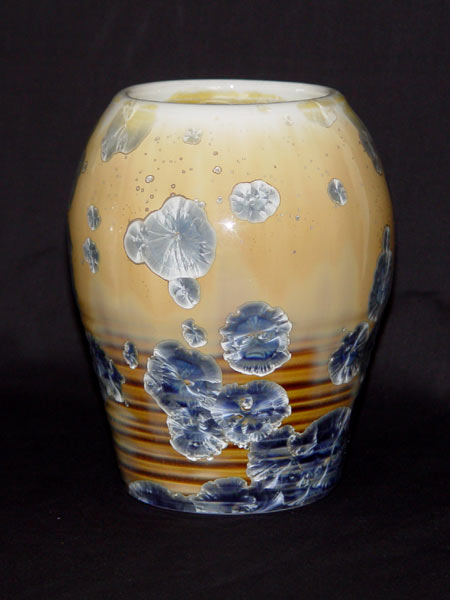
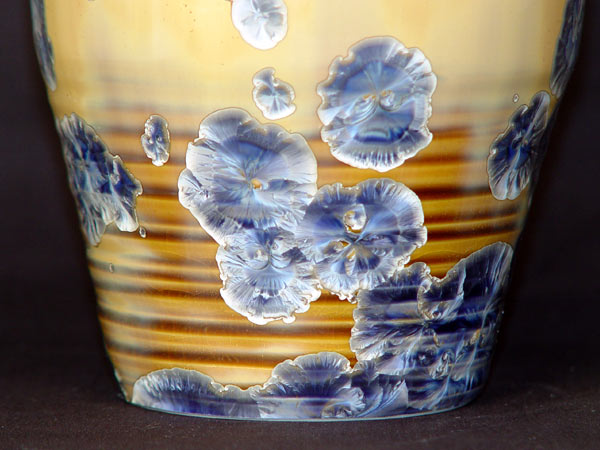
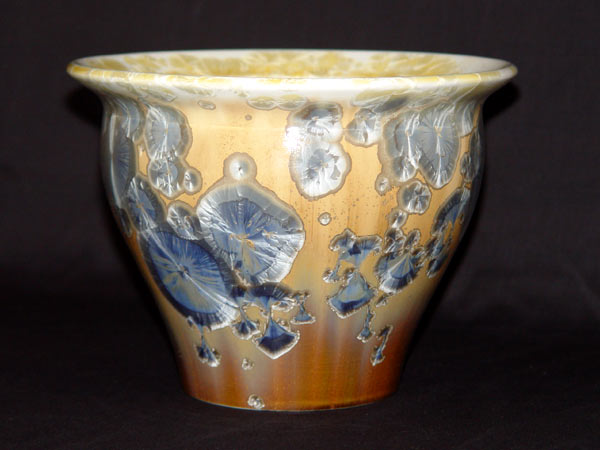
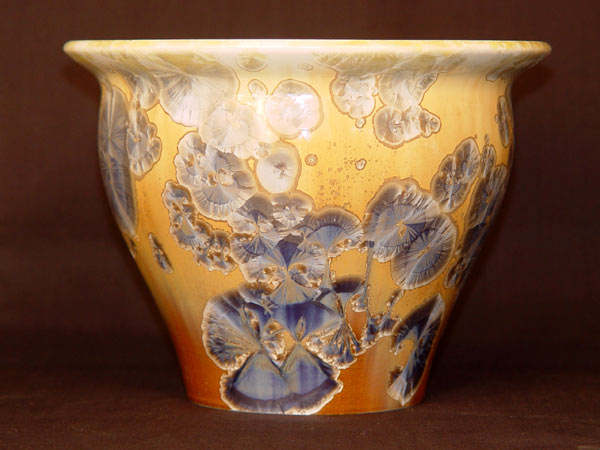
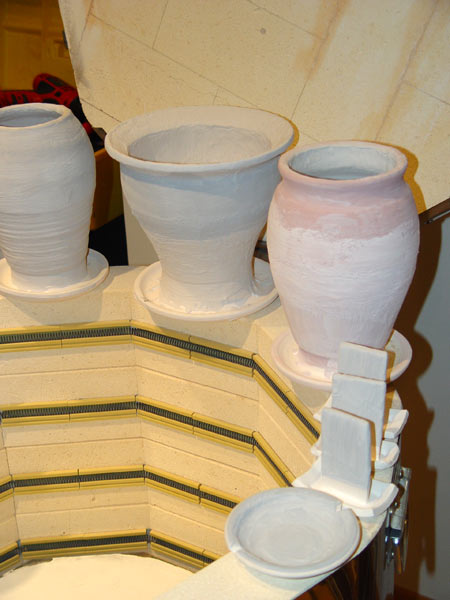
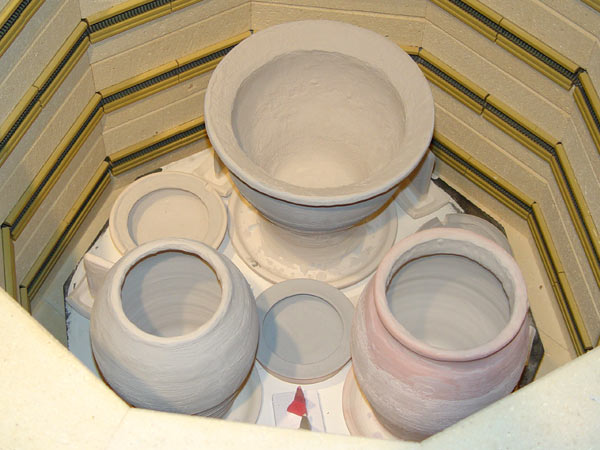
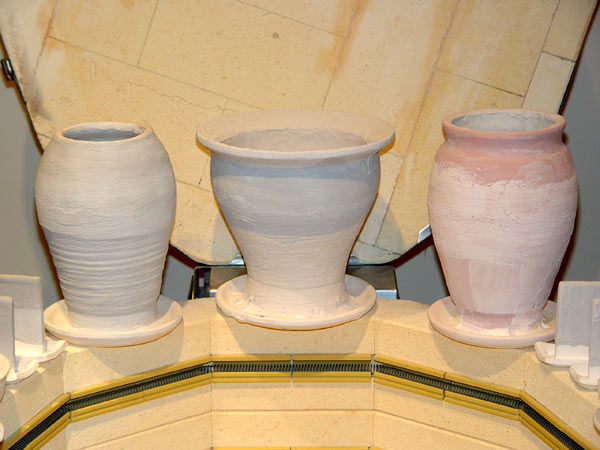
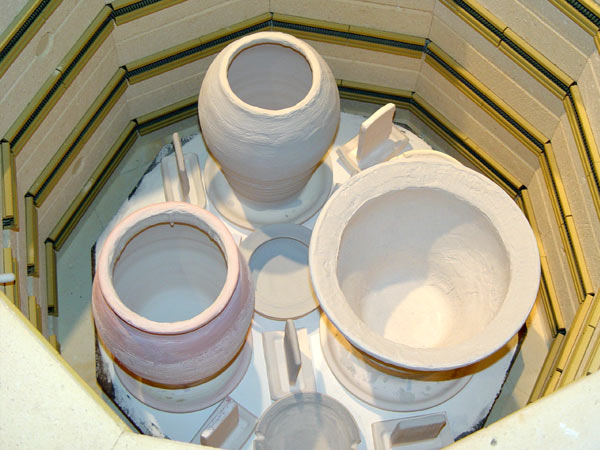
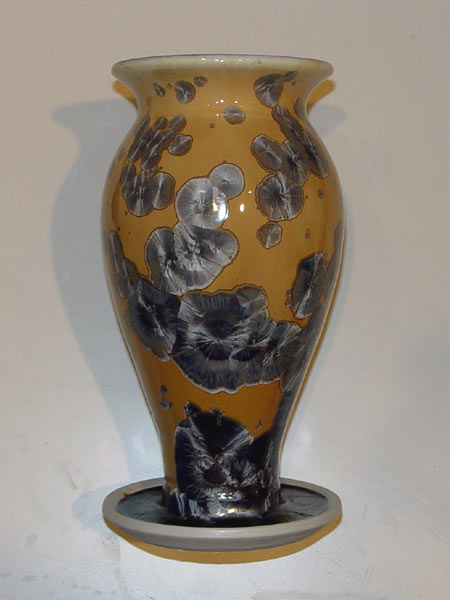
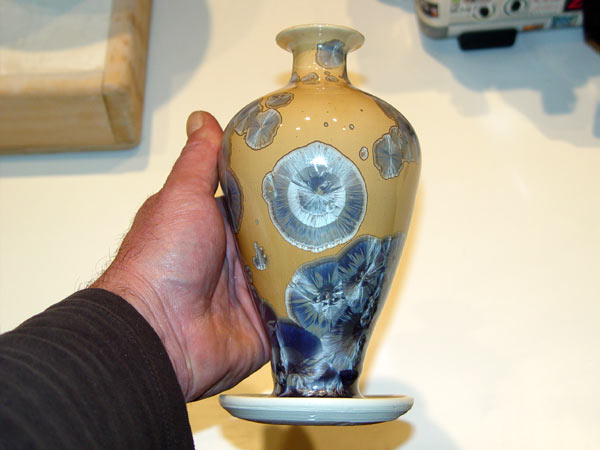
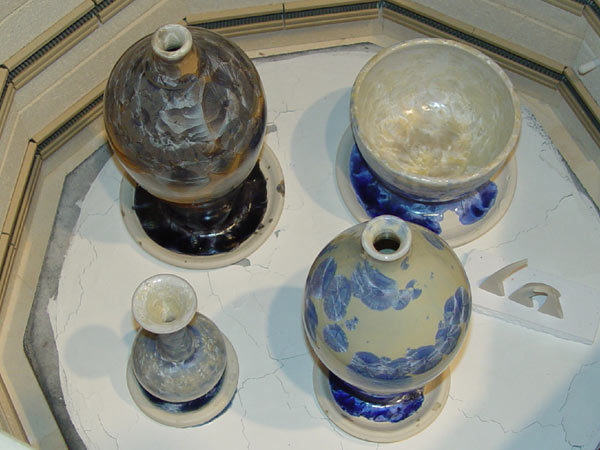
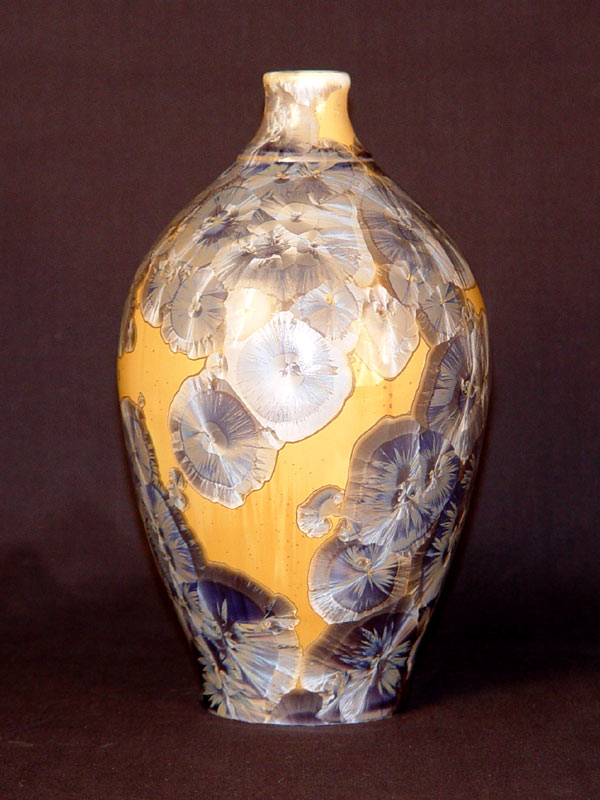
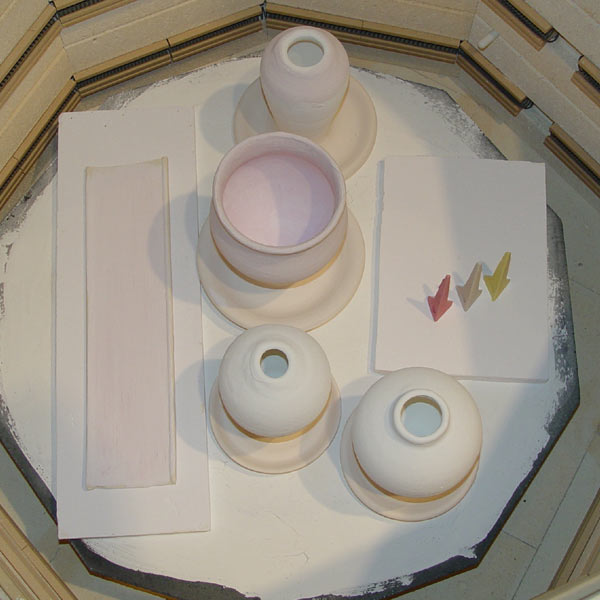
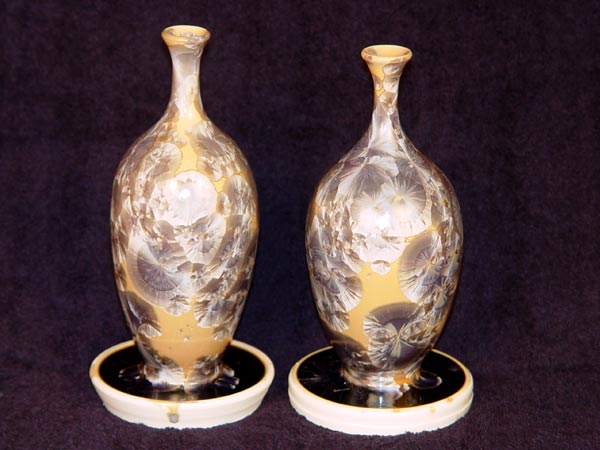
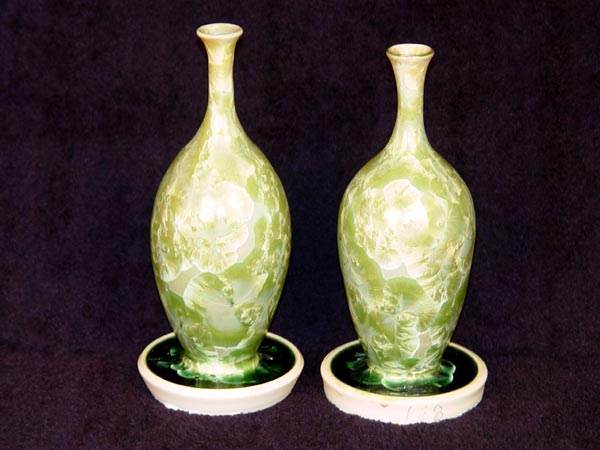
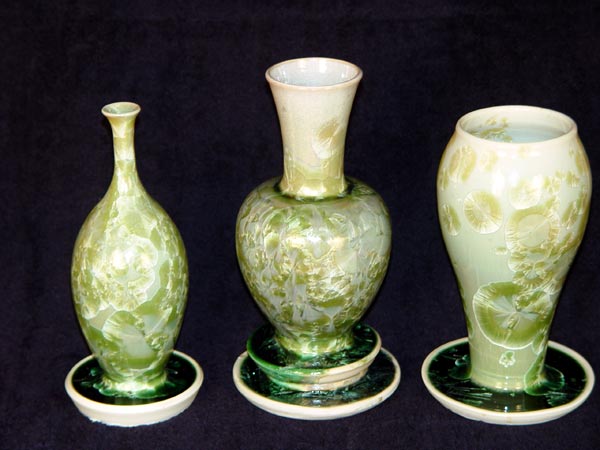
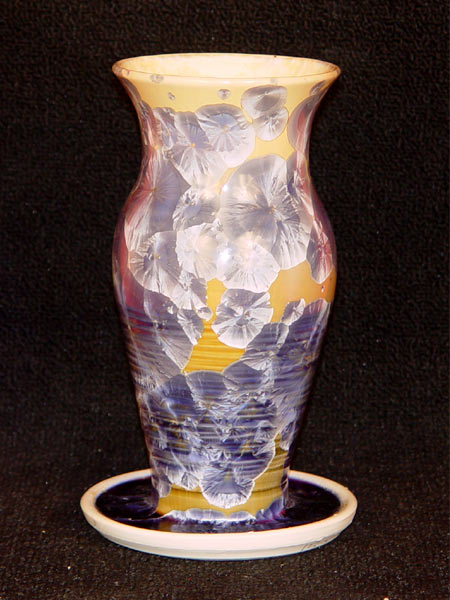
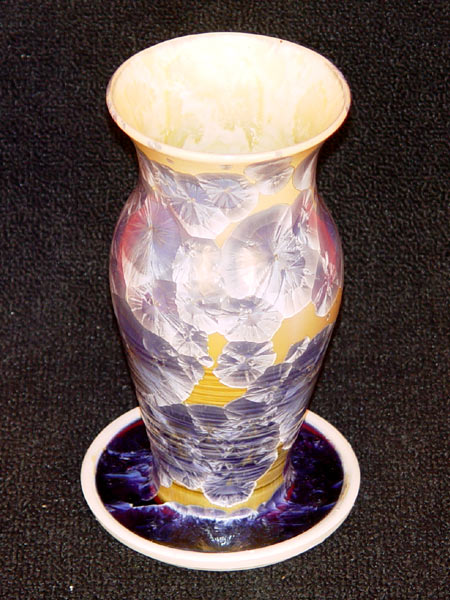
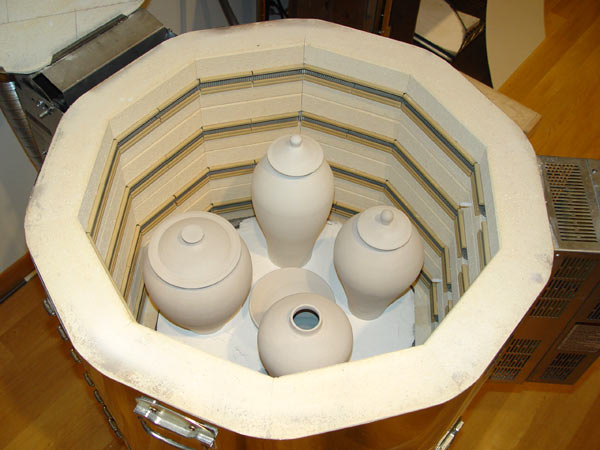
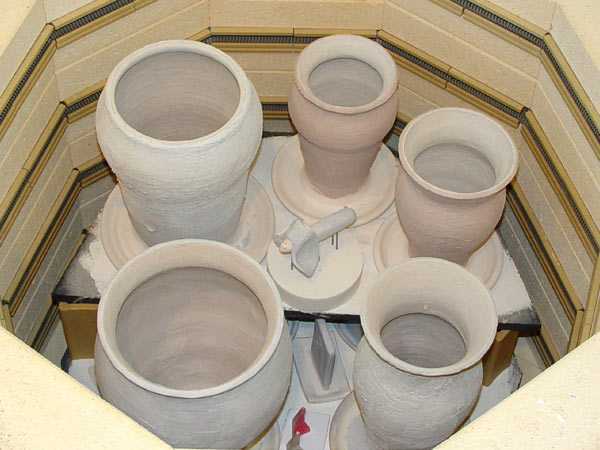
Sunday 5-6-07, my 51st birthday. 14th Firing Setup
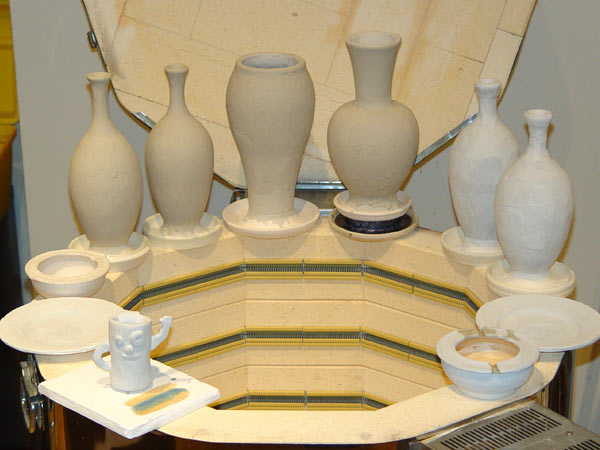
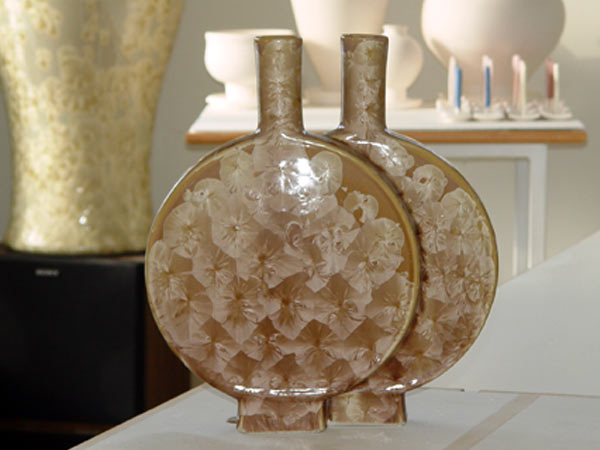
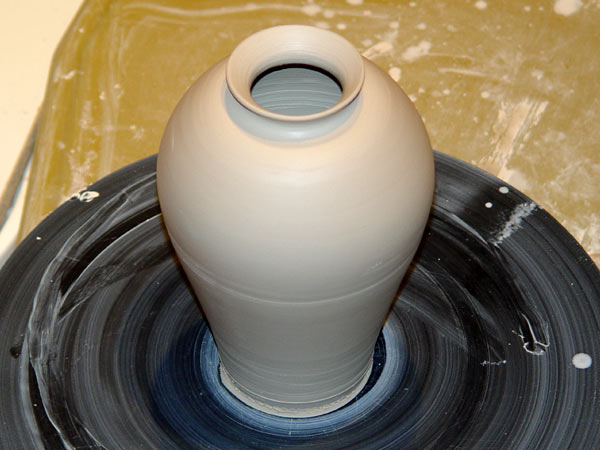
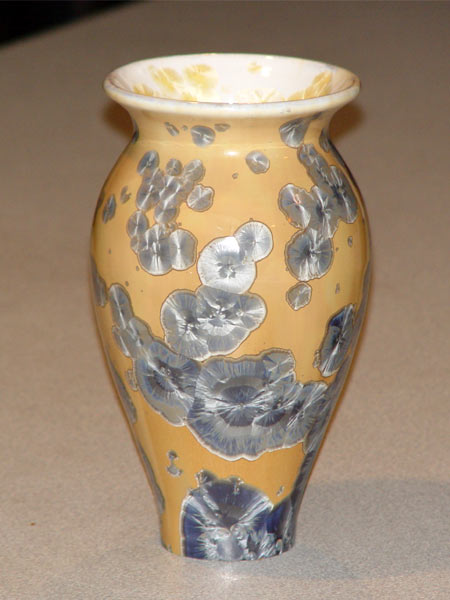
I tried 2 things this time. The first is to repeat the look of the cobalt - manganese pieces from my 11th firing on some of Chris' bottles, and not the look of the 12th firing. The desired look is large isolated crystals, not fish scale crystals that cover the entire surface. I still feel the difference is due to glaze thickness reasons, with a thick (1.5 to 2mm) coating yielding the isolated crystals and a thinner coating (~3/4 - 1mm) the fish scales, even though the sombrero tests of the 13th firing seem somewhat inconclusive. I loaded the glaze on in 3 saturated layers and measured glaze thickness on the necks of 1.5 to 2mm.
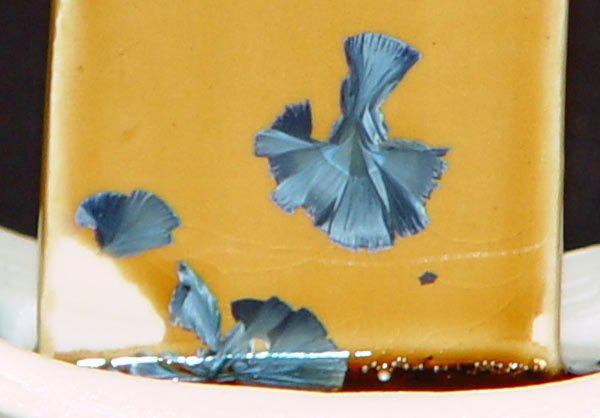
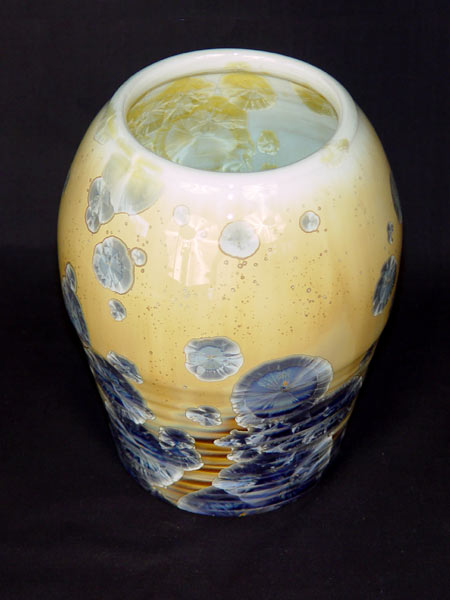
The second thing is to create a copper red glaze Chris can reduce that has the features I like the most. Namely metallic copper and gold highlights plus a copper red background.
5-4-07 Here's a compilation of some work by Chris Groat
4-28-07 13th Firing Results
I got some good results, some not so good results and some that were totally unexpected. Let's take it in the order presented on 4-22-07.
I was able to duplicate the glaze on pots in my 9th, 10th and 11th firings. I applied 0.5% CoCO3+ 2% MnO2 glaze in various thicknesses - .8mm at the foot, 1.5mm on the shoulder and 1.7mm under the rim.
 |
 |
 |
 |
|
The glaze catcher was almost full |
|||
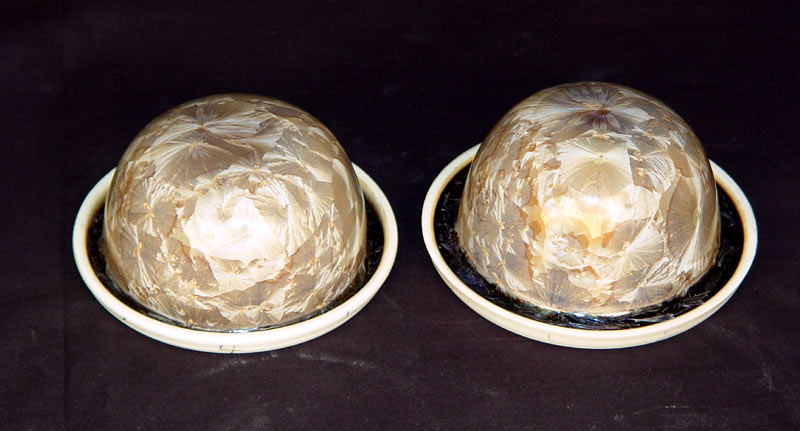
I was convinced that the fish scale look I was getting before was due to not enough glaze and I could demonstrate that when less is applied you get the fish scale look and when more is applied you get nicely separated crystals like those above. Well "it just ain't so"! The worst part of it is I don't have a clue what is really going on. Can anyone reading this page help me?
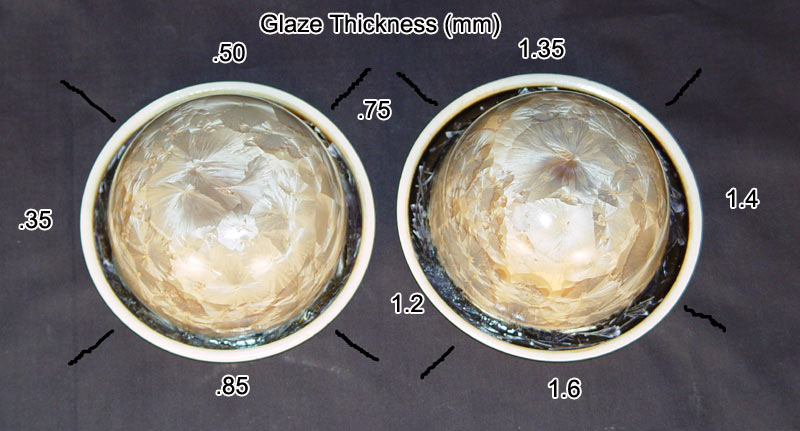
The results of the sombrero experiment did not come out as expected. The only good news I see (besides getting crystals) is that the dry cracking problem did not seem to make a difference in the outcome. Although the .35mm thick application is totally fish scaled, the 1.6mm thickness is not much different. The thicker areas show some background, but very little and certainly look nothing like the vase above, which had essentially the same glaze loading.
|
||||||
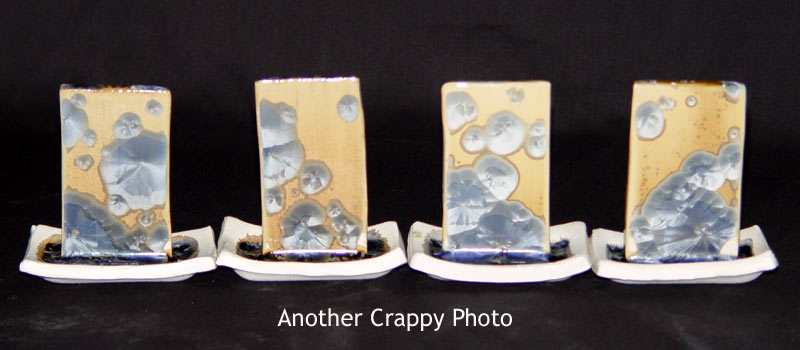
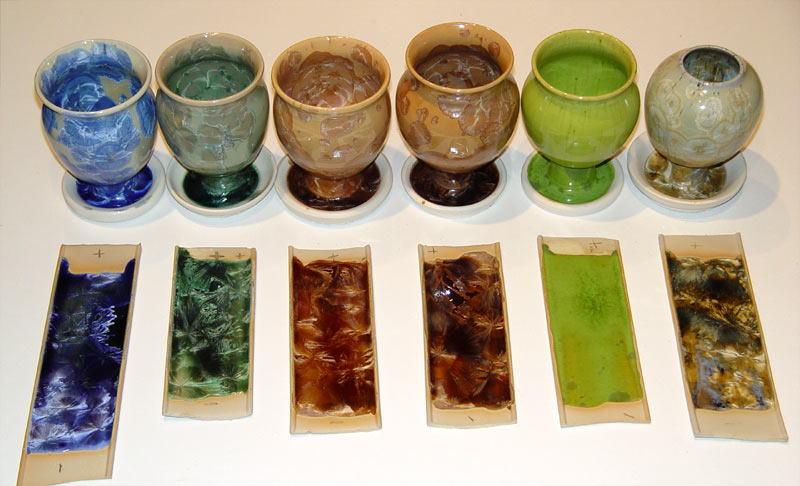
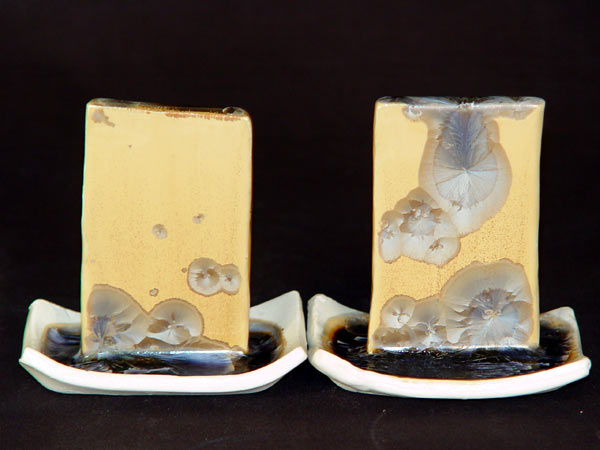
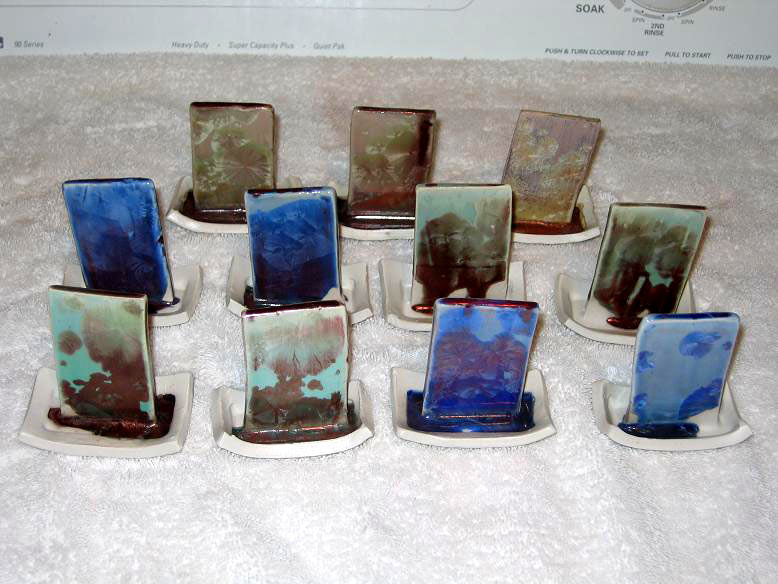
The vertical test tiles gave exactly the opposite result as I had expected with more crystals appearing in the thicker glazed sample and vice versa.
 |
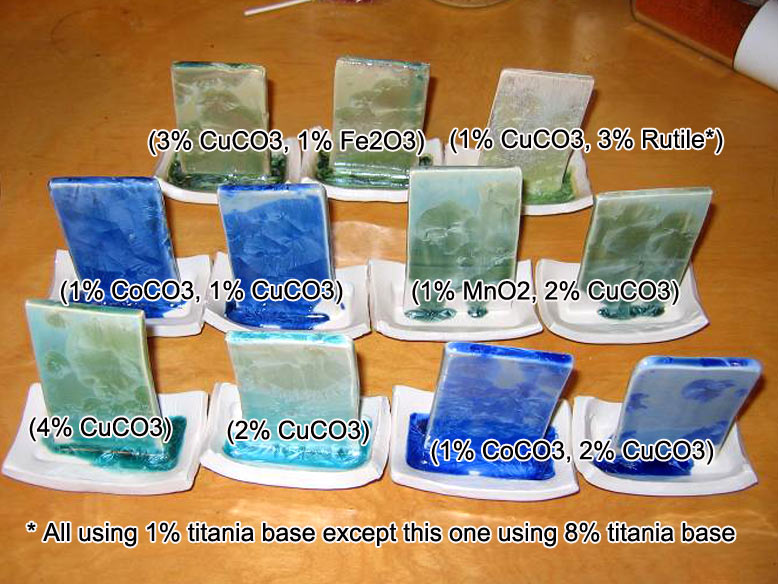
The results of the small wave of vertical test tiles came out pretty interesting with this 2% NiO , 1% MnO2 glaze being the most interesting. The red stained engobe covered with a modified "clear" glaze was a total letdown. (I'll keep trying) |
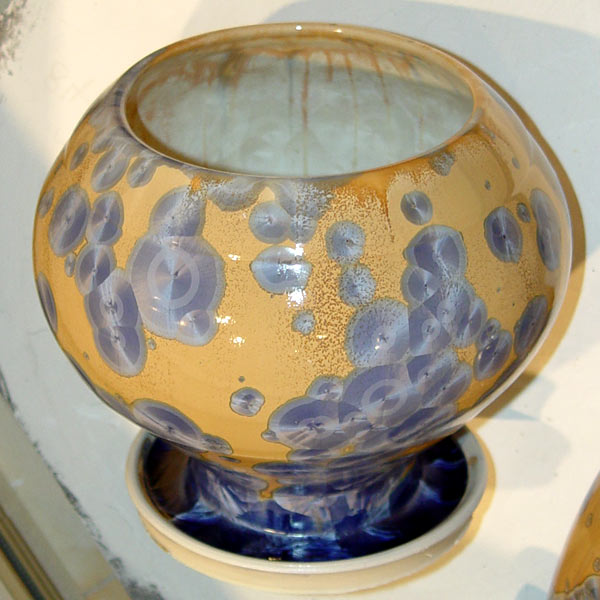
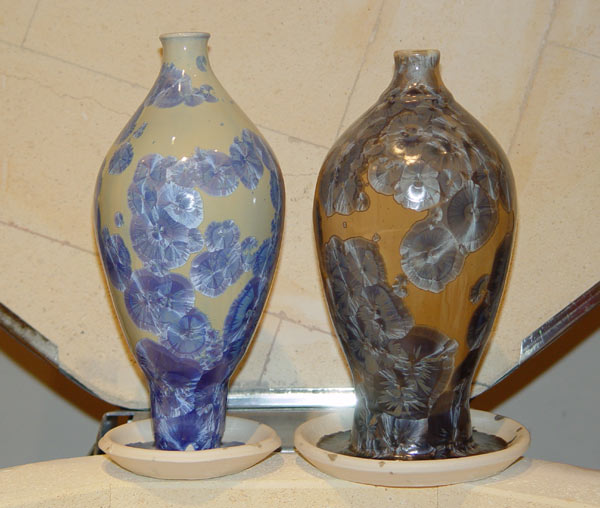
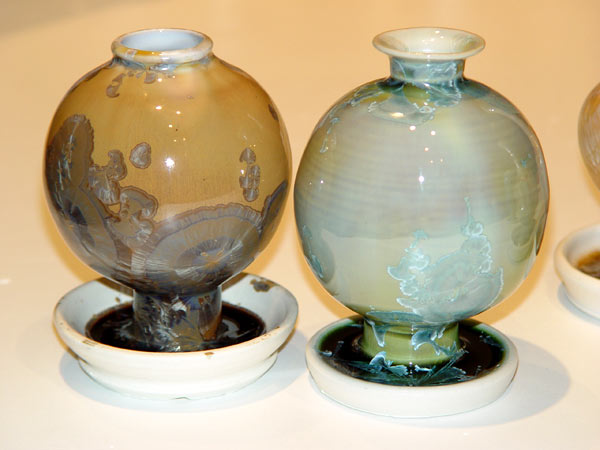
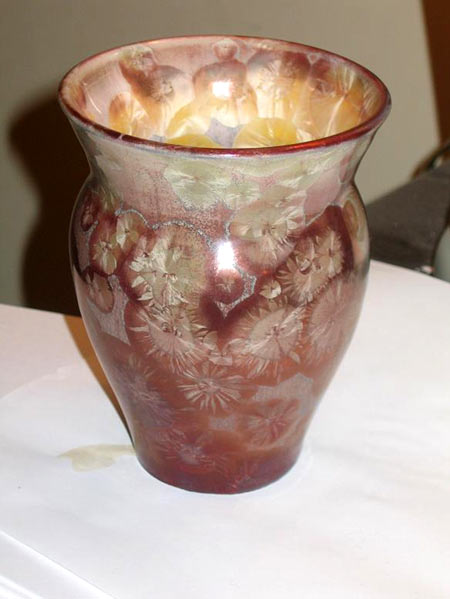
 The 2 pots with
3% copper carbonate and 1% red iron oxide came out real cool after Chris
reduced them. The various vertical test tiles I sent show real promise too
and will undoubtedly spark a new wave of testing. The 2 pots with
3% copper carbonate and 1% red iron oxide came out real cool after Chris
reduced them. The various vertical test tiles I sent show real promise too
and will undoubtedly spark a new wave of testing. |
|
|
|
|
|
|
|
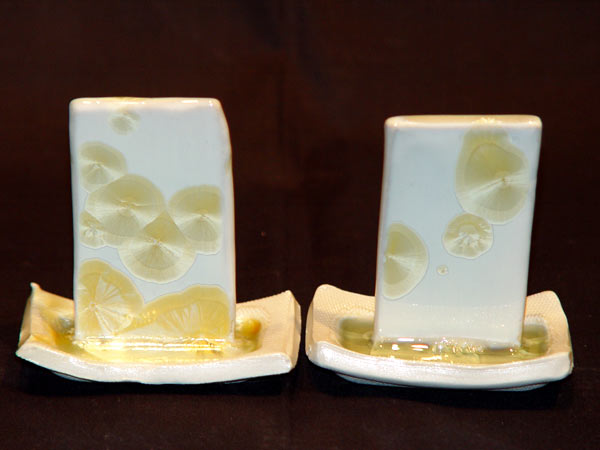
The pieces with throwing lines and .42% CoCO3, 1.0% Rutile, 1.33% MnO2 glaze, and an overcoat of a mixture of 1% titania glaze and CoCO3+ MnO2 containing glaze leftovers came out real nice too. Unfortunately the interiors are a little on the dry side, but I like the exteriors enough that I didn't consider re-firing them. |
|
|
|
|
|
|
|
The narrower piece had more of the "glaze leftover" bouillabaisse applied than did the wider one and yielded some beautiful transparent crystals where the breaking glaze caused by the throwing lines (actually trimming lines) show through. I sent this one to my good friend §.
|
|
|
|
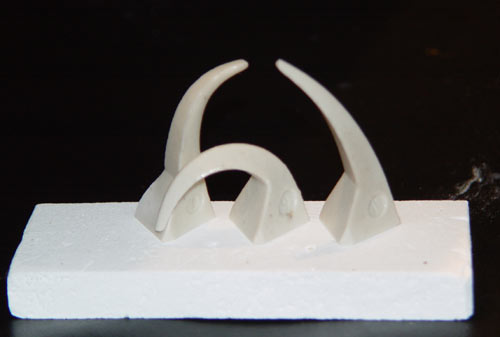
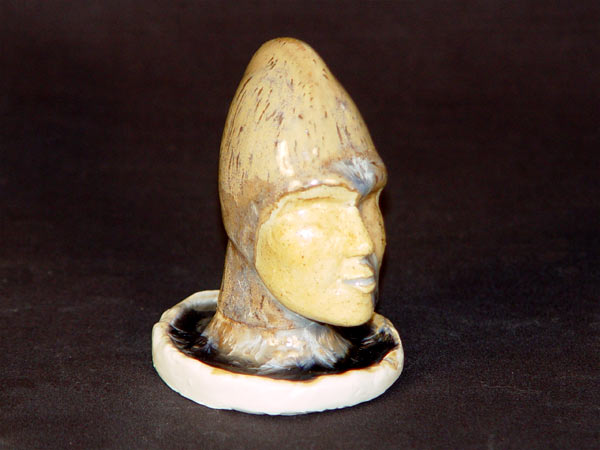
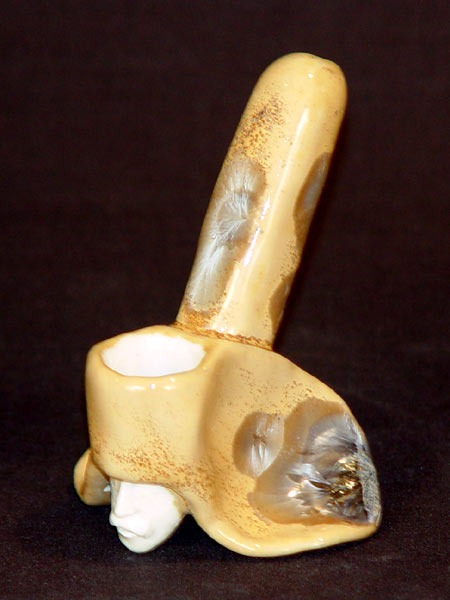
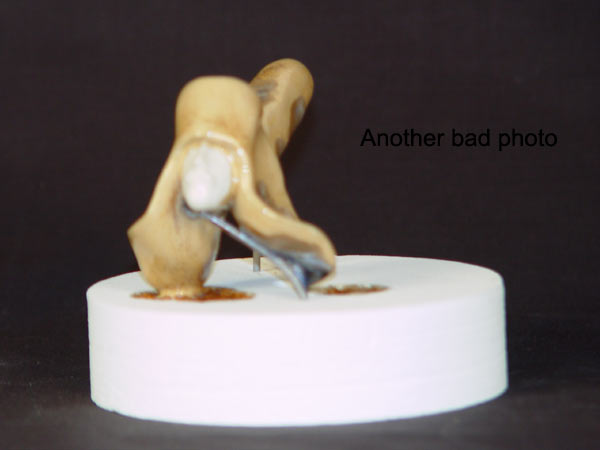
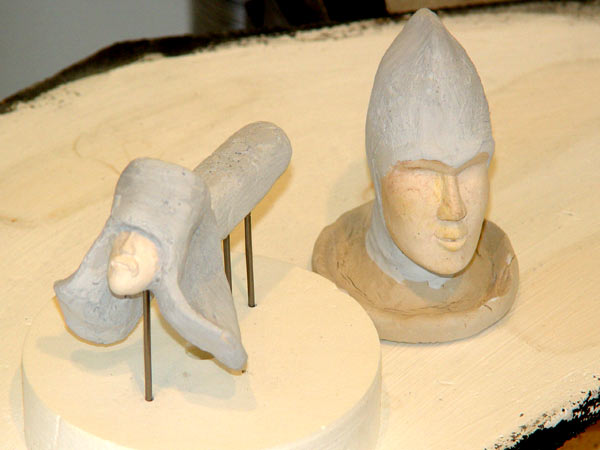
The 28 year old sculpture came through OK, I guess. I have never tried anything like this before, so I guess it is a positive experience. The homemade APM single wire stilt didn't hold up too well, but the double one made it OK. Next time I'll support the wires in mullite tubes or a thermocouple insulator. The alumina fiber board did suck up the drips OK and I was able to Dremel the gobbed glaze off without too much damage.
|
|
And finally I followed this firing with a bisque fire of the lidded jars I made recently. Now that §'s stilt method of lid firing is out in the public domain I can't wait to try it and report on the results. I have a few more pots to fire from my "form struggle period" (Holly may say just smash them and move on) and some more Chris Groat "Let's make a Deal pieces" before I will. |
|
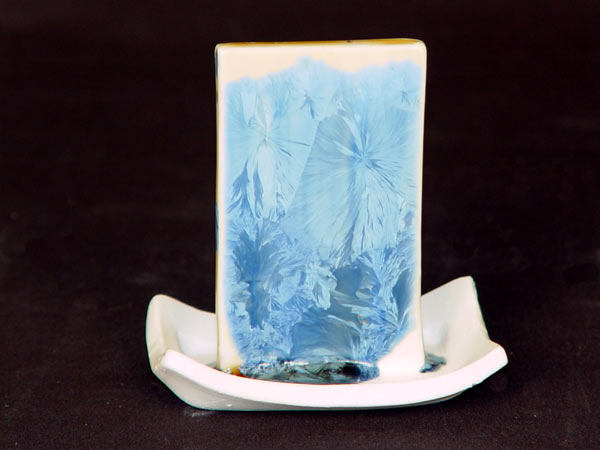
4-23-07 13th Firing Sneak Preview @ 280°C (536°F)
 |
It looks like I got some nice crystals and a piece that looks like it could be from my 9th, 10th and 11th firings. Nothing overflowed. The wire stilt didn't hold up and probably needs a mullite support tube. I didn't put enough glaze on the sculpture. I guess I can try again. There may be dry spots on some interiors. Do I re-fire and run the risk of losing the nice exterior crystals I see? Chris - I like the green on the pots with 3% copper carbonate and 1% red iron oxide. Maybe after reduction the crystals will be red with gold halos. |
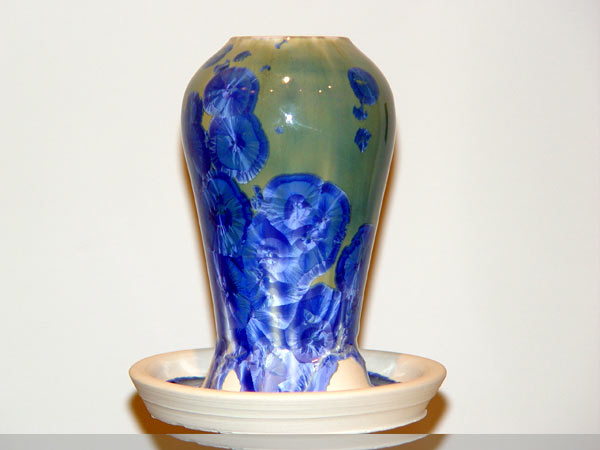
 Let's
Make a Deal
Let's
Make a Deal
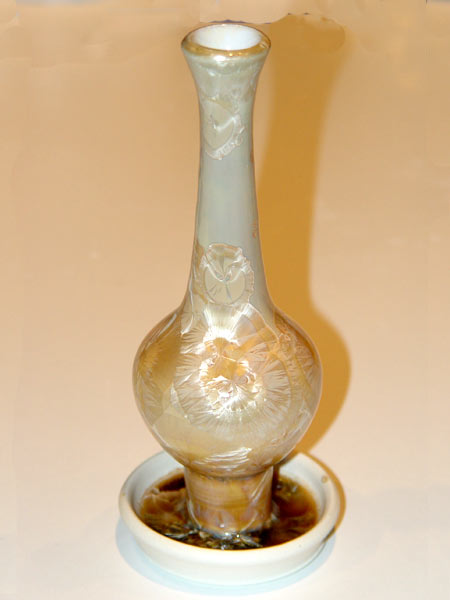
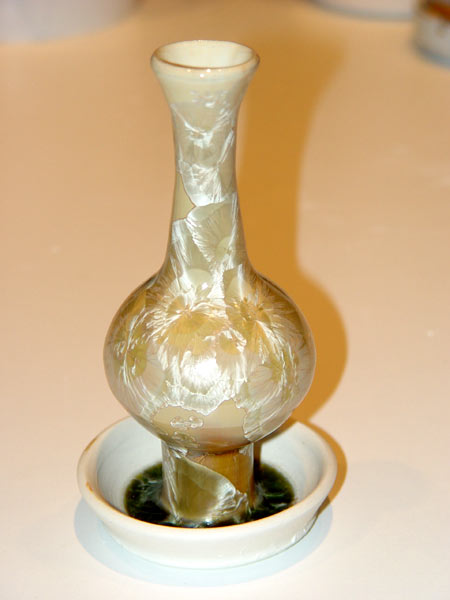
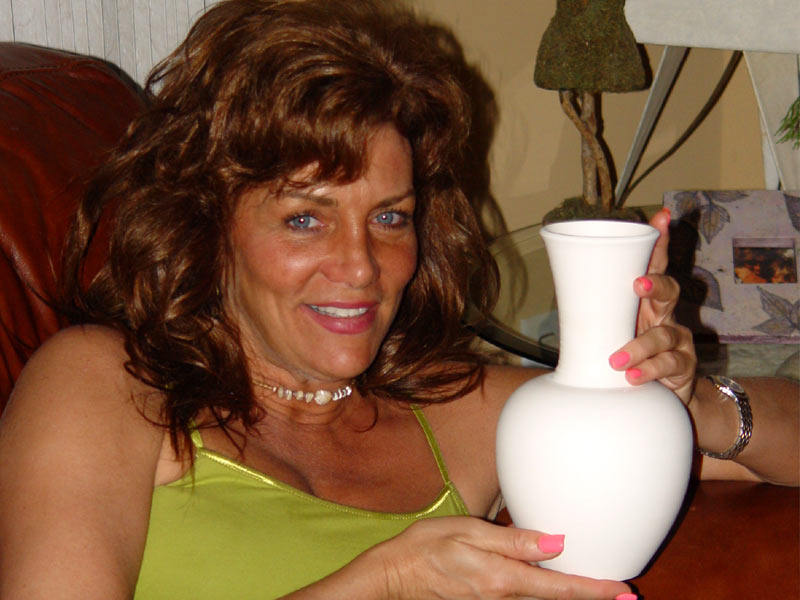
A very nice vase and perfectly fitting catcher sent by § to crystalline glaze. He told me he only sent 1 because his wife liked the other too much to let it go. I can see why. This thing is smooth as my wife Patti's "you know what". And It makes Chris Groat's work, which I thought was unbelievably light, feel like it was made by a guy in a caveman suit!
I would have glazed both and sent back the one of his choice. My offer still stands to everyone else too!
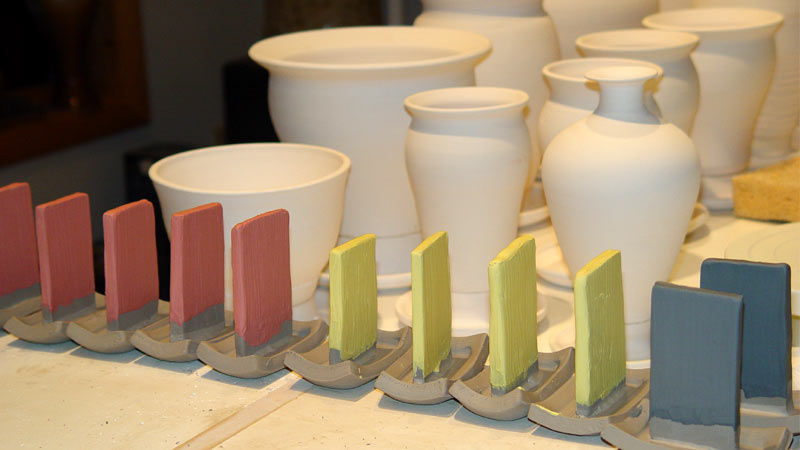
4-22-07 13th Firing Setup
I'm trying to get a clear look at how much glaze to put on to duplicate the pots in my 9th, 10th and 11th firings and get a better look at the impact of the revised firing schedule previously described. Using 2 Chris Groat supplied sombreros I applied increasing thicknesses of .5% CoCO3+ 2% MnO2 glaze. After scraping down to the clay I measured the thickness using calipers, then "kinda" filled in the holes.
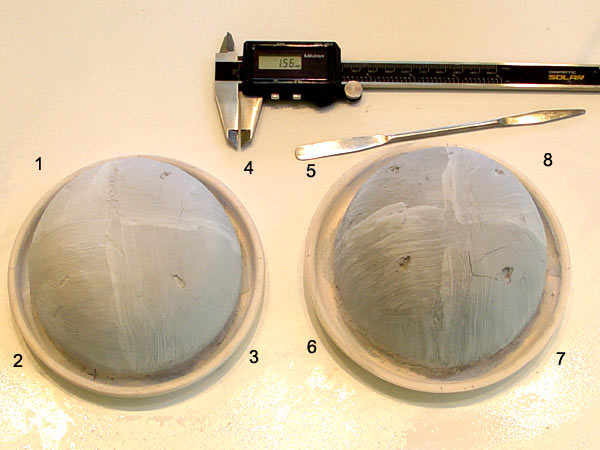 |
Brush Strokes | 1 | 2 | 3 | 4 | 5 | 6 | 7 | 8 |
| ~Glaze Thickness (mm.) | .35 | .5 | .75 | .85 | 1.2 | 1.35 | 1.4 | 1.6 |
Other things in the firing include:
Another small wave of vertical test tiles (click to see list) including another pass at a red stained engobe covered with a modified "clear" glaze (Thanks Chris).
2 pots with 3% copper carbonate and 1% red iron oxide to send to Chris to play with in his reductionator.
2 pots with throwing lines with .42% CoCO3, 1.0% Rutile, 1.33% MnO2 glaze, and an overcoat of a mixture of 1% titania glaze and CoCO3+ MnO2 containing glaze leftovers which I added after I ran out of the original glaze and felt the coating was too thin.
A 12" pot with 8% rutile liner and outside of .5% CoCO3+ 2% MnO2 glaze applied .8mm at the foot, 1.5mm on the shoulder and 1.7mm under the rim.
Some 28 year old sculpture. I put one piece up on a stilt made of APM wire impaled in SALI Alumina insulation.
|
|
|
|
|
13th Firing Setup |
I have to find a way to stop the thick glaze applications from dry cracking. |
Made these during the 70's (while wearing bell bottoms). I hope the homemade APM wire stilt holds up. |
4-16-07 12th Firing Results
I finally got the photos of my Test Glazes posted. The best thing about these is that I have a clear sense of what I want to test next. Some of my favorites include:
|
|
|
Nickel Effects, Clear Base with: |
|
|
|
 |
||
|
Clear Base with 1% Fe2O3, 2% MnO2, 3% CoCO3, |
Clear Base with 1% MnO2, 2% CuCO3 with a little Newton's Rings action going on (Photoshopped for your viewing pleasure) |
3% NiO producing a textured surface |
1/2% NiO |
|
|
|
|
|
Attack of crystalline glaze on ZAL-15. I'd say it held up pretty well as a high temp sponge. |
Very light application of CoCO3, Rutile, MnO2 glaze on water rinsed previously mouse urine soaked 28 year old work. (Who invited that S Crack) |
|
 Here's
a higher resolution picture of the firing (~.6mb).
Here's
a higher resolution picture of the firing (~.6mb).
I have a "§" kind of feeling going on. I'd say about 20% of the tests make me feel like I got it going on and the other 80% make me ask "WTF"? I need to spend time sorting out what happened. I will dissect them and put up photos next to the formulae. I had lousy results with the inclusion stains. Yes I got rid of the opacification problem and can see the color, but they are totally covered with little crystals. I need to work at it more. I think I suffered from not putting on enough glaze. I was trying to limit it on the horizontal pieces (and I'd say they came out OK) and Chris' bottles because I was afraid they would overflow the catchers. I think "holding back" spilled over on to my "soldiers" and I just didn't get enough on. There is not nearly as much glaze in the bottoms as on previous ones. I guess that's why they call them tests.
I think the "alumina fiberboard as a sponge" test worked well. The glaze chewed in less than 1mm (.04") and the board handled it. I know it's not as refractory, but I'm looking forward to trying Avril's RCF paper method.
|
|
|
100 Year Flood???? ~6" of rain in ~24 hours. I have never seen standing water on this part of my yard in the 25 years I have been here. |
Christmas Morning.....Do I like what Santa brought me?
 |
 |
 |
 |
4-15-07
|
|
I couldn't wait. I ran downstairs to open all the presents, but they were too hot.
This was taken at 420C. |
4-14-07 12th Firing Setup
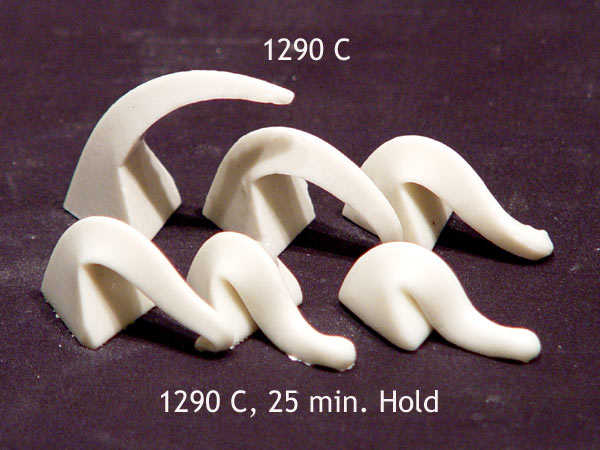
I modified the cycle to concentrate on the low end to try to enhance the dark halo. The business end of this firing includes a 10 minute 1290°C soak (to get ^10 touching), crystal growth holds of 1 hour @ 1050°C, 3 hours @ 1080°C, 1 hour @ 1050°C then a 1 hour ramp to 1020°C with a 1/2 hour hold.
|
|
|
|
||
|
"Let's Make a Deal" bottles by Chris Groat with .5% CoCO3+ 2% MnO2 glaze. |
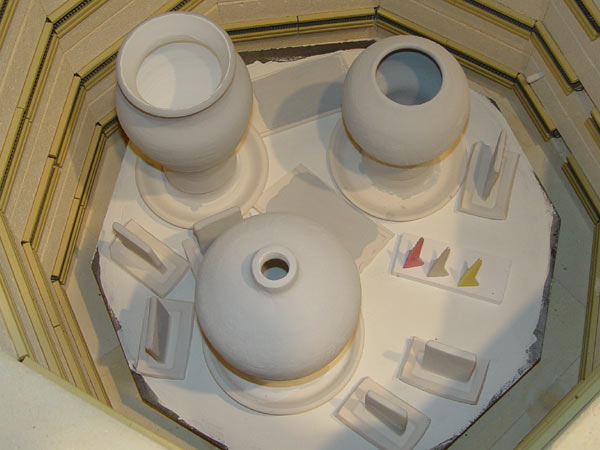
Loaded kiln before firing. |
|||
 |
 |
 |
||
|
An army of test tiles with the compositions described below. |
Test of crystalline glaze directly on alumina fiber insulation to see if it will act as a sponge without distortion. | |||
4-11-07
Test Glazes
I've batched a number of test glazes based on the "clear" formula I previously described in the transparency test. See Test Glazes for specifics.
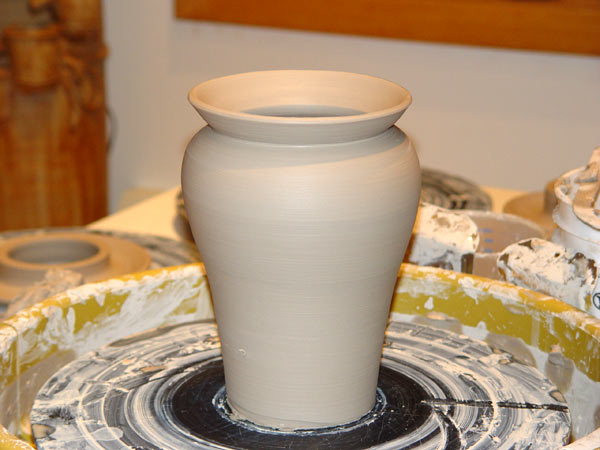
I think I liked this pot more before I trimmed it, and imagine I will pay attention to inside shapes more in the future.
4-8-07
I have to remember to film in landscape.
 |
 |
 |
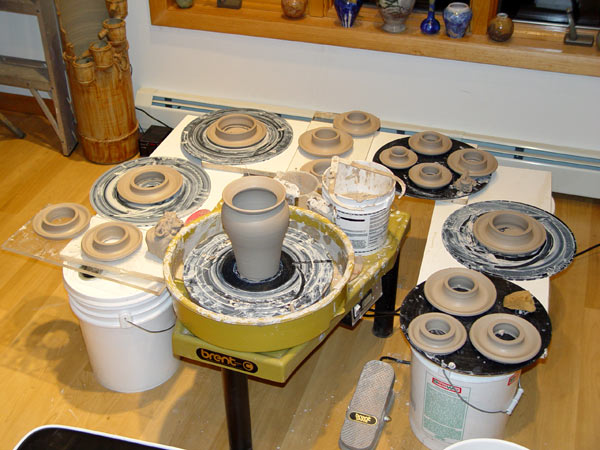
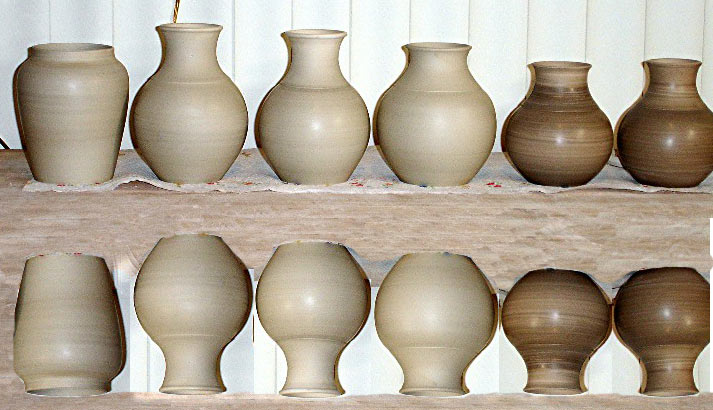
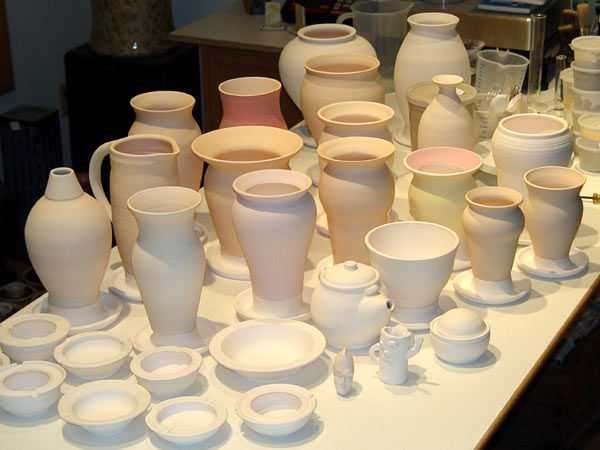
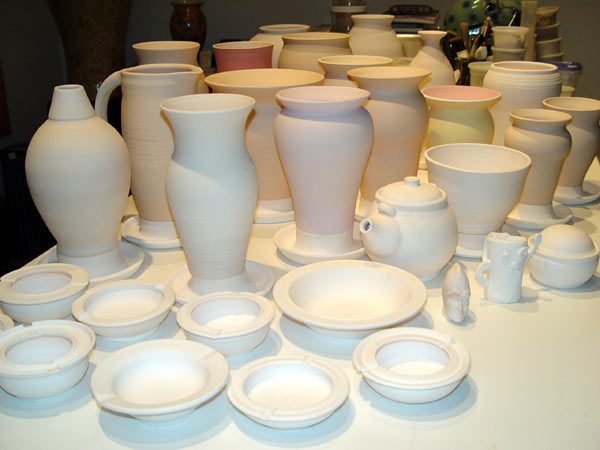
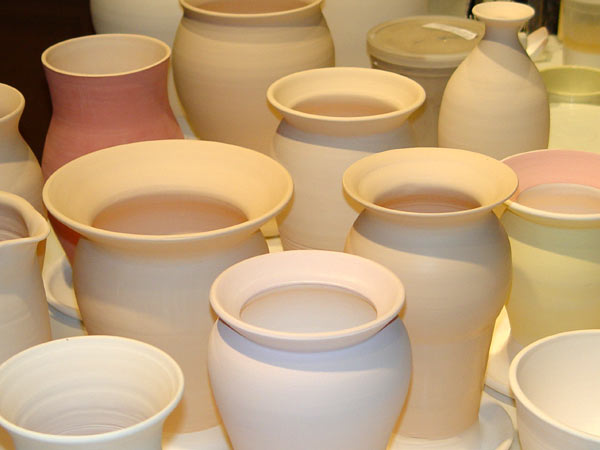
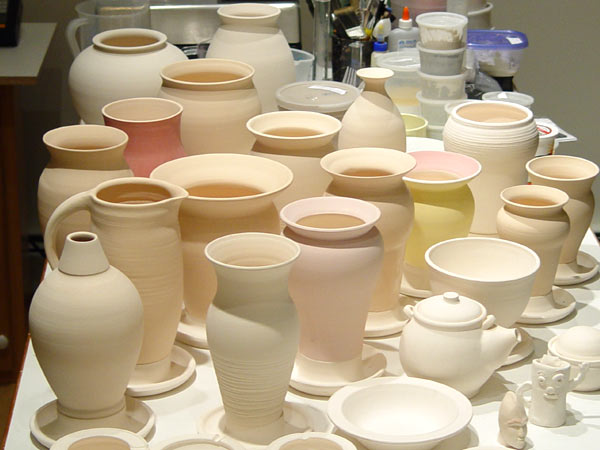
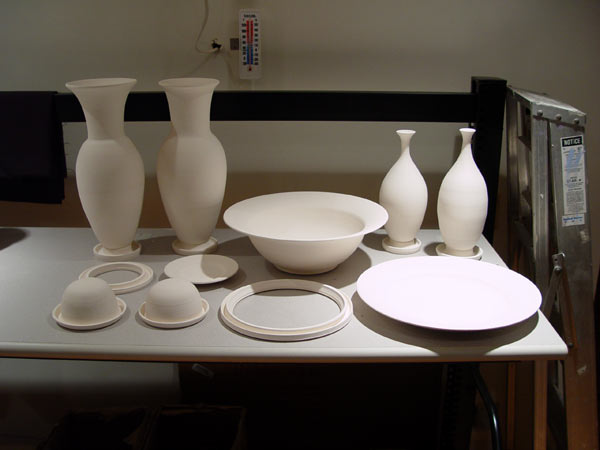
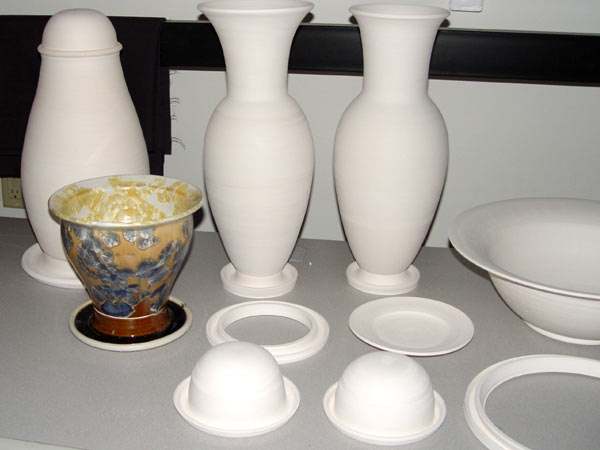
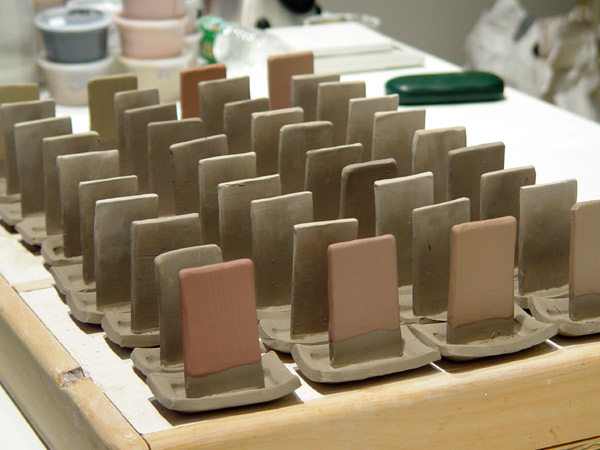
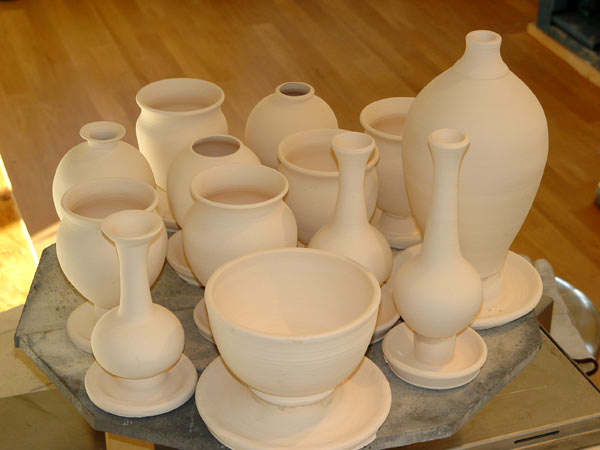
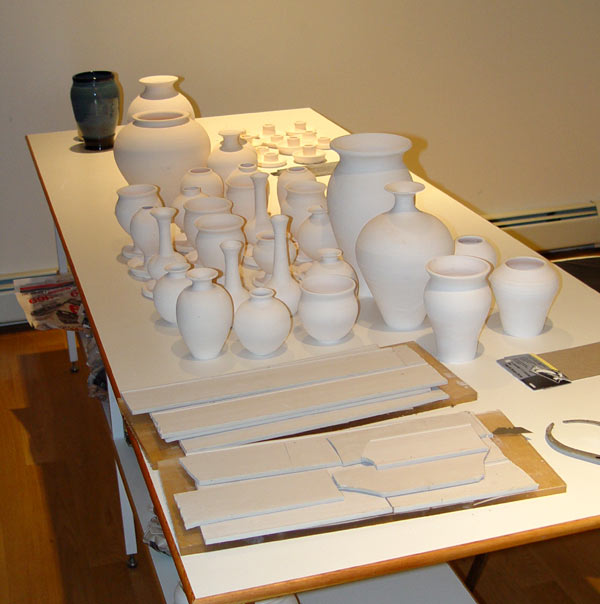
4-7-07 Ready for the next round of glazing.
I have 18 pots and catchers diamond lapped and wet sanded ready for kaolin / white glue and glaze.
 |
 |
 |
 |
4-6-07 Lid Cracking Dialogue
4-5-07 Let's Make a Deal!
I've struck a great deal with Chris Groat and would like to extend it to others involved in making crystalline glazed objects who might be interested. The deal is he made and sent pairs of pots and catchers. I will glaze them, return half and add the remaining half to my collection.
 |
 |
Chris sent these pieces. His work is gorgeous. We are still waiting for box 2 of 3, which contains the second platter and bowl, to arrive. I plan on running a few tests first to make sure I am putting my best foot forward and give his work the effort it deserves. I also want to work out the details of what glaze to use where.
The right hand picture shows 2 pieces of mine with catchers next to his work. I'm concerned I will overflow the catchers he made and will probably make new ones or set them in saucers so I don't make a mess in my kiln.
4-3-07
 |
 |
4-2-07
 |
 |
 |
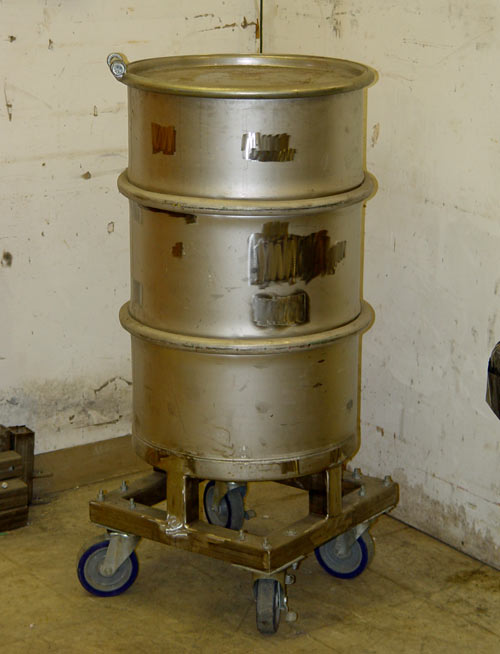
3-27-07 Post Reduction Furnace Shell
3-18-07
 |
 |
 |
 |
3-17-07
|
|
|
|
Current Pots |
3-12-07 Heating Element Coil Winding
3-4-07 11th Firing Results
I applied the glazes a little heavier on these pots than in the past. It seems to have come out thicker than those in previous firings and to have impacted the color of the glaze on the bottoms of the 2 cobalt + manganese pieces. Also you can see a change in the order and size of hold rings, plus 2 new rings.
 |
 |
 |
 |
 |
 |
 |
 |
 |
 |
 |
 |
 |
 |
 |
 |
 |
 |
 |
 |
The largest piece of each crystal comes from the 1080°C hold. Outside it is a smaller ring from the 1050°C hold. It looks to me like the slow cool ramp to 850°C in 2 hours with a 1/2 hour hold next produced a lighter color halo and then a dark outline. Looking at their size I doubt these grew much below 1020°C. I'll concentrate the lower ramp and hold in this region next firing.
 |
 |
 |
|
Inspired by Avi |
Secret cobalt + manganese + rutile recipe on left, .5% CoCO3+ 2% MnO2 on right. |
Daddy's helpers |
I call him Crabby Appleton. My wife Patti says this looks like me!
3-2-07 11th Firing Setup
I changed the program a little in an attempt to get more significant "end of the firing halos" and secondaries. It includes a 10 minute 1290°C soak, crystal growth holds of 1 hour @ 1050°C, 3 hours @ 1080°C, 1 hour @ 1050°C then a slow cool ramp to 850°C in 2 hours with a 1/2 hour hold. I hope I didn't go overboard on the low end!
(For Terry and my other metrically challenged friends that's a 10 minute 2354°F soak, crystal growth holds of 1 hour @ 1922°F, 3 hours @ 1976°F, 1 hour @ 1922°F then a slow cool ramp to 1562°F in 2 hours with a 1/2 hour hold.)
 |
 |
 |
 |
 |
 |
Glazes include another .5% CoCO3+ 2% MnO2, one with 1.5% Fe2O3, a 4th attempt at a friends secret cobalt + manganese + rutile recipe, another "transparency test (see 2-26-07),,only with 0.1% CoCO3, applied over engobes containing yellow and red inclusion stains. I also have some more pieces from 28 years ago that I hope Mickey Mouse didn't pollute too bad!
I really need to get a clock in my studio. I had no Idea what time it was last night as I was working away, but felt the tiredness set in and my eyes going. When I finally got in the car I realized it was 2 am. Guess I'll unload this firing Sunday morning.
2-28-07 Bisque Results
|
|
|
The graphite containing engobe samples, lower right, appear to have all most completely burned out.
2-26-07 10th Firing Results
 It looks like I
got ~50% crystal density (OK maybe 40%) after changing the firing schedule
slightly (1290°C soak set to 12 minutes and the order of crystal growth holds
reversed.) The new 12 minute soak at 1290°C yielded ^10 down+.
I think next time I'll soak for 8 or 10 minutes.
It looks like I
got ~50% crystal density (OK maybe 40%) after changing the firing schedule
slightly (1290°C soak set to 12 minutes and the order of crystal growth holds
reversed.) The new 12 minute soak at 1290°C yielded ^10 down+.
I think next time I'll soak for 8 or 10 minutes.
I thought that by switching the first soak from 1080°C to 1050°C crystals would nucleate in the first soak and would get growth rings from all 4 soaks, since it looked like they started in the first 1050°C soak anyway. This didn't quite work out. It seems that the lions share of the crystals nucleate in the second soak, independent of it's temperature. But then again, I did change 2 things at once (Oh, I'm so confused...what to do next?)
 |
 |
 |
 |
 |
 |
 |
 |
I did realize while reprogramming the soaks that previously when I had the soak time set at 1.5 it was giving me 1 hour and 50 minutes, not 1 1/2 hours. As a result this firing had 40 minutes less time at 1080°C. Maybe since they soaked for an overall shorter time and the crystals are slightly larger the change to having the 1050°C soak first did have a positive effect.
|
|
 |
 |
| Left seeded with zinc oxide / silica paste filled 1/16"dia. x 1/16" deep hole, right with zincite in same size hole. It looks like I can use much less paste in a smaller hole. |
Transparency test Left: Removed .07 titania from base. Right: replaced it with .07 silica (in case of crazing.) Both seem transparent, considering the .3% cobalt carbonate. I see no crazing in either. The one with additional silica showed stunted nucleation and crystal growth. |
Tonight's bisque. |
Avi: Kaolin (not alumina) is definitely the way to go! The first pot's catcher came off as I was taking it out of the kiln. 2 more "pinged" themselves loose after 10 minutes just sitting on the table and cooling. It only took ~10% of my Herculean strength to literally pull the other 3 apart. I did not have to use a torch, or diamond lap. They came apart clean, All I needed was a little aluminum oxide paper to clean off the caked kaolin and round the glaze edge.
 |
 |
 |
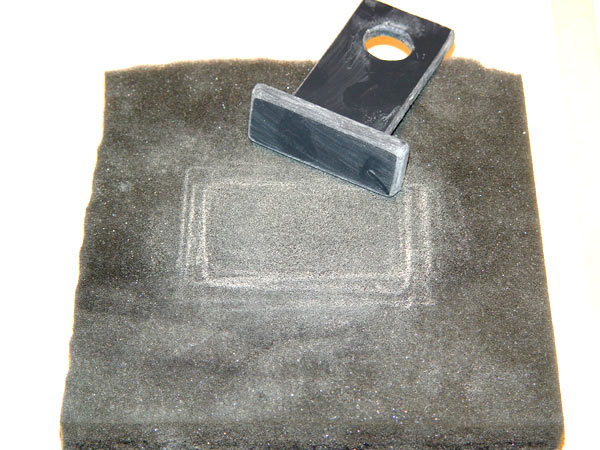
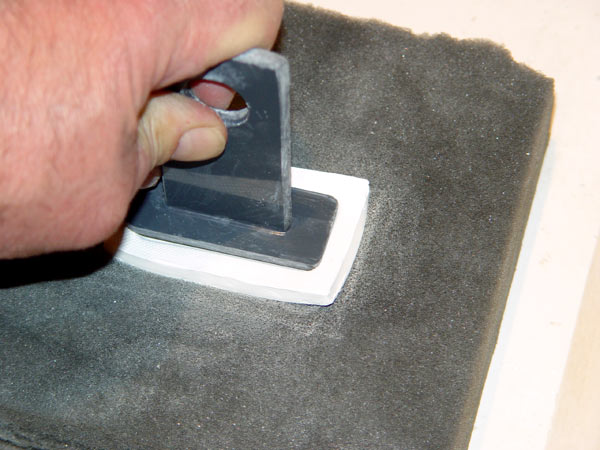
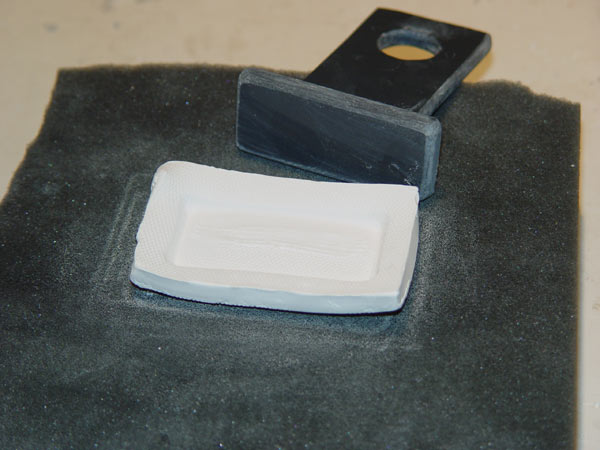
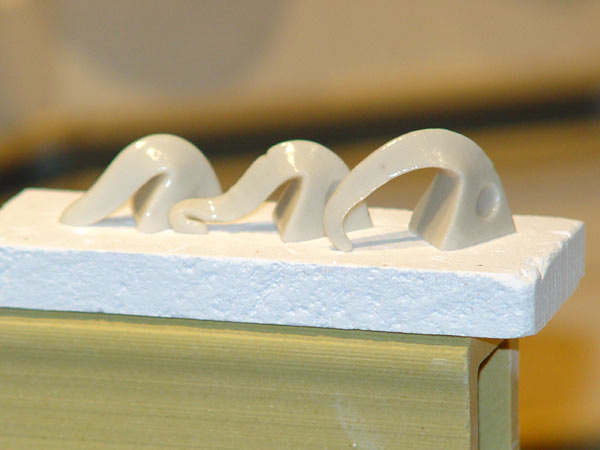
Jesse: How to make "those cool "boat shaped" recessed glaze catchers" (at least how to form them.)
|
|
|
|
2-25-07 10th Firing
I changed the firing schedule slightly (1290°C soak set to 12 minutes and the order of crystal growth holds to 1 hour @ 1050°C, 1 1/2 hour @ 1080°C, 1 hour @ 1050°C then 1 1/2 hour @ 1080°C).
|
|
|
|
|
|
I'll take all the luck I can get! |
More .5% CoCO3+ 2% MnO2 covered pots, test tiles containing zincite and zinc oxide / silica paste filled hole seeding tests and clear glaze with 0.3% cobalt carbonate tests1. |
3% red iron oxide 1st coat with same on top and bottom covered with clear base. |
|
1 Test #1: removed .07 titania, test #2: replaced it with .07 silica.
1/4% CoCO3+ 1% MnO2 after 900C heat treatment on left.
2-24-07 Getting Setup
|
|
|
|
|
|
Engobes with 20% Cerdec/Degussa Inclusion Pigments |
Graphite containing engobe on right |
Happy Family |
|
2-20-07 9th Firing Results
|
|
Thanks to everyone on the for all the help. William, These secondary crystals and inside drips are in your honor! Phil |
|
I intended to add a 15 minute soak @ 1290°C hoping to get cone 10 down. Then a momentary brain cramp took hold. I thought my programmer read in 1/100ths of an hour. I set it for .25 (to get 15 minutes), but actually got 25. It was much more than cone 10 down and looks closer to cone 11+.
|
|
|
|
|
Anyway the firing was not what I wanted but gave some useful results. These pieces really illustrate the effect of more heat work. The additional work had a dramatic effect on the population of crystals and some on their their color. I was hoping for ~50% background, but got more like 75%. Next firing I will adjust back to a 15 minute hold to get more crystals. I also notice that, counting the rings backwards, most of the crystals began growing in my second soak. I have soaks at 1080°C, 1050°C, 1080°C and 1050°C, The first 1080°C soak did virtually nothing. I want to switch the order of them to get the crystals growing sooner, but don't want to violate the "Only Change 1 Thing at a Time" rule.
In the following photos the new pieces are followed by pieces with the same glaze only fired to cone 10 @ 3 o'clock.
|
|
|
|
|
|
.5% CoCO3+ 2% MnO2 |
.5% CoCO3+ .67% MnO2 |
||
I added more glaze to the "light bulb" from the previous load which had dry spots and refired it. I tried adding egg to help hold the glaze on, without much success, and finally went to adding a CMC paste. It dried rapidly in front of the wood stove and held well.
|
|
|
|
|
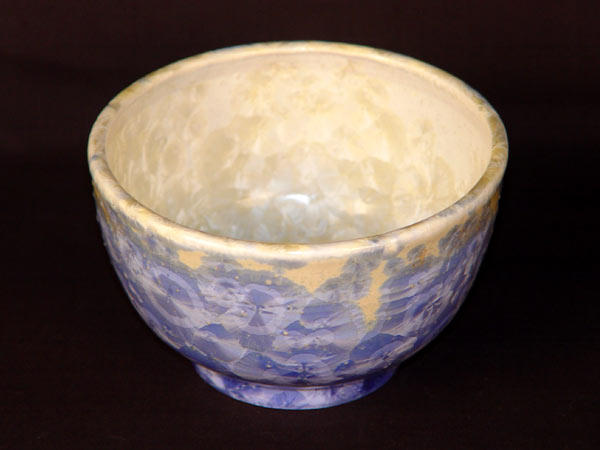
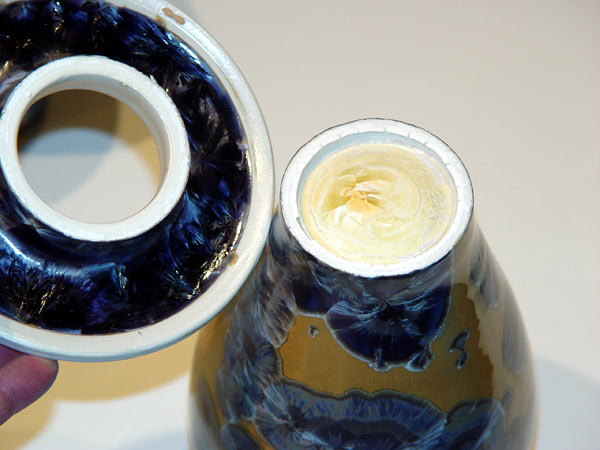
I diluted the original uncolored base in 1/2 with water so I had more time to swirl it all around the insides of the pieces without building up too thick a layer. This dilution seems to have had a negative effect, turning it matt and yellow. I probably thinned to far and didn't get as much on as I thought.
|
|
|
|
|
Included were a small pot and test tiles with a new base where I substituted 8% Rutile for the 8% titania. I think I will use this as liner glaze. Also there was another bowl I threw in 1979 (that was saturated with mouse urine) that bloated and seems way over fired. It turned the nice blue glaze (see the test tiles on the right) silver. I guess there are some pretty significant salts remaining in Mickey's pee.
2-19-07 9th Firing
Previous firings have seen cone 10 at 3 o'clock. During this firing I am looking for ^10 down in an attempt to get fewer crystals
|
I've added a 15 minute hold at 1290°C |
|
|
|
|
|
|
|
|
|
|
|
|
|
|
|
|
|
|
|
|
|
|
2-17-07 8th Firing
This time I am revisiting some formulations provided by acquaintances which I did not do so great a job with the last time through, plus looking at variations of the silvery-blue crystals on orange brown background from firings 6 and 7.
Specifically I cut the .5% CoCO3+ 2% MnO2 glaze in half with base glaze and then in half again.
|
|
|
|
|
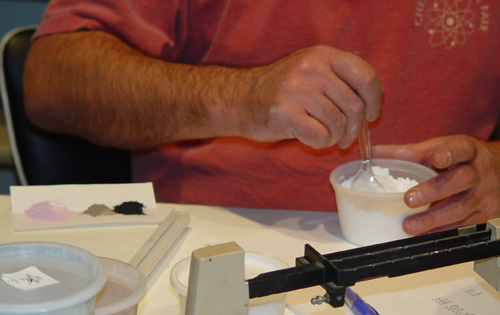
| Rough batching a glaze with 3 oxide colorants |
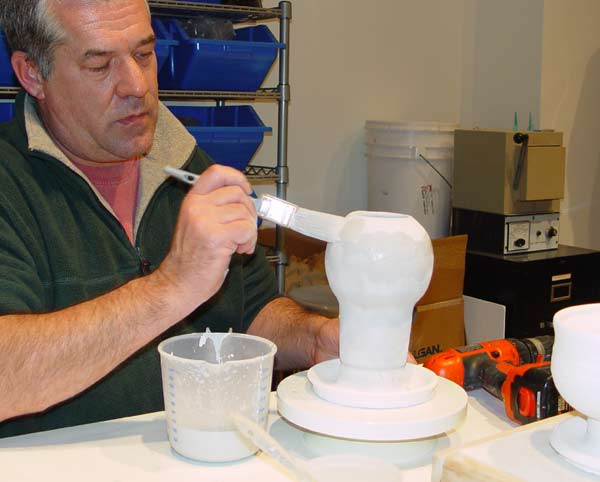
Applying a test glaze |
6 o'clock: 1/4% CoCO3+ 1% MnO2 11 o'clock: 1/8% CoCO3+ 1/2% MnO2 Both pots with white liners |
|
|
|
|
|
|
|
|
|||
2-15-07 After ^05 Bisque
 |
Test pairs (from left to right) with engobe colored with 5% & 2.5% iron oxide and 10% & 5% Cerdec stains: 2 reds, yellow and a mixture and cobalt carbonate. They are in the same order as in the photo below. |
2-10-07 Test Pieces
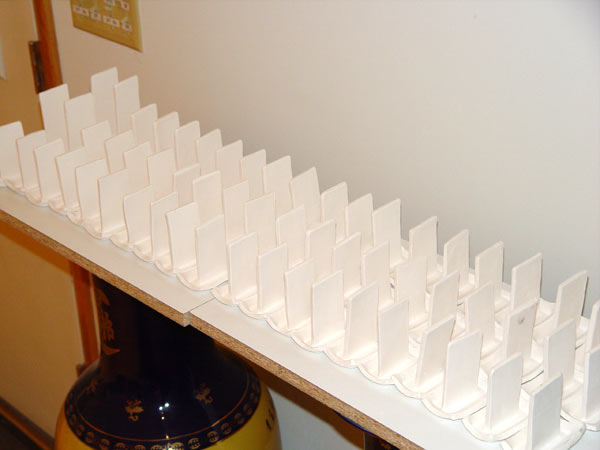
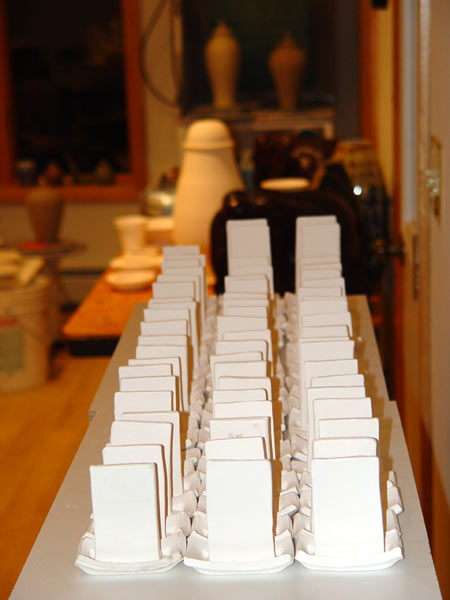
I'm looking for the simplest way to test glazes vertically. Previously I had made small pieces with glaze catchers. This was OK if the glaze worked out, but a real bummer (waste of time) if it was a flop.
 |
 |
 |
 |
| Strips with various inclusion stains added | Hand built vertical test strips with integral glaze catchers |
2-4-07 7th Firing
 I
was trying to duplicate the glaze from my 6th firing (.5%
CoCO3+ 2%
MnO2). The silvery coloration of the
crystals is the same, but there are more and larger crystals and the background
is lighter. I feel this is due to a thinner application of glaze than previously
done (See the amount of glaze in the catchers) and I will try and duplicate
these pots with a thicker glaze application to see if I get fewer crystals like
in the previous firing. I know I can raise or soak at peak temperature to get
fewer crystals, but I don't want to change that variable just yet.
I
was trying to duplicate the glaze from my 6th firing (.5%
CoCO3+ 2%
MnO2). The silvery coloration of the
crystals is the same, but there are more and larger crystals and the background
is lighter. I feel this is due to a thinner application of glaze than previously
done (See the amount of glaze in the catchers) and I will try and duplicate
these pots with a thicker glaze application to see if I get fewer crystals like
in the previous firing. I know I can raise or soak at peak temperature to get
fewer crystals, but I don't want to change that variable just yet.
The .5% CoCO3+ .67% MnO2 piece was an attempt to reduce the manganese content to see whether the manganese controls the glaze or the cobalt does. The crystals have the color of previous cobalt glazes I've made, but more of the character of manganese ones.
|
Setup |
Results |
||
|
|
|
|
|
|
Left: .5% CoCO3+ .67%
MnO2 Right: .5% CoCO3+ 2% MnO2 with white liner |
|
|
|
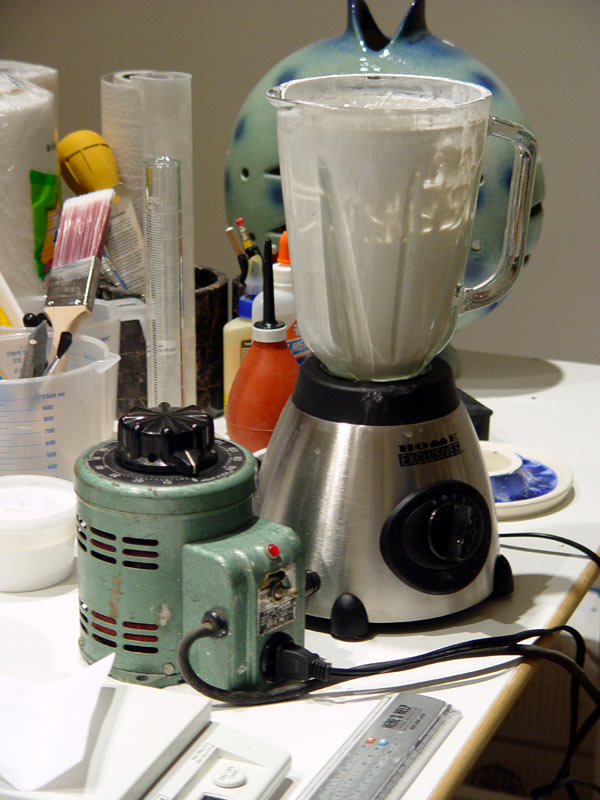
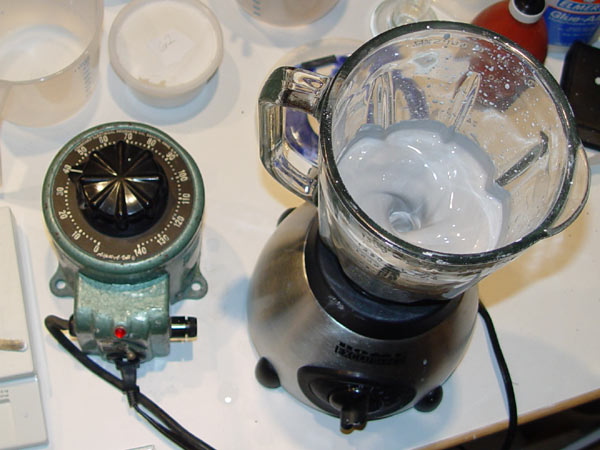
Glaze Mixing Crystalline Glaze Forum Dialogue
|
|
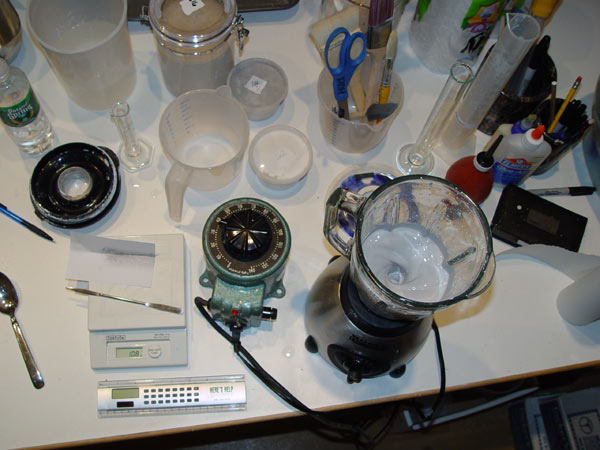
After getting feedback from Crystalline Glaze Forum participants, especially Doris Macdonald, I figured it was time to try the "el cheapo" blender I bought for just this purpose. I learned real fast that even the lowest speed and the "pulse" option splashed the material all over the place, including on me, before I learned to keep the lid on. The amount of splashing depended on the liquid level plus the character of the mixture at that instant. Using the lid was OK, but I had to scrape the various additives off the wall and lid to get them to go in the dispersion.
|
|
|
|
|
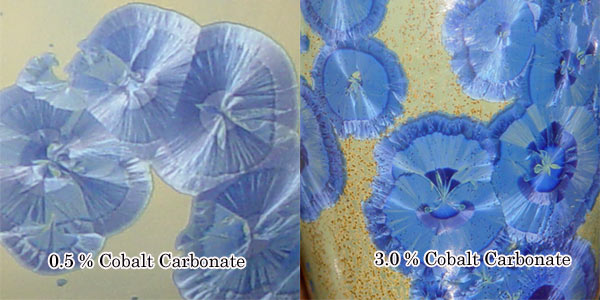
Cobalt Carbonate Pickup Comparison |
.5% CoCO3+ 2% MnO2 |
|
|
|
1-28-07 6th Firing
|
Setup |
Results |
||
|
|
 |
 |
 |
|
|
|
|
|
|
I forgot to put the plug in the peep hole. I guess cone 8 (left) was close enough to the peep that the air being drawn in cooled it on the side facing the hole. |
Left: .5% CoCO3 |
This piece exhibits micro bloating and a grey discoloration in the interior bottom of the pot. I threw this piece in 1979 (28 years ago) and just glazed it. For decades it was stored in my shed, with other pieces, where field mice made their homes. It wreaked of mouse urine and was re-bisqued before glazing. It makes me wonder if all the mouse goodies were really burned out. |
|
1-27-07 5th Firing
I am trying to duplicate the light blue piece that came out of the second firing. The trial in the third firing was a miserable failure. This time (piece 35) I have applied a very thick layer of clear base glaze with a small amount of cobalt carbonate containing glaze to the area where I think the glaze will mostly run from, hopefully leaving a trace of cobalt on a thick white background..
Also after scanning Jon and Leroy Price's book and seeing all the nice results from combinations of small quantities of colorant I couldn't resist "winging it" and mixing the remains from previous trials. I also applied a new 2% cobalt carbonate batch (Glaze 13) to piece 40 and one containing .5% cobalt carbonate and 4% manganese dioxide (Glaze 14) to piece 39.
|
Setup |
Results |
||
|
|
|
|
|
| Center is piece 40, others, clockwise from 7 o'clock, are pieces 37, 36, 35, 38 and 39. |
|
|
|
 |
|
|
|
|
Pieces 39 & 36 |
Piece 40 |
Piece 37 | Piece 38 |
On one pot (piece 36) I applied a mixture of equal parts of glazes 1, 5 and 6. I figure the result contains ~ .18% cobalt carbonate and 1% copper carbonate. I did not "name" or number this glaze batch as it all fit on one pot.
Glaze 11 consists of 1 part Glaze 8, 1 1/2 parts Glaze 10 and 2 parts Glaze 2. It contains ~ .8% manganese dioxide and 1% red iron oxide. This was applied to piece 37.
Glaze 12 consists of 1 part each of Glazes 7 and 4 and 2 parts Glaze 2. It contains ~ .1% manganese dioxide and 3/4% copper carbonate and was applied to piece 38.
All pieces have uncolored base (Glaze 1) applied to their insides.
Crystalline Glaze Forum Dialogue
1-22-07 4th Firing
At this point I felt it important to: 1) get serious about investigating a series of colorants (before I ran out of small test pots), 2) apply the glaze thicker like in firings #1 and #2 and 3) measure the amount of colorant added to the batches more closely so as to be able to reproduce results in the future.
|
Setup |
Results |
||
|
|
|
|
|
| Clockwise from the left are pots with batches 5, 8, 7, 6, 9 and 10 applied | Test pots and tiles ready for loading. | Clockwise from the left are fired pots with batches 5, 8, 7, 6, 9 and 10 applied | The very dark tile in the lower right corner contains the last of Glaze 3, showing a very high concentration of cobalt. |
To 100 g batches of Glaze 2 I added:
| Glaze Batch | Additive |
| 5 | .5g Cobalt Carbonate |
| 6 | 3g Copper Carbonate |
| 7 | 2g Manganese Dioxide |
| 8 | 4g Manganese Dioxide |
| 9 | 4g Nickel Carbonate |
| 10 | 3g Iron Oxide (red) |
I mixed the additives in with a spatula and then a small drill driven paint mixer until I felt they were thoroughly mixed. Then I applied them to pots and test tiles. On the pots I brushed a thin layer on the interior (~.5mm on the bottom and ~ 1mm on the top) and a thicker application on the exterior (~1mm on the bottom up to ~2mm on the top). On the test tiles I marked one end "-" (and applied ~1mm) and the other "+" (and applied ~2mm).
The photos in results above still show the fired parts have significant streaking from un-dispersed colorants. Some people say this effect is very nice. Sometimes I agree, but also think it's time to invest in some sieves.
1-19-07 Third Firing
Mixed Glaze 4, 1 1/2% copper carbonate (also by eye).
| Setup |
Results |
|
|
|
|
|
| Test tile and various pots. Some with straight Glaze 3 or Glaze 4 and others with Glaze 3 or 4 layered over a thin coat of Glaze 1. | Glaze 3 on the top half with Glaze 1 on bottom and interior | It seems that the cobalt blue got deeper in color as I got to the bottom of the sample. I believed a significant amount of un-dispersed material was at the bottom. |
This firing was a little bit of a letdown in terms of I didn't get what I thought I would.
I believe I applied some of these glazes too thin. But, the more I revisit it, the more I like the crystals in this piece.
Also I was shooting to reproduce the light blue piece from the previous firing - but didn't get it. In retrospect I think a combination of things happened including: 1) on the original piece I had applied a heavy layer of Glaze 1 (uncolored) before adding a small band of Glaze 3 to the to the top, 2) in these pieces the Glaze 1 layer was much lighter, 3) I think the concentration of cobalt in Glaze 3 increased as I got closer to the bottom of the batch, and 4) I applied more of Glaze 3 than before.
 While
the second firing was happening, I prepared more pots with glaze catchers.
While
the second firing was happening, I prepared more pots with glaze catchers.
Originally I used a mixture of 325 mesh alumina (Alcoa A14) and Elmer's Glue. It formed a dilatant paste. I found this applied easily and "bit" well. Also it released easily.
Subsequently I read Avi Harriman say he preferred Kaolin instead of alumina and used it. I did not find it as easy to work with as alumina, that it broke free (by accident) under very little force before firing. After re-reading his note I see he was comparing kaolin to alumina hydrate - a totally different animal.
1-15-07 Second Firing
Mixed up Glaze 3, what I believed to be 3% cobalt carbonate (by eye). In retrospect I think it was more like 5+%.
| Setup | Results | ||
 |
 |
 |
 |
| Group including base glaze, dark blue and light blue colorations of base. | Dark blue from ~3% cobalt carbonate in base glaze applied inside and out. Black streaks from undispersed agglomerated cobalt carbonate. | Light blue from base glaze applied inside and out with a band of ~3% cobalt carbonate glaze on top shoulder only. | |
 |
|
||
1-14-07 First Firing
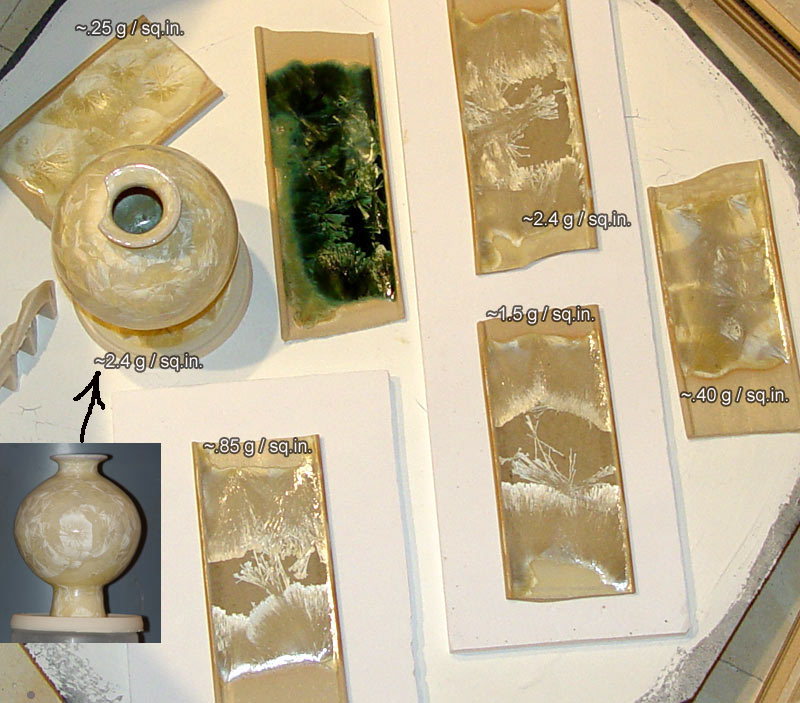 The
first thing I did was mix up the contents of a 28 year old copper
carbonate colored crystalline glaze leftover I had and applied it to a test
tile. I applied Glaze #1 at various rates (.25 g/sq.in.
to 2.4 g/sq.in.) to test tiles. Using 4 small vases mounted on catchers I
tried to apply thin (~ 1/2 mm) to the interior surfaces and thick to the outside
surfaces (~ 1 mm at the bottom and 2 - 3 mm at the top). Needless to say I was
pretty please with the results of the first firing.
The
first thing I did was mix up the contents of a 28 year old copper
carbonate colored crystalline glaze leftover I had and applied it to a test
tile. I applied Glaze #1 at various rates (.25 g/sq.in.
to 2.4 g/sq.in.) to test tiles. Using 4 small vases mounted on catchers I
tried to apply thin (~ 1/2 mm) to the interior surfaces and thick to the outside
surfaces (~ 1 mm at the bottom and 2 - 3 mm at the top). Needless to say I was
pretty please with the results of the first firing.
Deciding on the firing cycle
During college I fired to 1290C, quick cooled to 1100C, then slow cooled to 1000C over the course of 4 hours. This gave beautiful crystals, but really none with any growth rings or some of the interesting features I've seen in the recent literature. I decided to start with the following schedule:
To 1290°C, drop to 1080°C, hold 1.5 hrs, drop to 1050°C, hold 1 hour, up to 1080°C, hold 1.5 hrs, drop to 1050°C, hold 1 hour, cool.
Mixing the glaze
I did not know how much material to mix to glaze test samples for my first pieces. (Glaze #1) I weighed out 100 grams of material and realized it would be way too little to cover hardly any of the items I had, much less fill the small ball mill jar. I increased the batch 8X to yield 800 grams. Once I put this in the jar, I had no idea how much water to add. I tried a liter. It turned out to be more watery than I wanted. Then I ran across input to the Crystal Glaze forum by Jesse Hull where he cited 60 - 70 grams water per 100 grams of batch. (Glaze #2) I made the next batch 1500 grams of solids and 1 liter of water (67 grams water per 100 grams solids). This seemed to make a nice consistency batch. I could probably go higher on the solids content if I wanted.
Deciding which glaze to try first
I spent days and weeks pouring over my old college notes, independent study papers, reference works from the 30's & 70's, recently published books and websites. Finally I settled on a composition from an extensive study I did on 2 compositions where I varied the silica and titania contents to see the effect on crystal growth habit. I settled on the one I commented that gave the largest and most pleasing crystals. Exactly what I meant by that I am not sure. The formulation is:
| Ingredient | Weight Percent |
| Ferro 3110 | 51.8 |
| Zinc Oxide | 24.5 |
| Silica | 14.4 |
| Titania | 8.0 |
| Kaolin | 1.2 |
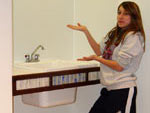
I have had the pleasure of attending a Pottery Class locally and was able to make some bisqued cone 10 porcelain extruded tile, pots and glaze catchers. I don't have a sink in my studio yet, much less a wheel. I was able to get the teacher to make me quite a bit too, to help me get started.
________________________________________________________
This marks the beginning of my active return into the area of making crystalline glazed ceramics. Besides being a collector and crystal gazer, I have had no involvement since 1979 - my undergraduate senior year at The New York State
College of Ceramics at Alfred University.
Page: Current 12 11 10 9 8 7 6 5 4 3 2 1
Back to Crystalline Glaze Information Page
|
|
Recently I had the good fortune of importing many very interesting crystalline glazed pieces from Beijing, China. |
|
|
The source of all my good fortune---my day (and night, 24 - 7) job. ZIRCAR Ceramics, Inc. |
 |
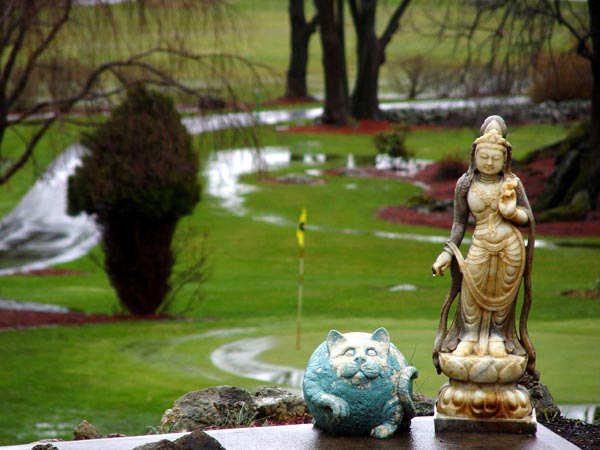
One of my other passions - landscaping, gardening, greens keeping, etc.. |


 It feels like Christmas Eve and Santa is coming! My 12th firing is in
the kiln on it's way down. Just like a 5 year old peeking down the stairs to
catch a glimpse, I've peeked in at 790C. With my 50 year old eyes and 50
cent flashlight I can see just a little. Enough to know tomorrow is
Christmas Morning and I'll be looking for the presents under the tree.
It feels like Christmas Eve and Santa is coming! My 12th firing is in
the kiln on it's way down. Just like a 5 year old peeking down the stairs to
catch a glimpse, I've peeked in at 790C. With my 50 year old eyes and 50
cent flashlight I can see just a little. Enough to know tomorrow is
Christmas Morning and I'll be looking for the presents under the tree.