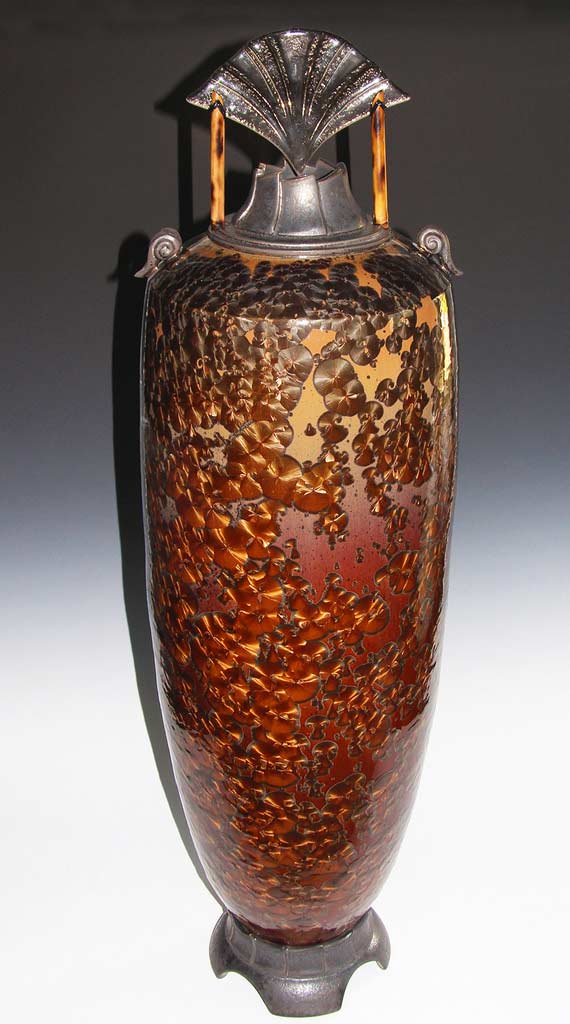
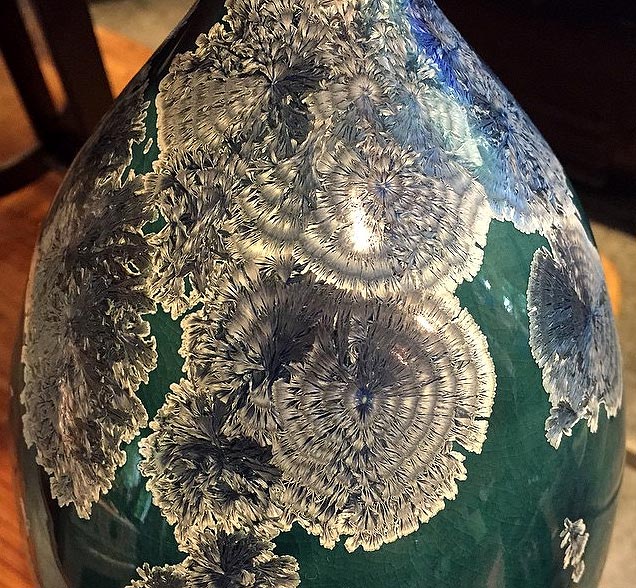
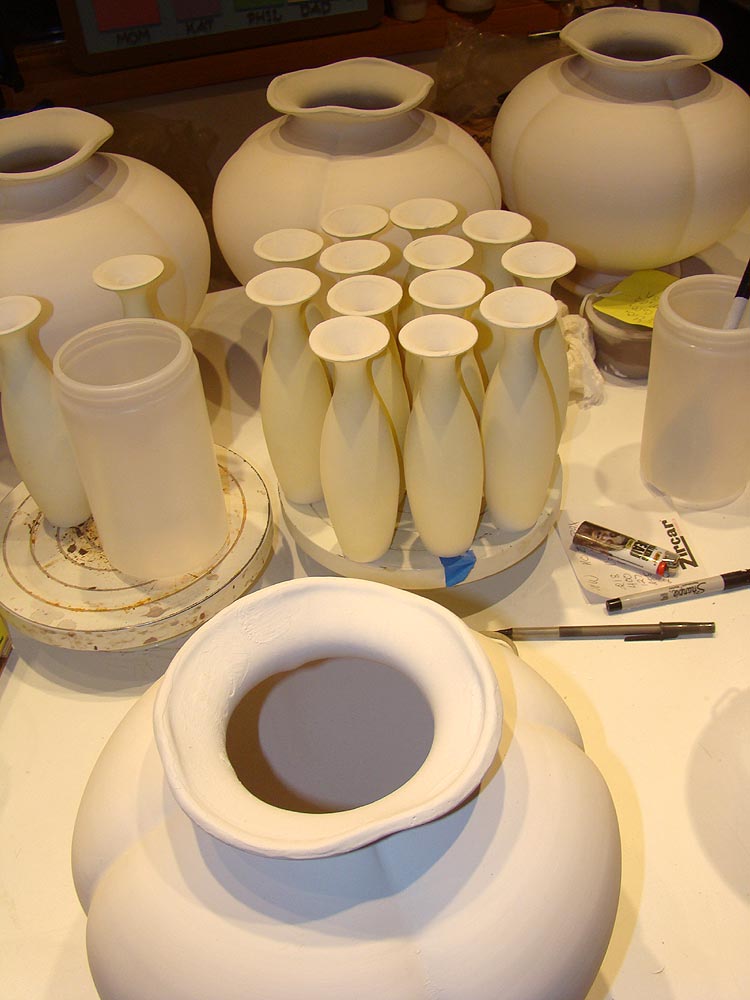
Phil Hamling

376 County Route 1

Warwick, NY, USA 10990

e-mail: pdah-at-optonline.net (change the -at- to @)

GLAZES

FIRING SCHEDULES

Clay Comparison


Zinc Silicate Crystalline Glaze Pottery

A chronicle of my recent progress and a way for me to keep it straight in my head!

Click on thumbnails to enlarge photos

Info I've been asked to keep in confidence.

Firing Schedule Grapher

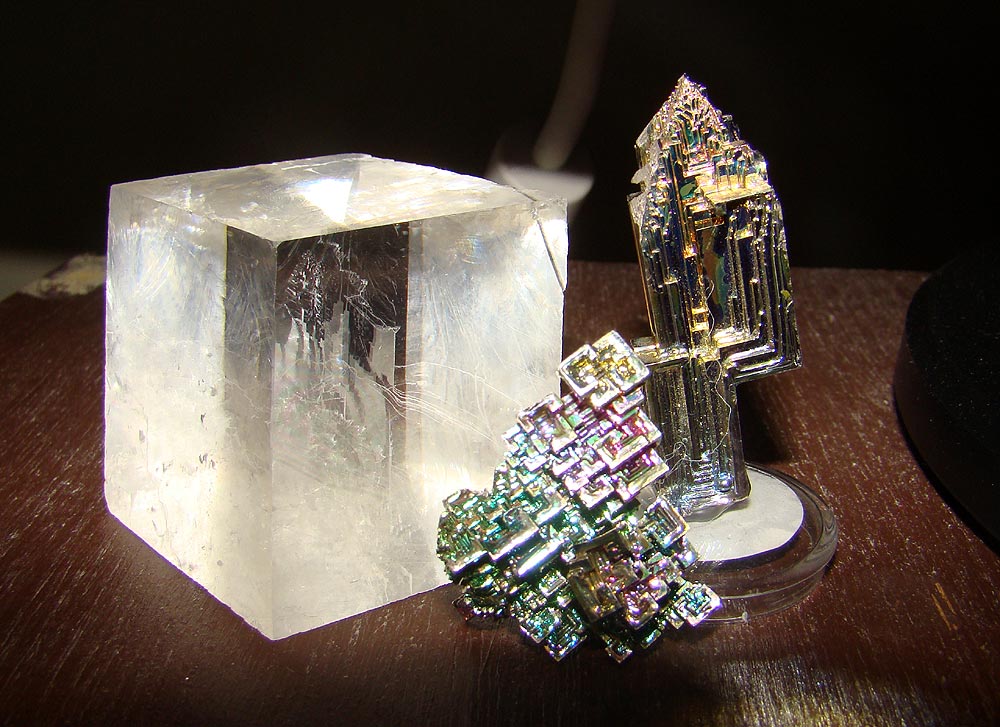
Crystalline Glaze Info
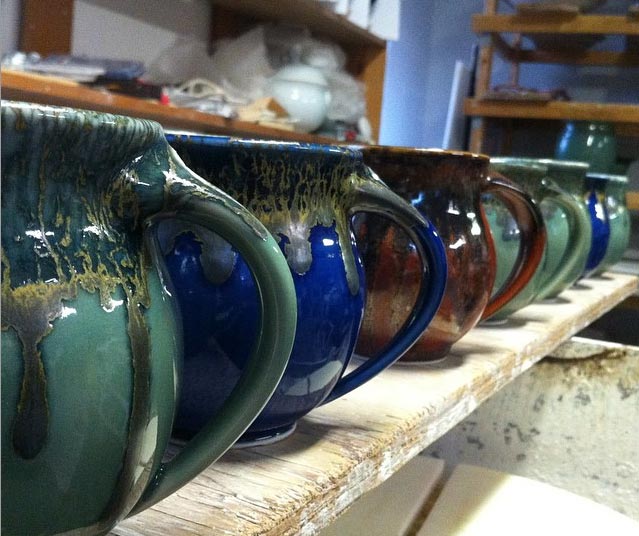
rmation

FORUM

Friends' Work

Workshops

Temperature Conversion

Crystalline Glaze Variables

Bailey Pottery

US Pigment Corp.

Fusion Ceramics, Inc.

L&L KILNS

Hit Counter

Page: Current  4   3  2  1

September 7, 2008

80th Firing Result - WTF????? I thought this was going to a rather mundane firing. It didn't turn out that way. I had a re-fire, 2 pieces with NFU at a low loading (~.35 g / sq. in.) and one piece with NFU + 1/2% cobalt carbonate, which should have yielded pieces with 1 1/2" to 2" dia. crystals. When I first peeked in I saw very few smallish crystals - not what I was expecting. It looked like an overfiring condition, but I have limited experience.

After closer examination I saw that ^11 had slumped well beyond where it had in the past (^11 touching). The first photo above shows ^'s 9, 10 & 11 from this firing in front and typical cones from previous firings in the rear. It looks more like ^13 to ^14 to me.

I'm in a quandry as to what to do to get back to the normal ^11 touching situation I've seen in the past. I checked the program and saw that nothing had changed. Is it a thermocouple degradation thing? Are they in need of replacement? I would expect platinum Rhodium thermocouples to last a very long time at this temperature. Is it just a "computer thing" and will rebooting the unit set it straight? I have many more pieces I was going to put this this routine firing, but don't want to screw them up and am not quite sure what to do.

Doll Test Firing Result - Well there certainly is some green showing but the pieces are all fish scaled. Even with a 30 minute hold at 1290ºC ^11 only came down to ~3 o'clock. I added another layer of uncolored 8% titania glaze to the pieces when they were still above 100ºC (it sticks prettty well) and refired it with a 35 minutes soak at the top end.

Result   Re-Firing
 

September 6, 2008

80th Firing Setup

Doll Test Firing

A few more NFU pieces plus a refire. I'm using the schedule of 4-27-08 except I've sped up the first 3 segments

2 refires plus a new one. All have some copper in hopes of having some nice stuff to reduce at Bill Schran's.

September 4, 2008


September 1, 2008  Labor Day Holiday Weekend

Kat spent some time at the wheel - loving' it too!

I wired this piece together with old platinum tc wire.

It was a beautiful weekend with most of the time spent in the yard and finishing the studio kitchen. This summer brought us some unbelievable weather. On Labor Day I spent about an hour passed out on the hammock. The temperature was in the high 70's with a light breeze and not a bug to be found. It was Heaven I tell you!!!!

August 30, 2008  

Gettin' glaze catchers together. I'm going to stitch the split prismatic one on the seams with scrap platinum thermocouple wire. (Is that an oxymoron or what?)

Kat got the itch to throw some pots.

August 26, 2008  

My latest attempt at making something of this form.

More creations from Andy Boswell

These sunflowers have re-seeded themselves for several years now and are in peak bloom.

Connie's Bunnies

   August 23, 2008        One more try!

I'm giving this one more shot. This is the fourth one so far (there are two other variations still waiting for the finishing touches).

In this attempt I stripped out about half the clay on the upper 2/3rds of the slabs to thin the wall and lighten it up plus left some extra material to make the base wider. I like the transition from the top into the foot better than in the previous one. I hope that by today the base has firmed up enough that I can remove the stamp and make a low profile glaze catcher.

Notes on Bill Schran's show

THE CRYSTALLINE SPECTRUM:  A JOURNEY FROM STUDENT TO MASTER

.........

My current studio mate!

It was glorious out in the yard today. The sun had that intensity which makes fresh cut grass glow.

The Grasshopper's new stamp. Nice stuff Nathan!

August 20, 2008

A bit of epoxy added to stand 'er up and I think I'm seeing a pot with a little attitude.

Straight from the goose that laid the golden egg. Thanks a million Mr. Wizard!

August 17, 2008

This third time through test firing gave me much more background (maybe even too much). I attribute this too a very thick glaze application. I think I will go back and study this by producing pieces with controlled glaze loadings. Anyway these pieces will be nice to reduce at Bill Schran's this fall.

79th Firing Results

The good news is it looks like I have the control over this glaze I've been looking for in order to reproduce it. Its look is very sensisitive to glaze thickness. The bad news is....... See Below

ARRRRRRGH! It just didn't have enough beef in the "trunk" to hold itself up. I guess there is good news in this though (Thanks Glenn Woods) including I got an answer to my question "Will it hold itself up?" and surrounding it with other pots was the right move as one of them prevented it from fusing to, and destroying, the side of my kiln.

August 17, 2008

79th firing setup.

Mostly NFU at .35 g/sq. in. loading

Trying to make a little less of a "Pegleg Pete" this time.

Kat & Dillon's camouflage paint job on the fountain controls.

Robert Hessler's Studio Sale


Increasing the hold time to 30 minutes brought ^11 close to touching, but there's nothing to write home about in terms of the glaze. I added 2 1/2 coats of fresh glaze and am firing them for the third time.

August 16, 2008

New work from Braden Gabriel

Not much background here. I'm re-firing these now.

Avi, It survived the bisque and is ready for glaze.

I increased the Doll's hold time at 1290C to 30 minutes in the hopes of getting ^11 touching in this test firing. Maybe that will help with fewer crystals.

August 13, 2008........Totally Off Topic

A contractor friend of mine has had a job building a Buddhist Temple recently. Pictured are 2 "doohickeys" he'll be installing soon.

August 10, 2008

I have to tell you.....This is probably the most rewarding slab built form I've made yet. I really enjoyed the process and like the shape too. I'm sure it breaks many of the "Art" rules, but who cares. I like it. It's about 18 inches tall and I can't wait to see some nice crystalline rings on it. I plan to use NFU at a low loading rate where I'll see minimal glaze run off and have built a glaze catcher kind of doohickey into the base.

After joining the shaped slabs I added a base and extruded rods to form the top lip and foot then ribbed and burnished the whole thing.

The process of making the form involved drawing the original 2D curve, rotating it in a 3D work volume, mirroring it to make 2 curves, making a 3D surface to form the curved surface, plus angled surfaces for the top, bottom and sides, then programming tool paths, projecting them on the surfaces and cutting the pattern in the foam.

The form was really a mind blower to come up with. I was surprised how exhausted I was the next day. In retrospect I think it's due the fast that I spent 10 hours programming 2 very complicated 3D jobs at work before starting this one. It took from 6pm to almost 11pm playing on the machine to make this Styrofoam form so I could use it at class the next night.

This is the kiln I recently bought from a friend for $120. He bought it off the sidewalk from a guy who was trying to get. Although it has strictly manual control I think it will be useful for use as a reduction torture machine. It looks like it is circa the 1970's to me.  I'll have to check with Steve Lewicki to find out if the serial number helps date it. I'll bet its older than the Grasshopper.

The elements are in great shape and look like they have seen heat < 1/2 dozen times. The brick between sections was a little chewed up but I applied some ZIRCAR AX Moldable and CTP-1 Paper between the joints and they look to be sealed up right nice!

August 6, 2008

Nothing better than a fresh hair cut.

It's amazing how much the weeping willows have recovered from their June 1st pruning.

Don't tell anyone but Bella has a foot fetish.

Tales from the Pickle Jar

This test involved using the same glaze*, on the same clay, in the same firing at different loading rates. (*OK,  it had been aged 6, 23 and 65 days in a jar before I used it.) It appears aging (at least for this time period) makes no difference in the reaction of the glaze, but glaze thickness does not only with the color of the background but with the shape and color of the crystals. Note how little runoff there was from the pots with the lower glaze loadings.

The background color and shape of the brown crystals change significantly with glaze thickness.

August 5, 2008

78th Firing Results. It looks like I was successful bracketing the looks I've seen come out of NFU (Clear Base with 4% Rutile and 3% Red Copper Oxide). It's look at this low temperature is very dependent on glaze thickness.

I kind of like the way this test came out. Trying to approximate a Mankameyer firing, all I had time for was to press the START button and walk away.

Ray and Mathew Boswell at Tuesday night class.

August 3, 2008

78th firing setup. This load is mainly loading variations of NFU glaze stored in the pickle jars for various lengths of time.

Test firing of 8% titania glaze with .4% cobalt carbonate.

I had to straighten the place up.

August 2, 2008

Giffin Grip, marble chuck, clay, pot to trim and Avi's scrap computer drive bearing makes trimming this slender bottle easier.

I had to add a wad of clay to this thin bottomed pot to get by stamp on it. Also I've taken to dating the pieces

My latest piece. Thanks Ray Boswell. I think the lines are getting better, but I still feel clueless

It looks like Gorilla Glue will work for bonding layers of foam insulation for making the next set of slab built pot.

I have used Gorilla glue for years but never read the directions. It says to moisten one surface with water which causes the glue to foam. It works like a charm and makes the glue foam and harden in 4 hours. Being water based it doesn't dissolve the blue foam like Super 77 spray adhesive or other petroleum based material do. I'm going to put a bunch of material together an machine the forms on a CNC router this time.

July 30, 2008  - 77th Firing Results

I've been doing this same glaze for some time now trying to get a good handle the relationship of glaze loading to appearance. It gives a handful of different looks depending (critically) on how thick it is applied. These were all controlled at 0.4 grams (dry) per square inch. I can see that where it has puddled a little it gives the more green color and will probably look at .45 to .50 g per sq. in. in the next firing.

A 3/32" hole works great for draining the interior and holding the drip.

Results of Katerina with a camera.

July 26, 2008  - 77th Firing

July 29, 2008

July 28, 2008

Sneak Preview  -250°C Setup

********

July 24, 2008

July 27, 2008

The Wizard's Army Glads Bella, Bella, Bella! DT reduction.

Crystalline Glaze Quiz

Name the 5 frequent Crystalline Glaze Forum visitors who created these.

July 20, 2008

I guess I didn't have these joints, which split open in bisque, joined very well.

Building glaze catchers for these pieces which bisqued OK.

1 1/4 year old Fallon Classic with a healthy mold coating.

Mixed leaf lettuce salad anyone? Photo shot in the black dirt fields of Pine Island.

Fishing this weekend in NY's Thousand Islands

Phil won the bet with the 6#, 32" Northern Pike he took off Scow Island with Singer Castle on Dark Island visible across the shipping channel.

July 16, 2008   76th Firing Results

July 14, 2008   76th Firing Setup

I'm using a firing schedule modified to include elements of the missing bisque fire to hopefully minimize pinholes and bloats.

This piece has a glaze loading of ~ .40 g/sq.in., and the lid is supported using the "Fallon Stilt".

The 75th firing included mixed results. The glaze loading was enough to get me back to the look of this glaze that I like, but the piece is riddled with small bloats.

July 13, 2008

75th Firing Setup


74th Firing Results

The results of the 74th firing were poor (from a visual sense) to say the least.  The crystals were quite bland and there was virtually no run off in the catcher. So I quickly loaded some more glaze on the bowl getting the loading up to .40 g/sq.in. On the positive side I did learn that a loading of .25 g of solids per sq. in of area just isn't enough. Also there were many, many pinholes. Then Mr. Turner told me, in an attempt to save electricity $, he bisqued these pieces to ^06 using the "Slow Glaze" cycle which runs much faster than the bisque cycles. My guess is the clay wasn't hot enough long enough to complete its dehydroxylation and off gassing.

July 12, 2008

74th Firing Setup

These have been final shaped and burnished. The prismatic one has been a bear as the flat faces have bowed concave out as it dries. I've reshaped it 3X and finally resorted to covering it where it wants to dry first.

The 17 1/2" dia. David Turner bowl in this firing has the glaze (NFU) brushed as thin as I could while getting a real even single coat. It worked out to be ~.25 g of solids per sq. in of area. This is about 1/2 the loading of June 16th's firing - a lighter loading than I expected. It is reproducible, and I can add more and keep track of exactly how much I have on as I'm glazing.

I expect this will give a look similar to the results of my 68th firing and will see for sure tonight (7-13-08). I plan to explore loadings in between .25 and .5 g solids per sq. in.

The kitchen is coming along real nice. We're hoping to pick out the granite counter tops this week. John Welch (www.finekitchenandbath.com) has been doing a fantastic job and is a pleasure to work with, plus I think he's more anal than I am, if that's possible!

Patti modeling the spring loaded wiffle ball antennae earmuffs I made to add a little comedy to lawn mowing.

This year's blueberry crop is looking real good!

July 5, 2008

July 4, 2008

June 29, 2008

June 29, 2008

The rings from this test came out pretty interesting with quite a lot to see. I did get more crystals than I wanted though. Too many seemed to pop up throughout the firing.

It's been so nice outside it's tough to stay in the studio. The yucca is blooming for Independence Day. Our poor willows took such a beating this spring. They are filling back in after their butch cut.

The resin's solvent distorted these quite a bit before they hardened.

Slumping, slitting, fitting and filling. Oh yeah, and then the rib and sponge.

Bella is a hell of a helper, just a little bossy though.

After filling, ribbing and sponging the interior.

Trying to keep the edges moist with towels while this two pair of halves firms up.

June 27, 2008

Test Firing of a pot glazed the same as in the previous firing.

I'm trying this low temp repeating cycle schedule with my fingers crossed hoping the crashes aren't so severe as to nucleate too many crystals.

1 coat of fiberglass resin started dissolving the foam. Bummer!

June 24, 2008

David, I'd say tonight's smoking was quite nice indeed. You really pulled out all the rings nicely. I wonder if a little iron would give some yellow highlights?

June 23, 2008


Shaped with wood putty and then 2 coats of latex paint.


Before and after 3X reduction by David Turner.

June 16, 2008 73rd Firing Results

I'm still trying to get a good handle on the relationship of crystal growth to glaze thickness for this glaze when fired in the low temperature range (860C to 1000C). I brushed one heavy coat of the pudding consistency glaze on each piece with and additional 1 1/2" band on top.

For the 2 pieces in the right photo I measured the amount of glaze I added and estimated their surface area to determine the loading rate. They had 0.51 and 0.46 g solids / sq. in. of surface. All these have the characteristic look of some of the first NFU pieces I made. I can, and will, apply the glaze more thinly (0.4 g / in. sq.) on future pieces to hopefully get back to the "explosive" crystal growth I saw before.

Regarding the 2 pieces in the right photo, the one on the left had the 2 1/2 week old glaze and the one on the right had it from a new batch. I don't think the aged stuff worked as well.

June 15, 2008 Happy Father's Day!  

A 2 1/2 week old "pickle jar" of NFU.

73rd Firing Setup

Thanks for the photos, Kat.

Another beauty by Glenn & Keith.

June 13, 2008

I had the good fortune of spending 4 days with John Mankameyer at his home and studio in Miles City, Montana.

He's located deep in the heart of cattle country! On the trail Lewis and Clark followed when exploring in the early 1800's. Near the site of Custer's Last Stand by the Little Big Horn.

John has been making crystalline glazed porcelain since the mid 1970's. After years of doing the show circuit in Northern California now he's retired and still actively experimenting with these glazes and his unique twist to them. John has a motto posted on his PC which reminds him of his charter (I guess) which reads: "I am trying to do more than make a pot with colored blotches on it"

Agate - Inspiration For John's Crystalline Glaze Select Photos From My Visit

Fort Keogh Livestock and Range Research Laboratory

Montana Landscape

June 7, 2008

 I'm off to spend a week with John Mankameyer.

www.crystallineglaze.com


June 5, 2008

A fantastic birthday present from Avril Farley.


David Turner: Potter, Carpenter, Fawn Master?


My latest 2 pieces from Tuesday night class.

May 31, 2008 72nd Firing Results

3 types of crystals

1, 3/4, 1/2, 1/4 & 0% MnO2 in NFU in rear.

The kitchen is going in the studio. Soon I'll be setup for visitors.


May 29, 2008 71st Firing Results, 12" Diameter X 14 1/2" Tall


May 27, 2008

 70th Firing Results


71st Firing Setup


An all Klinsky event.

May 26, 2008   

70th Firing Setup

One coat of wood filler.

David Turner's latest big bowl is on the bottom. It is all NFU except for the inside bottom which is 8% rutile base. The top shelf is all NFU too. I gave the pieces a heavy coat of glaze right around the top lips this time to try and get more of the action I've seen around the bottoms further up the pots. The little guys are on their second firing with a little more glaze.

Half a day on the lawn, the other half in the studio. It doesn't get much better than this. Low 80's with a light breeze and all the freedoms afforded us by this great country. Happy Memorial Day!

Oh, to be an 18 year old Bad Ass again!

On Memorial Day, the flag should be hung at half-staff until noon, when it should be raised to the top of the staff.

May 25, 2008

I finally got the new 2 mm APM elements installed. These heavy gauge 5 ohm coils are wired in series as opposed to the parallel arrangement the kiln used with the finer elements.


"Launch Pad"....20' long sewer pipe, with 3" wide longitudinal slot, planted in the ground, with paint and a 100 watt bulb, at night.

May 23, 2008

Replacing elements. I used the the "B Tank" torch to bend the leads around the posts as well as bend the coils in the corners to get them to lay in the slots. I should have stretched them to about 74" length first to put them in compression a little. I'm sure they'll settle in after the first firing.

May 20, 2008   69th Firing Results

When I got home from the rock pile last night the kiln was still going through the last holds. It did shut off and was cooling, but by "Pumpkin Time" it was still 500°C. I was able to peek and saw it was not good. The crystals looked nice, but the pot had collapsed. I knew those 2 real wet rings on the outside, when I glazed the inside, were the sign of doom!

I did check into what capability my controller has, but unfortunately I didn't order the amp check feature. I plan to do a continuity and resistance check before the next firing, but I have to admit I loaded a bisque this morning.

May 19, 2008

At 8:00am this morning the cycle should have been 1/2 way through the 9 hours worth of holds. It hadn't even reached top end of 1290°C yet. The programmer was calling for 1257°C but the chamber temperature was only 1240°C. I added some more insulation to the lid and left for work. Then at 11:00am I returned and saw it had topped out and was at 1143°C on its way down to the first hold at 1000°C. It appears to be 8 hours behind schedule.

May 18, 2008

69th Firing Setup

Cones 9 (left) thru 11 (right) from the last firing

The Freshman Formal Dance was Friday. Kat got all dolled up and looked like a beautiful woman.

It looks like my elements are about done. I was expecting to see an over firing condition when they got to the point of not having enough "snot" to get there (resistance too high) in the programmed time, resulting in a heck of a lot more heat work happening as it slowly, I mean slowly, crept up to top temperature. It looks to me like they are running out of gas as the furnace hit somewhere between ^12 and ^13. I didn't really pay attention but seem to recall the programmer said this cycle took 32 or 33 hours - about 10 hours longer than it should have.

I decided to fire the 69th anyway and watch it (as much as I could). I turned on the 16 segment feature (see firing schedule of April 27, 2008), pressed the start button about 6pm and noticed at about 9:30pm the programmer was calling for 500° but the chamber temperature was 495°C.

After Dance Party Note: We had about 250+ kids here for a party which ran from ~10:15pm (after the dance) until 3:30am (when I started asking people to leave). It was in the barn, the house, the yard and the Christmas Tree Field. It was like Woodstock. Driving rain all night, and mud all around the bonfire. The kids seemed oblivious too it and I imagine had a great time. I have spoken with no angry parents, neighbors, police or attorneys either.

May 14, 2008  68th Firing Results

The big one and little one in the front are first fires with one even coat (I'm happy to see) of "thick shake" glaze. A little more glaze on top and I think they would have the exaggerated growth low temperature crystals all over them. I haven't seen these crystals grow this large before. There was very little run off to the catchers, but some. Next trial I will add a little more glaze right around the top.

May 12, 2008

68th Firing Setup

The big pot and a small one were glazed  with one coat of the "thick shake" glaze shown below. This was what was used on the "1, 2, 3, 4 and 5 coats..." tile in the last firing. At this consistency the glaze doesn't de-water fast, and I'm hoping allowed me to get a thin even coat and will result in the dual color "low temp" crystals again.


NFU except 1, 1 3/4, 2 1/2, 3 1/4 and 4% rutile. Things seem to be on target with the 4% rutile currently in NFU.

1, 2, 3, 4 and 5 coats of NFU. I think this test demonstrates that a thin glaze layer is key to the formation and growth of crystals at these low temperatures.


Two test tiles and four re-fire pots - three of which are going back in.

More glaze with 4% CMC and thick shake consistency.

May 11, 2008


Norma, I like!  

Sneak Preview, 300°C

May 10, 2008 

67th Firing Setup Norma's last piece

Hold Temps

Minis by Graeme Anderson, down in the land of opals.


This load is all re-fires. I mixed more NFU with 4% CMC. The thick shake consistency made it easy to apply a reasonable coat which stayed put. There is also a test tile strip with 1, 2, 3, 4 and 5 coats of NFU to see if I can get a clearer picture of the relationship of low temperature crystal growth habit to glaze thickness. There is another with 1, 1 3/4, 2 1/2, 3 1/4 and 4% rutile.

May 8, 2008

Glenn Woods and Keith Herbrand's work continues to amaze me. Glenn wrote "..we won first place in ceramics at a smaller local show but we were up against some really awesome work so were felt honored to pull this one off." I'm thinking ...ART... no Mr. Wizard?

I came home from work to a green carpeted with cherry blossoms tonight.

.

This is the firing schedule for the last firing. Many people have asked about it so I put it on my firing schedules page as well as here.

Jesse Hull wrote "You said, "It seems the thickness of this glaze at these low temperatures has a major impact on whether these crystals will form and grow." If you're going to compare glaze thickness -or anything else for that matter- shouldn't you use similar, if not identical, forms? The form on the left is a far cry from the one on the right... going from nearly flat to nearly vertical within your testing scheme. And the one in the middle has a neck which holds glaze that eventually runs onto the shoulder (replacing the glaze which is lost there), while neither of the others do."

Using identical forms and measured amounts of glaze for a glaze thickness comparison certainly would be a good way to quantify the situation. Maybe besides cutting into the piece to measure the glaze thickness there is an optical method to use.

I think these recent pots are examples of ones with glaze on the thin side and ones which have this type of crystal. My observation about "...the thickness of this glaze at these low temperatures..." is based:

1) On seeing the pot on the right with broadly separating rings on its top which formed at temperatures below 1000°C. And on the shoulder where it is thicker, and the high temperature crystals (1050°C to 1080°C) grow quickly there is little separation between the low temperature bands.

2) This glaze appears green when thick and tending towards aqua when thin. This thick - thin is based on believing I know how much I've brushed on.

3) Seeing these greenish pieces not having formed crystals at these low temperatures and knowing I brushed on a very heavy application of glaze.

4) Re-firing the piece, seeing the glaze flow off the pot and accumulate in the catcher, the color change towards aqua and crystals forming.

I think the piece on the right exhibits a greener color on the bottom where the glaze is thick and has small crystals with more of a traditional look, and tends toward aqua color on the top where the glaze is thin and has larger, faster growing crystals on top where the glaze is thin.

It's interesting to note though that I may say fast or slow, but the "fast" growing ones here in this "thin" glaze at these low temperatures (860°C to 1000°C) only grow at a rate of ~1inch in 9 hours. That should be enough time to grow 6" diameter crystals at higher temperatures (1080°C)

May 7, 2008 66th Firing Results (Probably the lightest load since firing #9)